Setting Up Google Ads Conversion Tracking for Lead Form Submissions


If you’re running Google Ads campaigns for lead generation, accurate form tracking is key to your success. After all, how can you improve your ads if you don’t know what’s working? This is where conversion tracking comes into play. When it comes to tracking form submissions, doing it the right way is critical to your ad campaign’s success.
At Grow My Ads, we see advertisers tracking clicks as conversions all the time. This can easily lead to inflated (or even inaccurate) results and bad data. Instead, the best practice is to track conversions using a thank you page or success page URL. This post will walk you through everything you need to know to set up Google Ads conversion tracking the right way, for more reliable data and better campaign performance.
Prefer video? Check out our video on How to Set Up Google Ads Conversion Tracking for Lead Form Submission (The RIGHT Way):
Still with us? Good. Let’s dive in.
Accurate Conversion Tracking: Why it Matters for Lead Form Submissions
Before diving into the setup process, let’s discuss why conversion tracking matters (and why using a thank you page is the gold standard for form tracking).
What Is Conversion Tracking?
Conversion tracking in Google Ads allows you to measure the actions users take after interacting with your ad. For lead forms, this action is typically fired after a user fills out the form and submits their details. This is the form submit event.
Why Does It Matter?
Without accurate conversion tracking, you risk:
Overestimating Performance: Tracking clicks or events without verifying actual form submissions can inflate your conversion numbers.
Under-Optimizing Campaigns: Smart bidding algorithms rely on accurate data to optimize bids for conversions. Feeding them inaccurate data leads to poor account optimization.
Why Use Thank You Pages?
Using a thank you page for conversion tracking ensures precision because:
Only Genuine Submissions Count: A user must first complete the form to reach the thank you page, so there are no false positives. Only a successful form submission triggers a conversion.
Eliminates Ambiguity: Clicks or other form events do not always indicate completion. Thank you pages confirm the form has been submitted successfully.
Example: Imagine you are running an ad for a pest control service. A potential customer clicks your ad and fills out a lead form — then, for whatever reason, they leave. If your tracking is based on clicks, you might count the conversion even if the form wasn’t submitted. By tracking the thank you page, you ensure only completed submissions are counted.
What You’ll Need Before Starting
To set up conversion tracking properly, you’ll need:
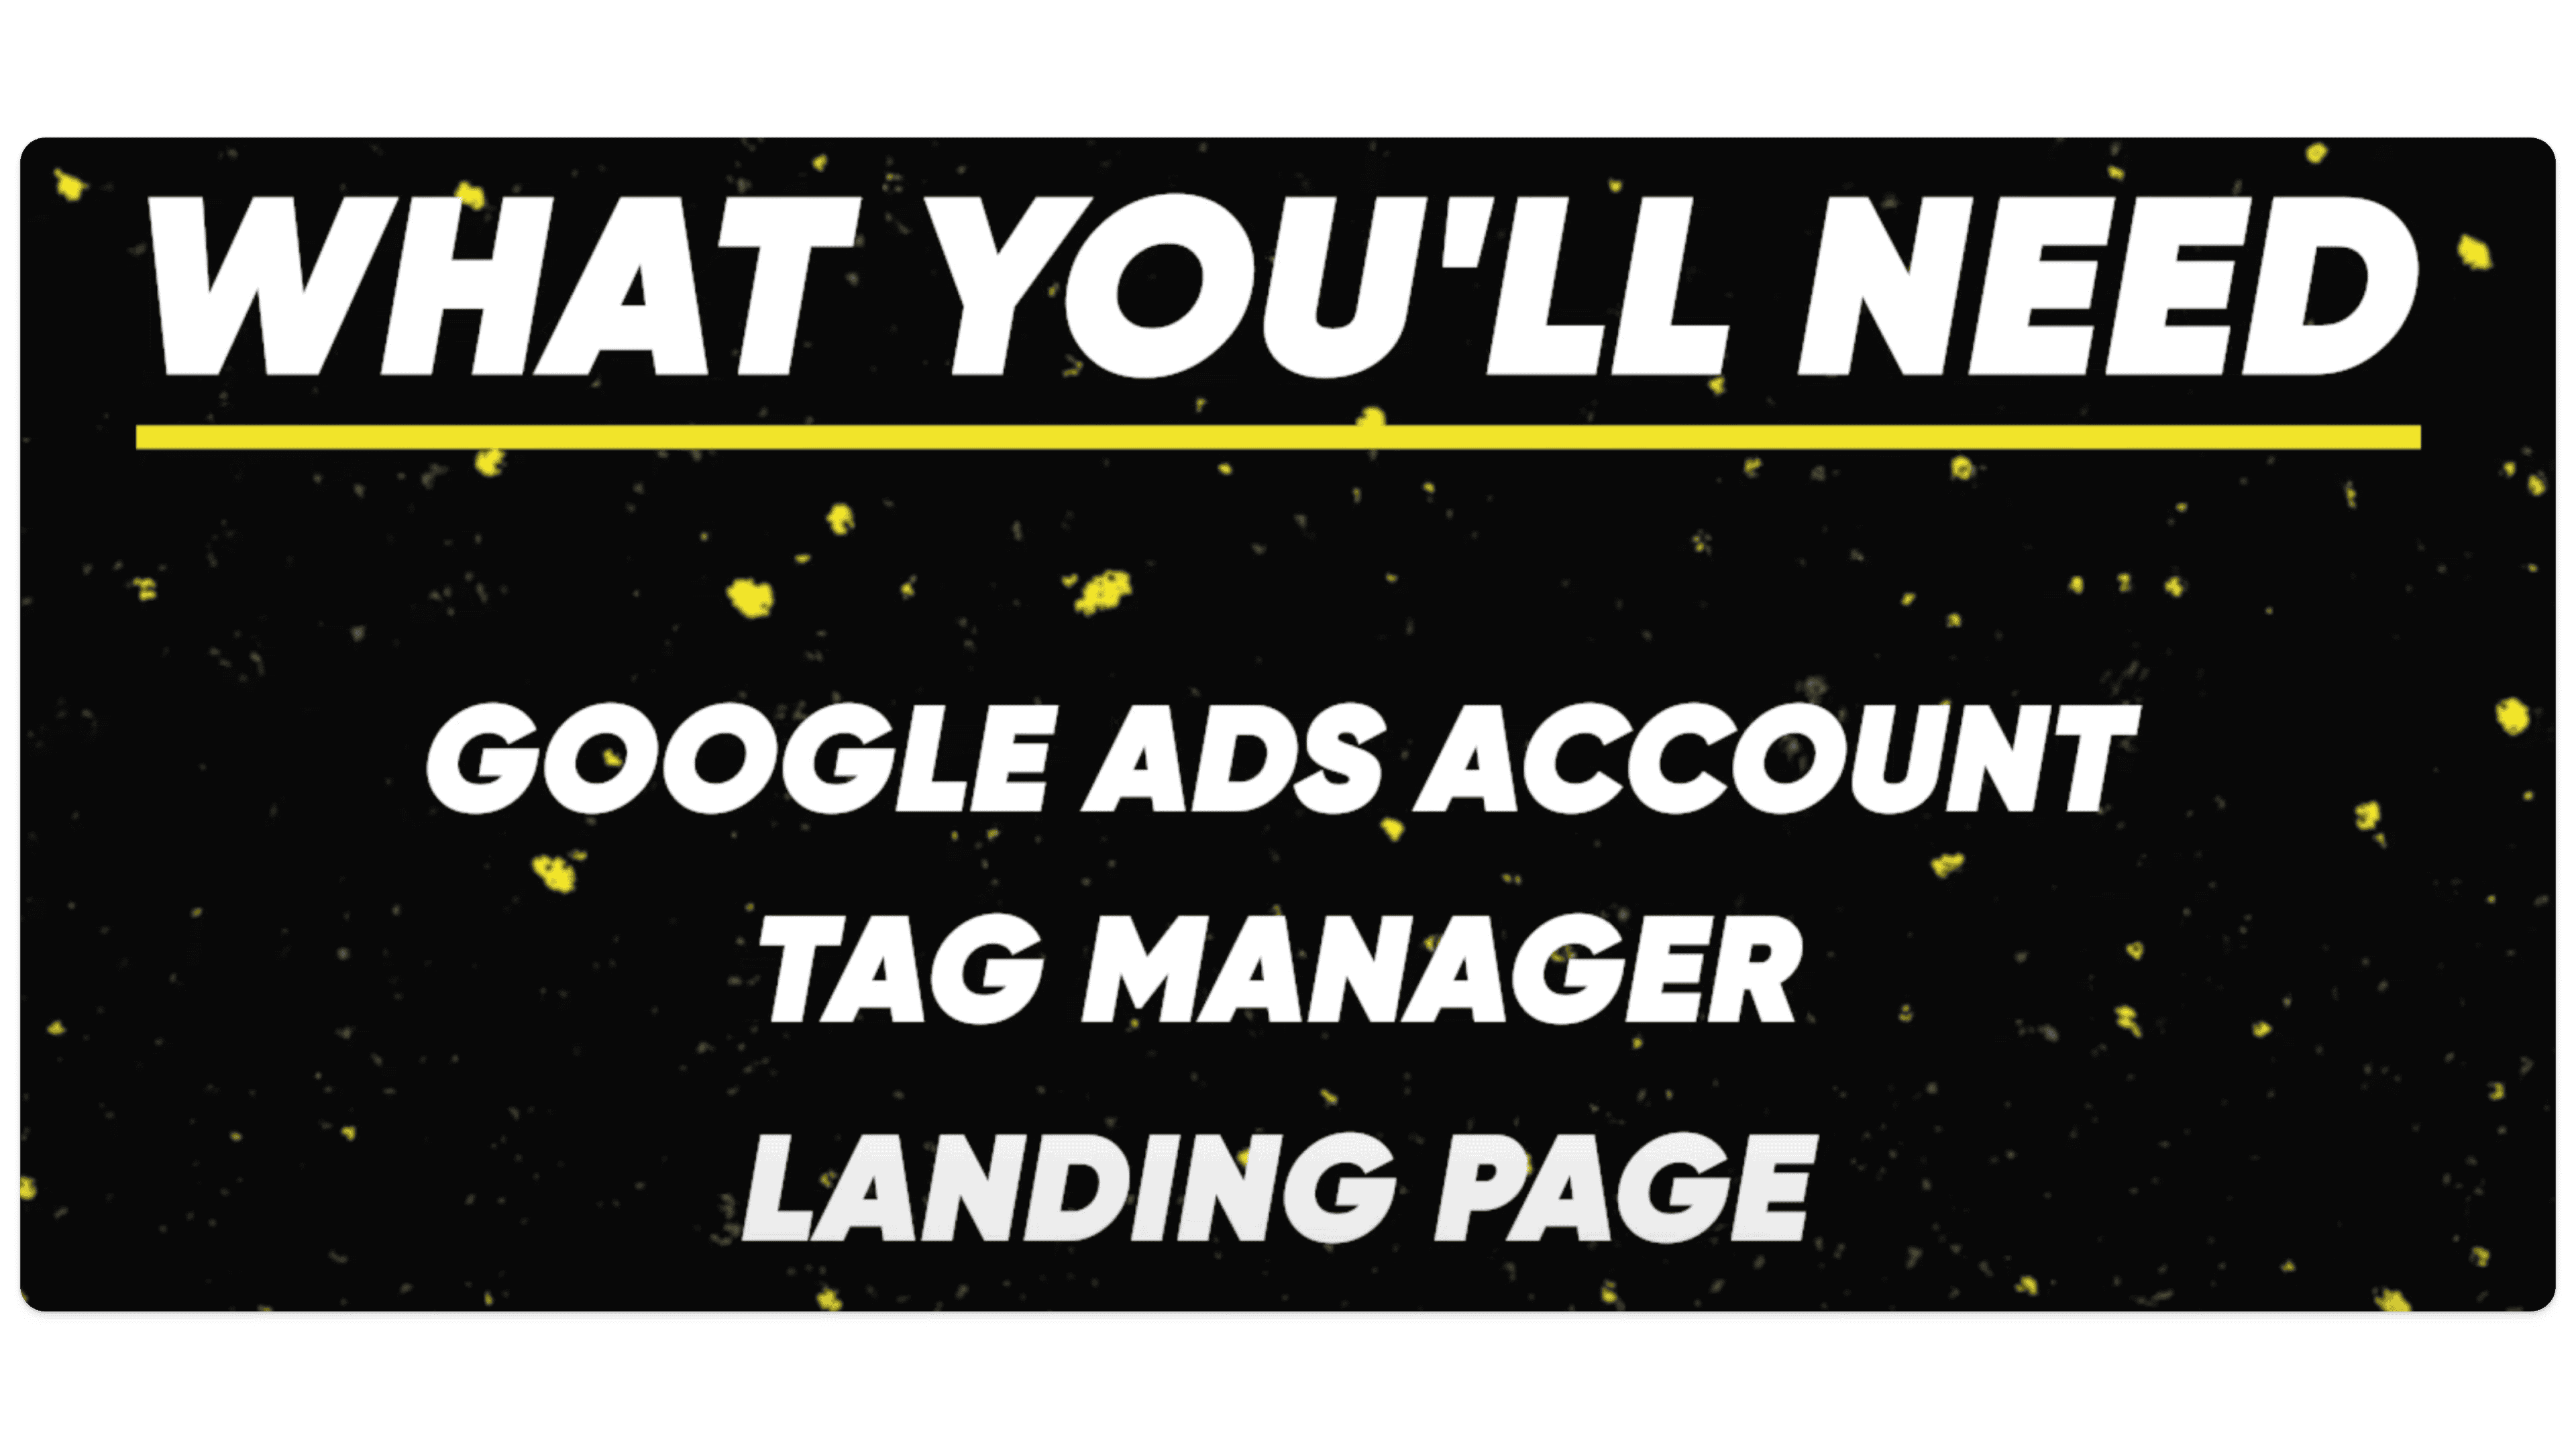
Google Ads Account: Ensure you have admin access to manage tracking settings.
Google Tag Manager (GTM): Google Tag Manager simplifies the tracking process and allows for centralized tag management.
Landing Page and Thank You Page: Your lead form should redirect users to a unique thank you or success page upon a form submit event.
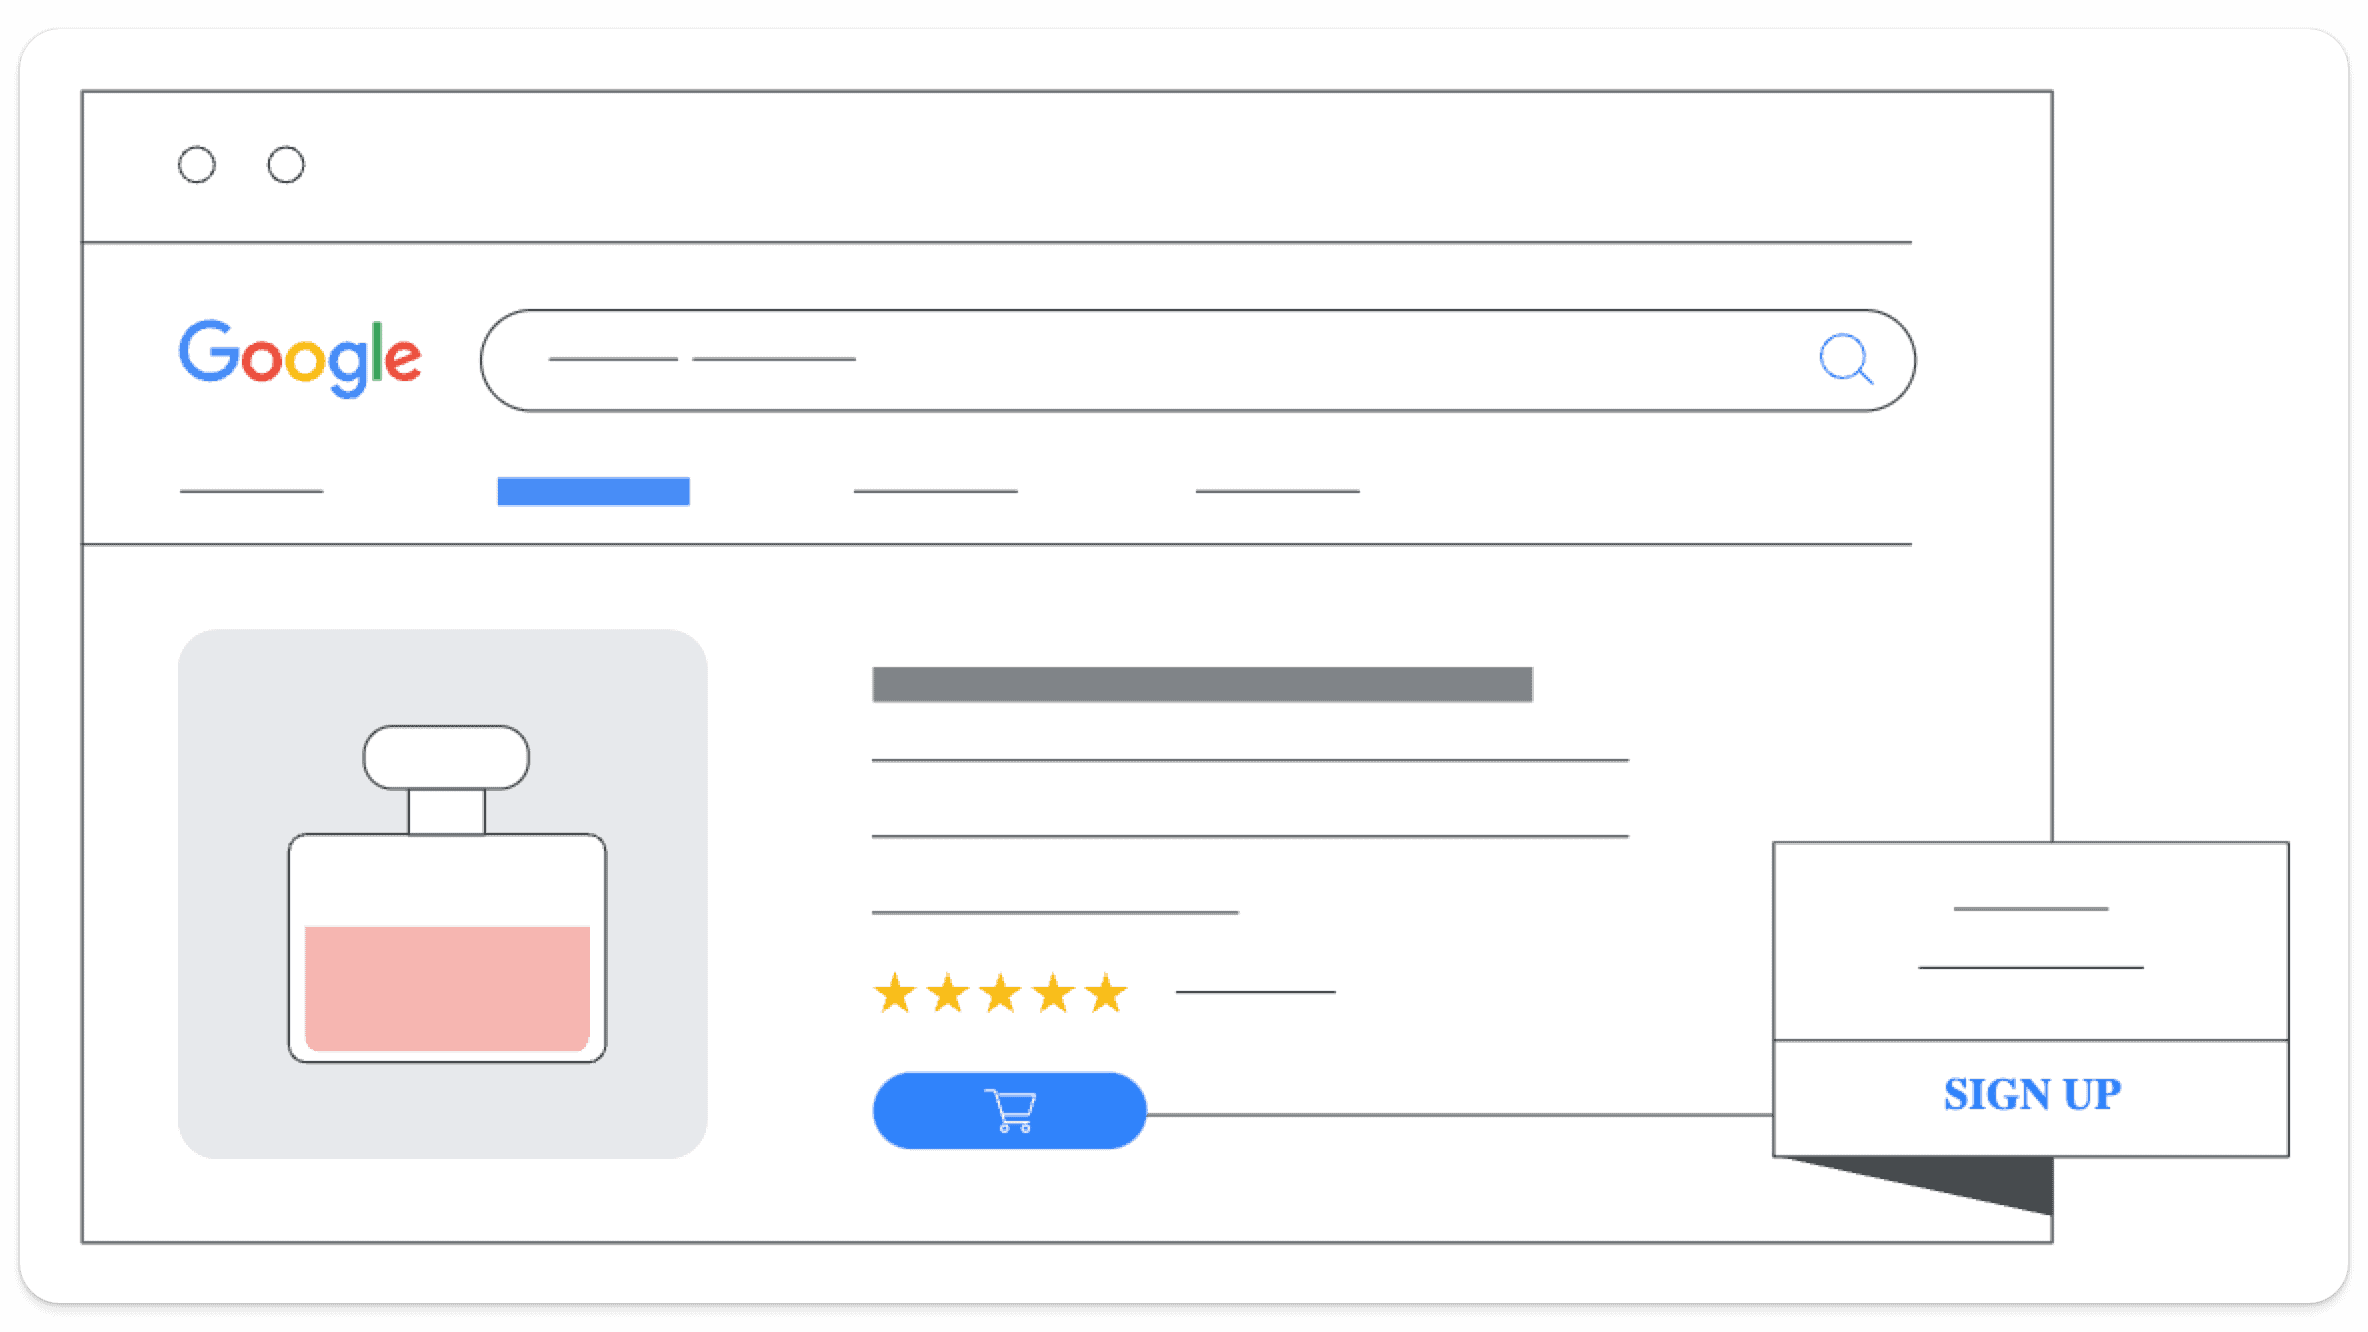
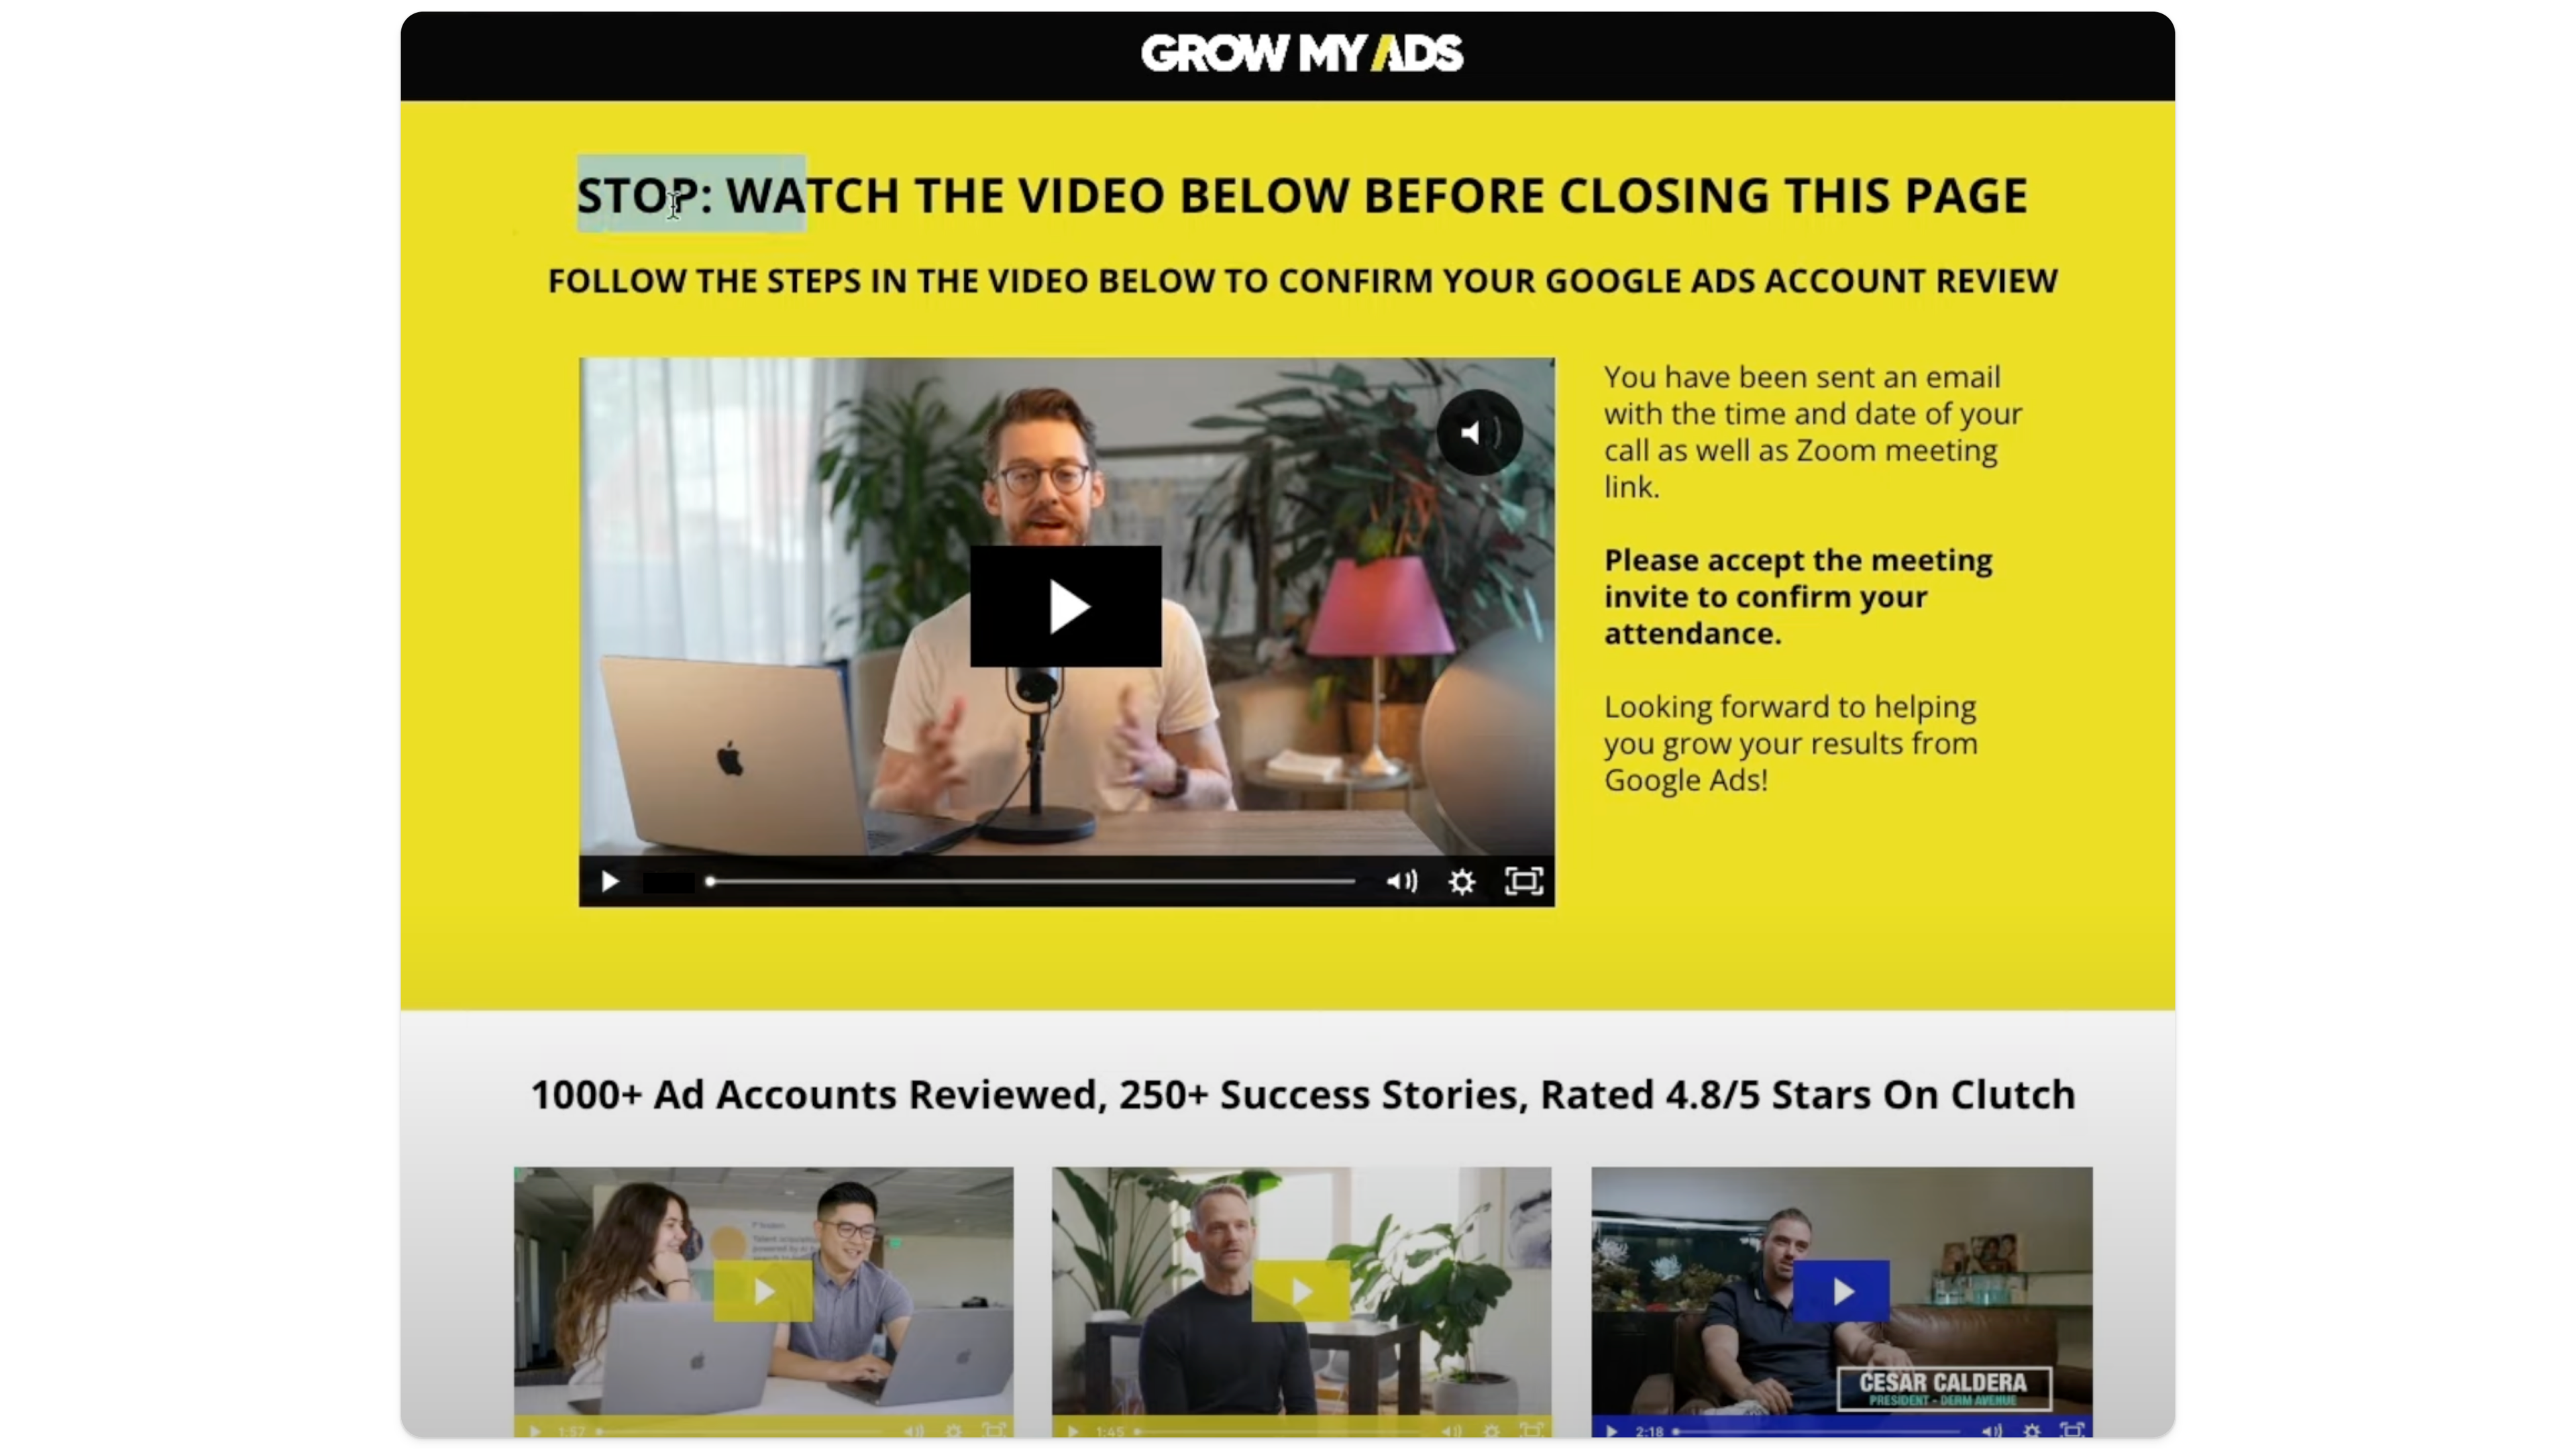
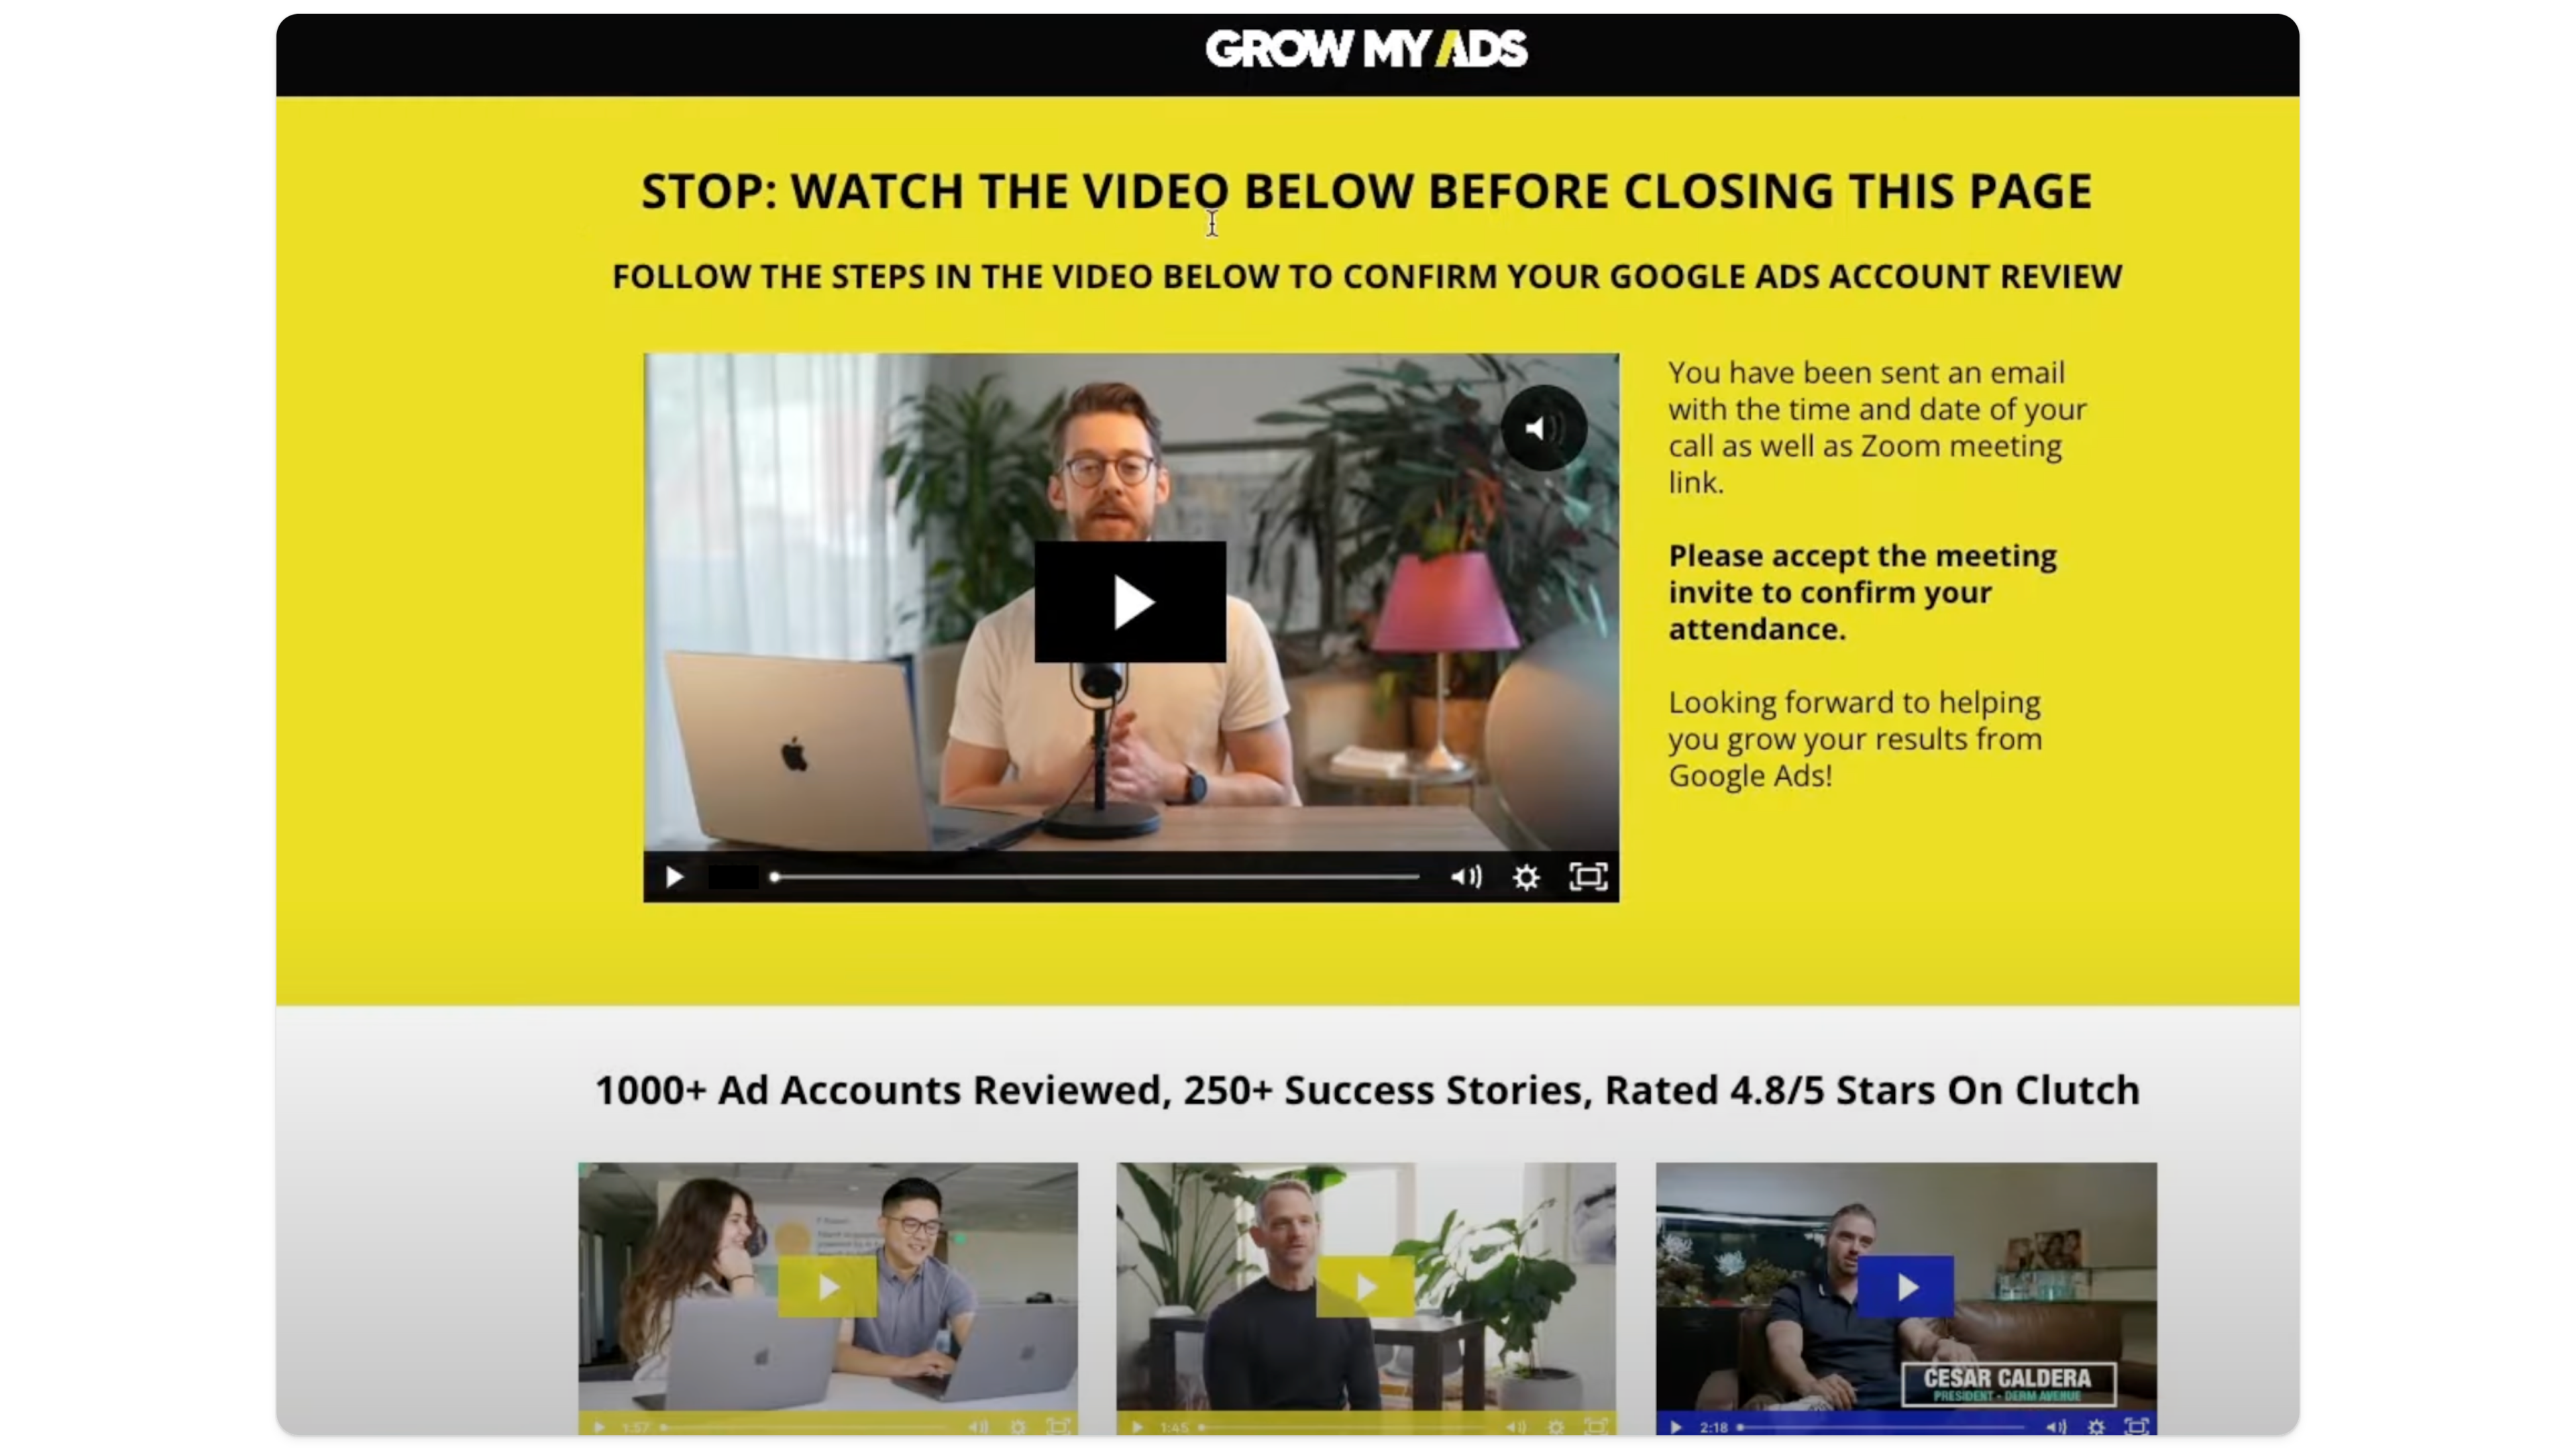
For example, here’s our landing page:

When you click the button, you’re taken to a form submission. Once prospective clients have filled out our form, they land on a success page (the page that triggers the conversion event). This ensures we’re only tracking form submissions.
How to Set Up Google Ads Conversion Tracking
Step 1: Create a Conversion Action in Google Ads
Start by defining the action you want to track in your Google Ads account.
Log In to Google Ads:
Go to the Goals menu and select Summary under the Conversions section.

Add a New Conversion Action:
Click + Create Conversion Action
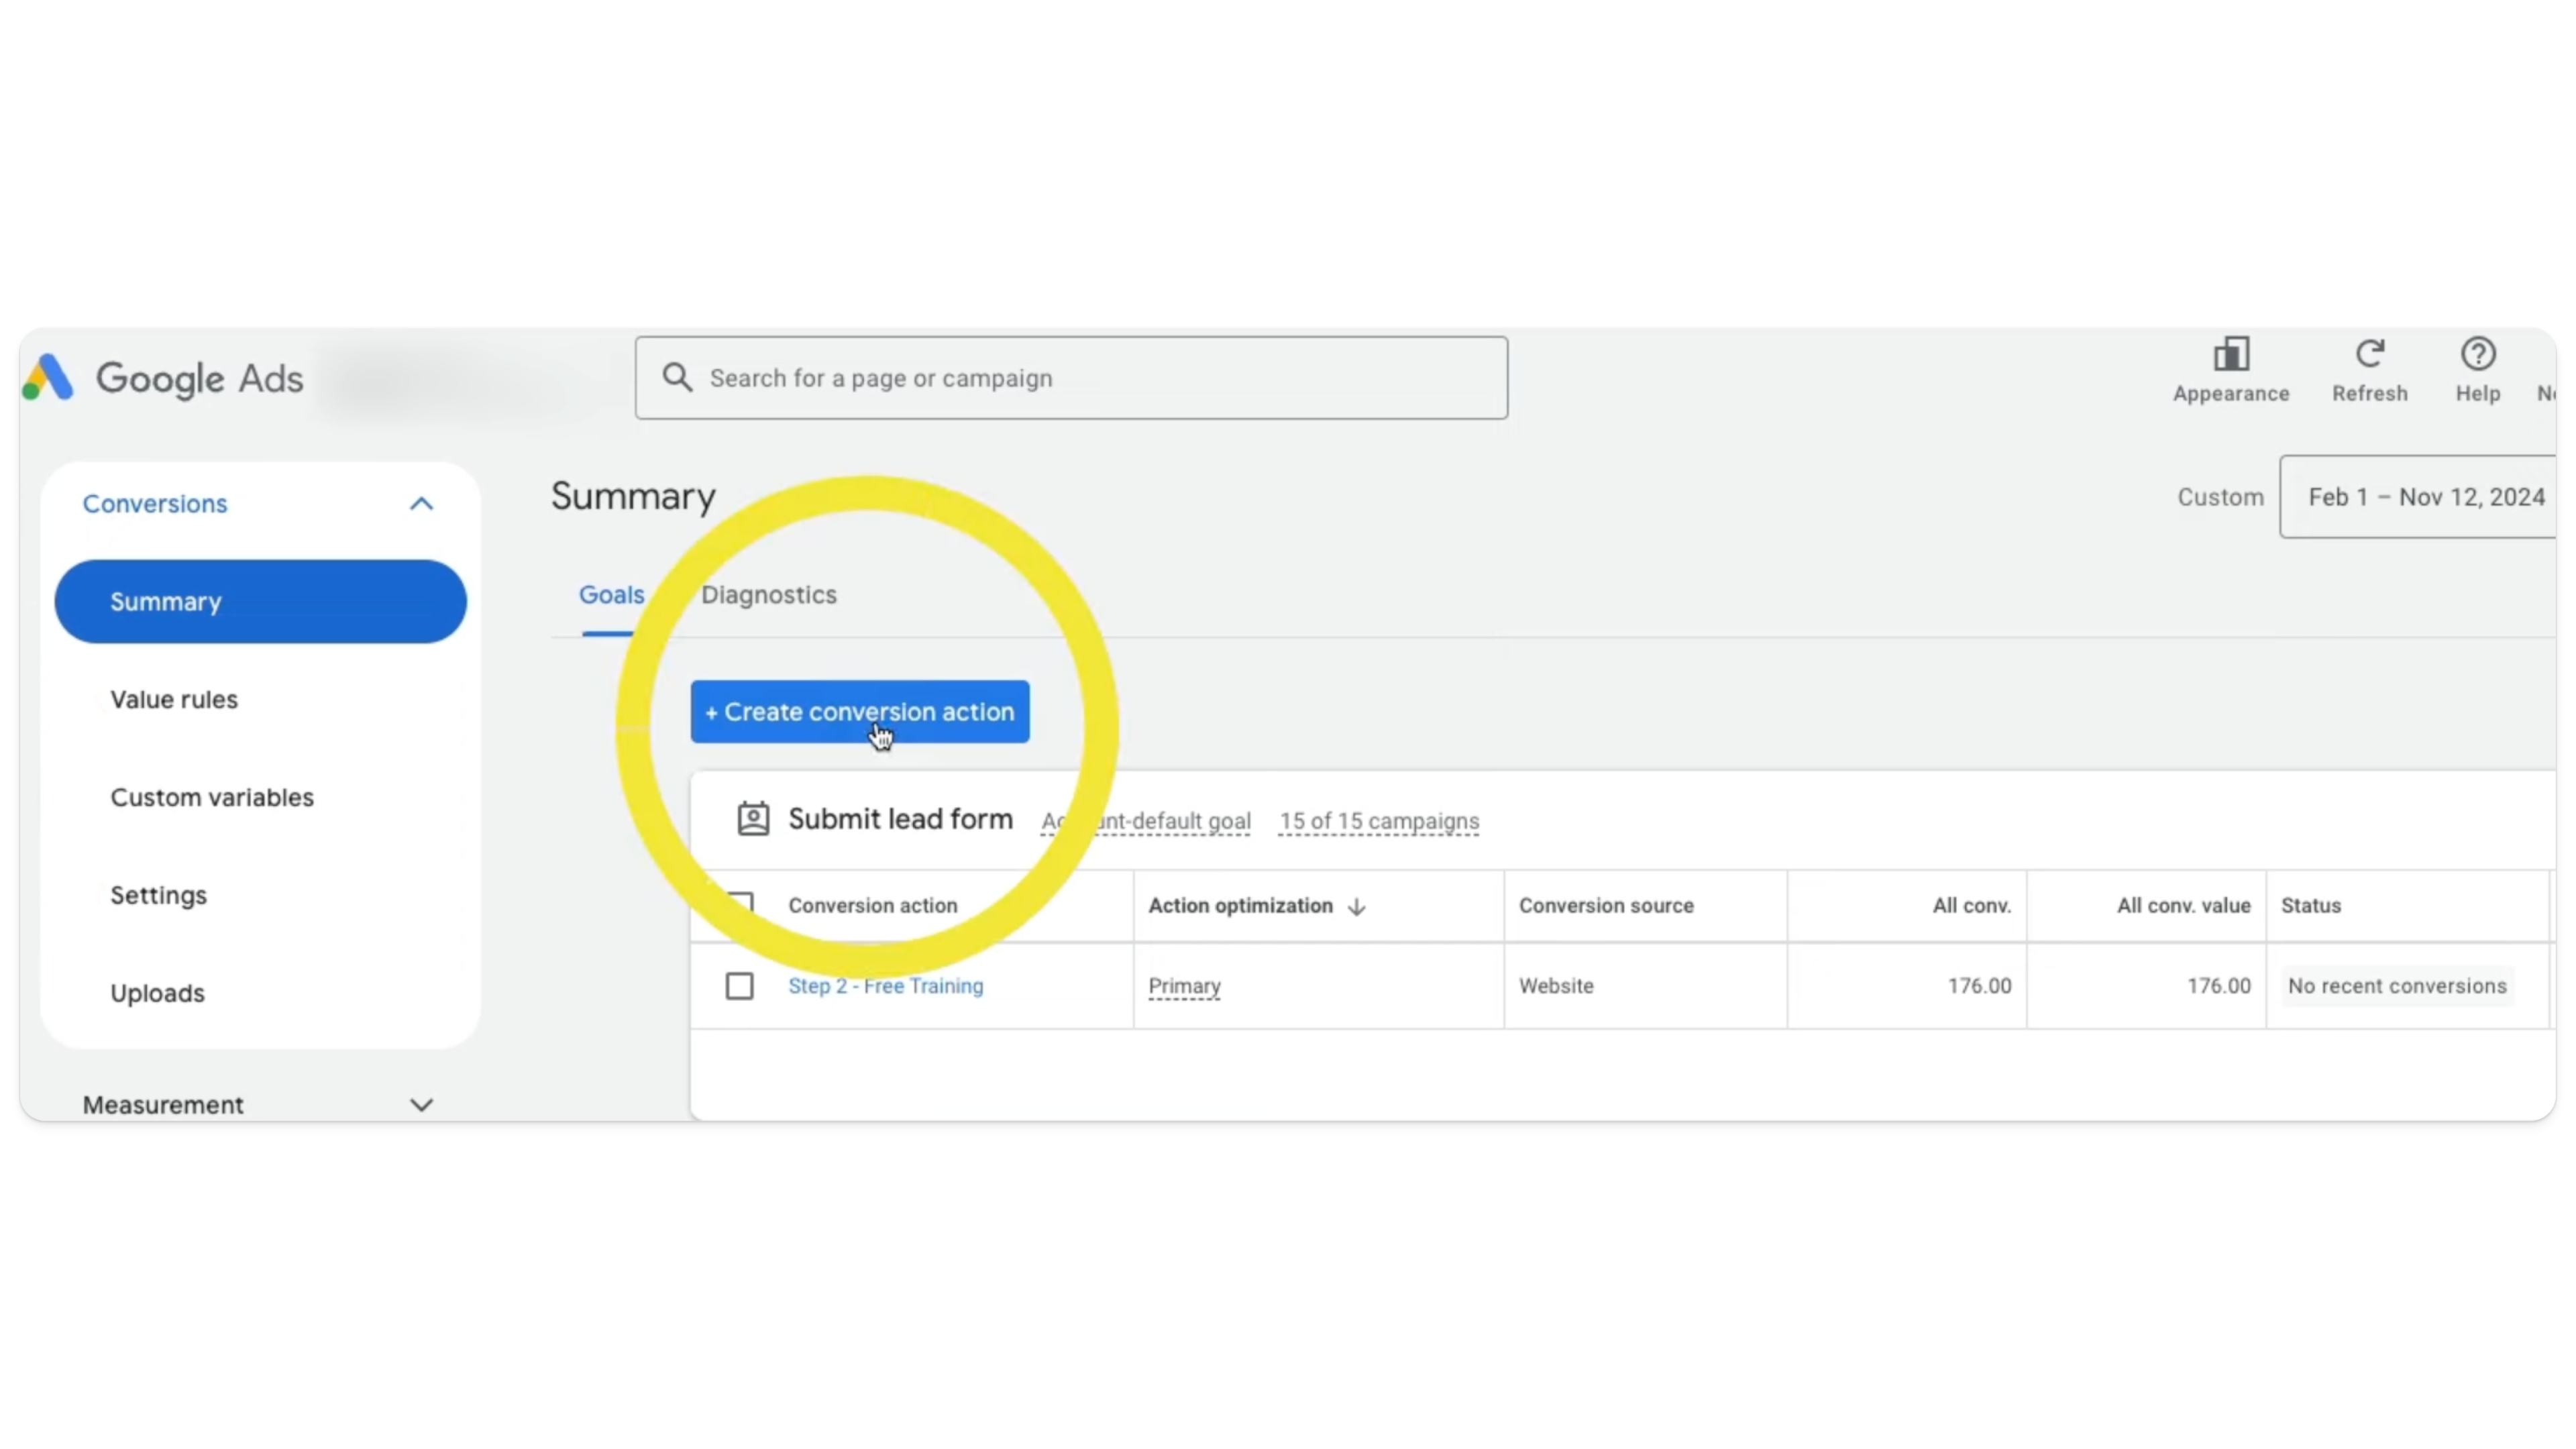
Choose Website as the source.
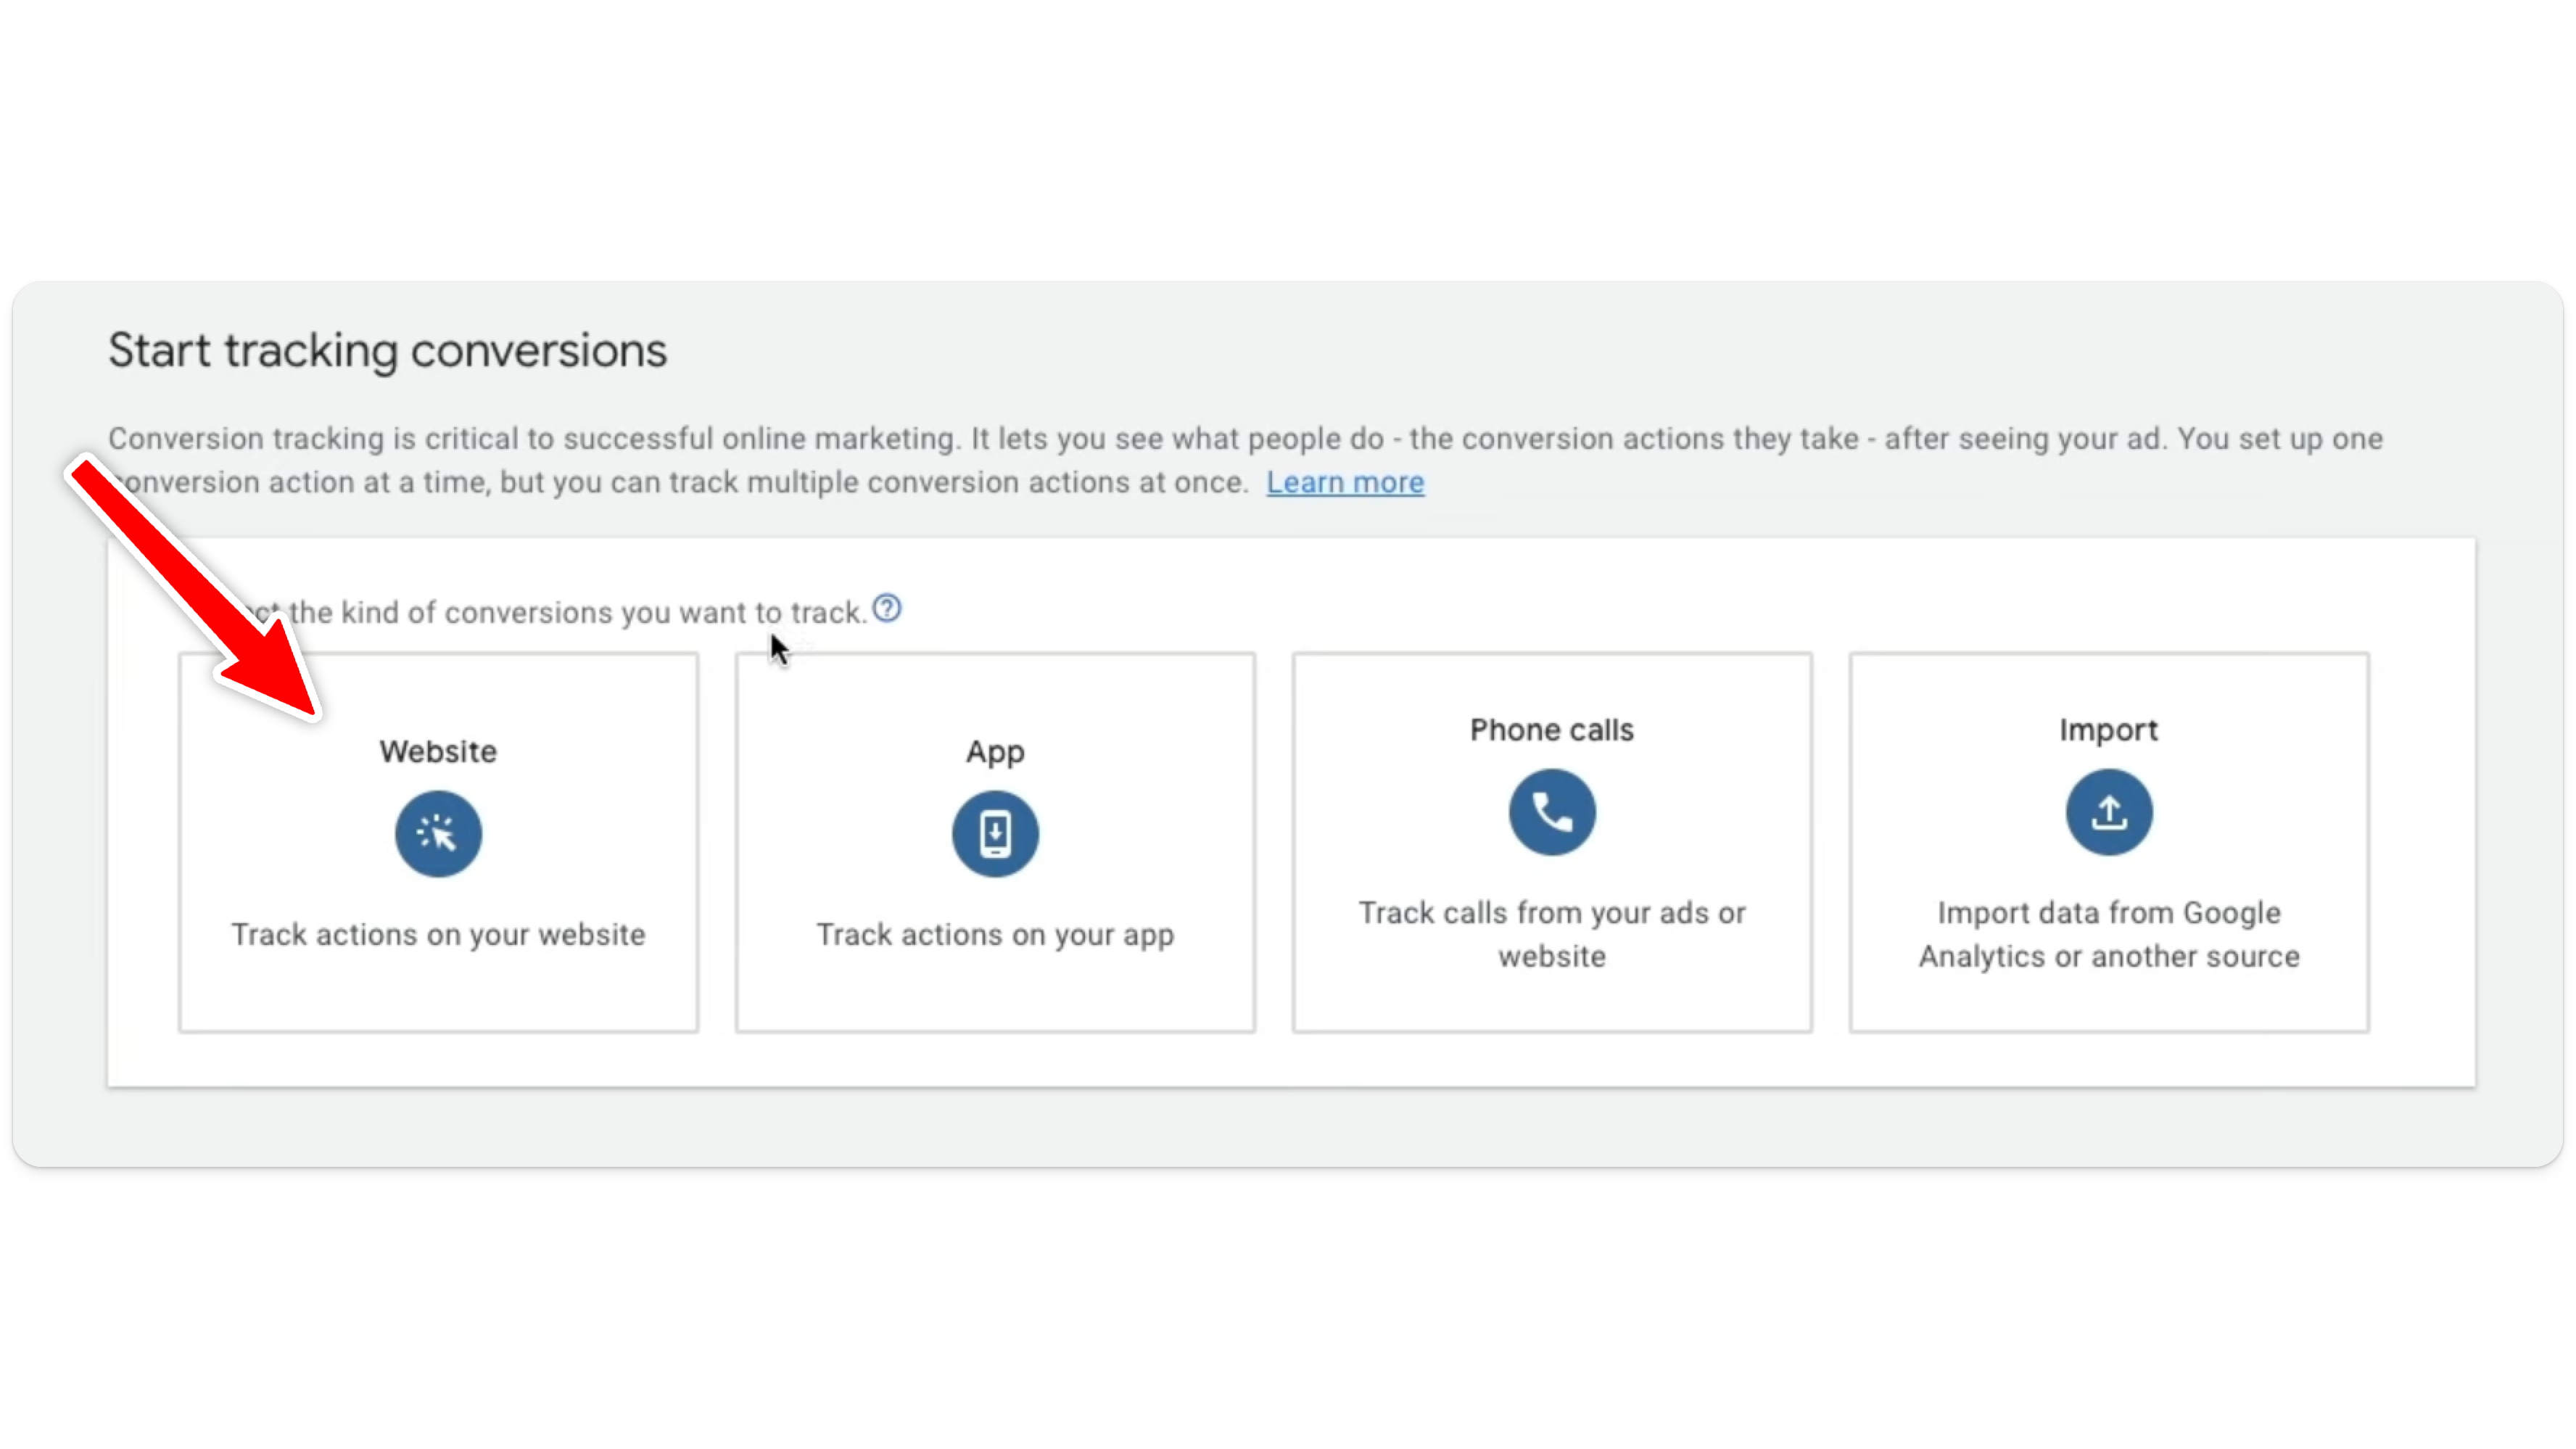
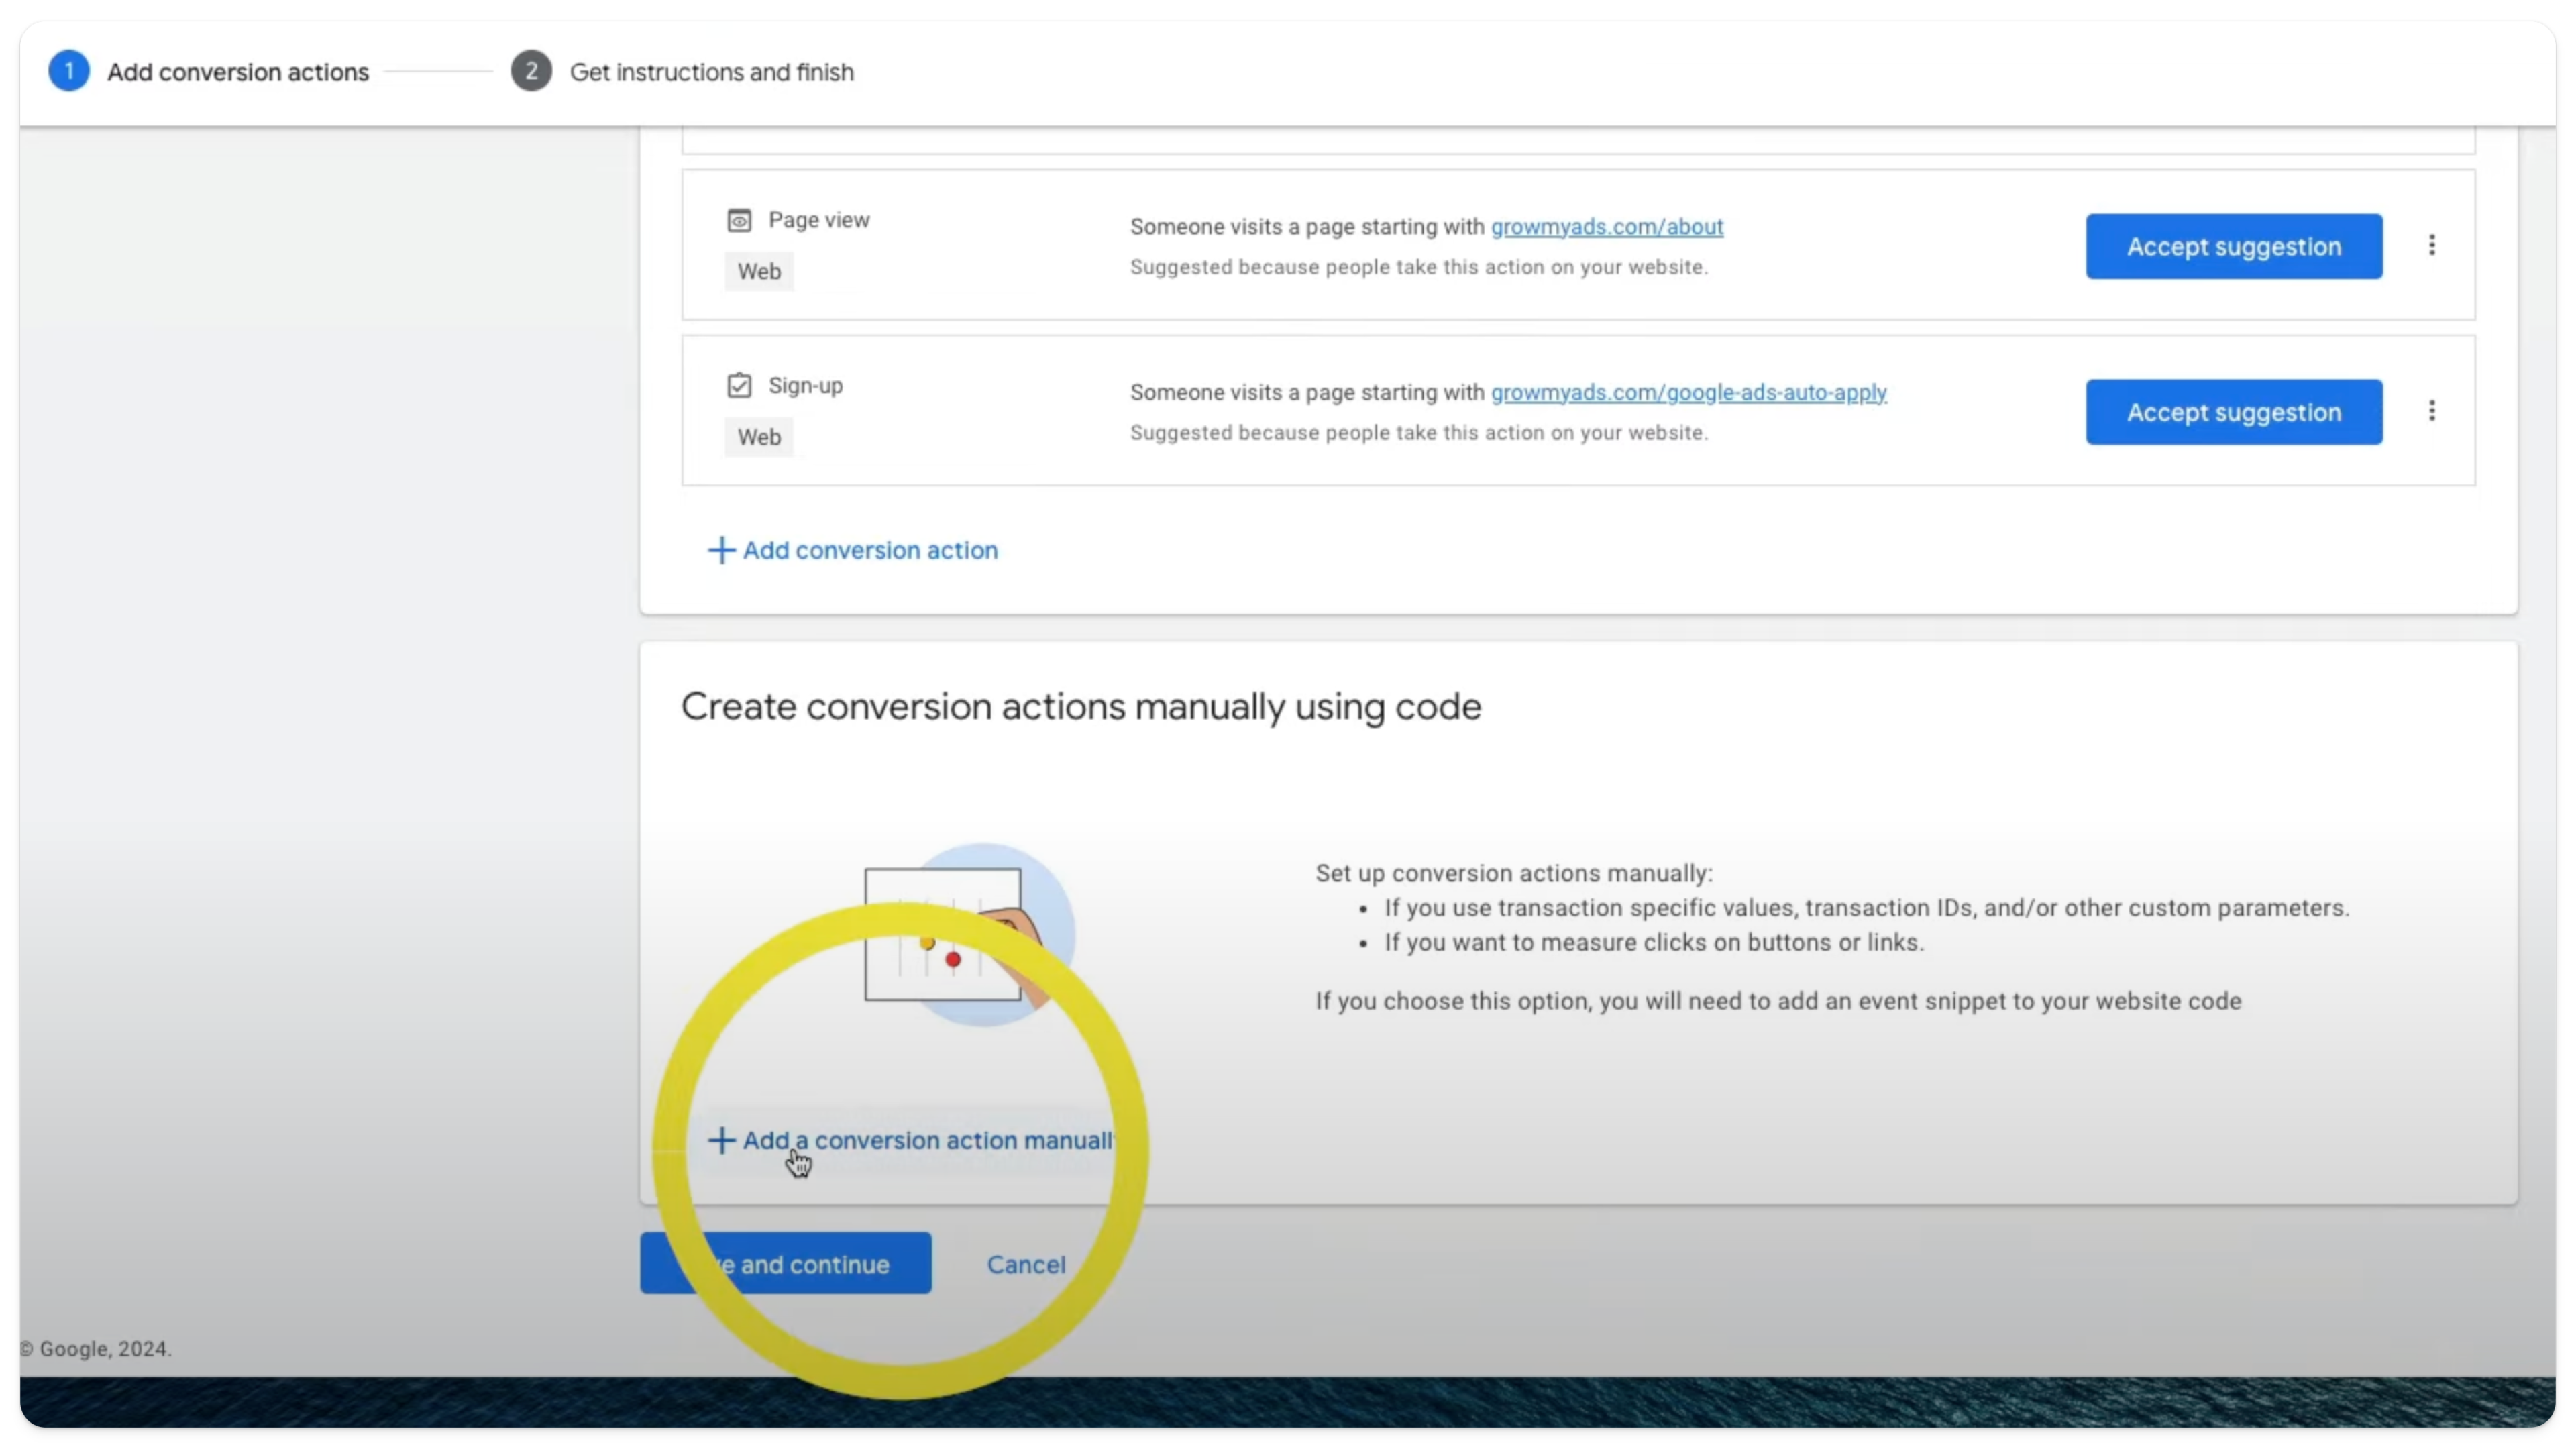
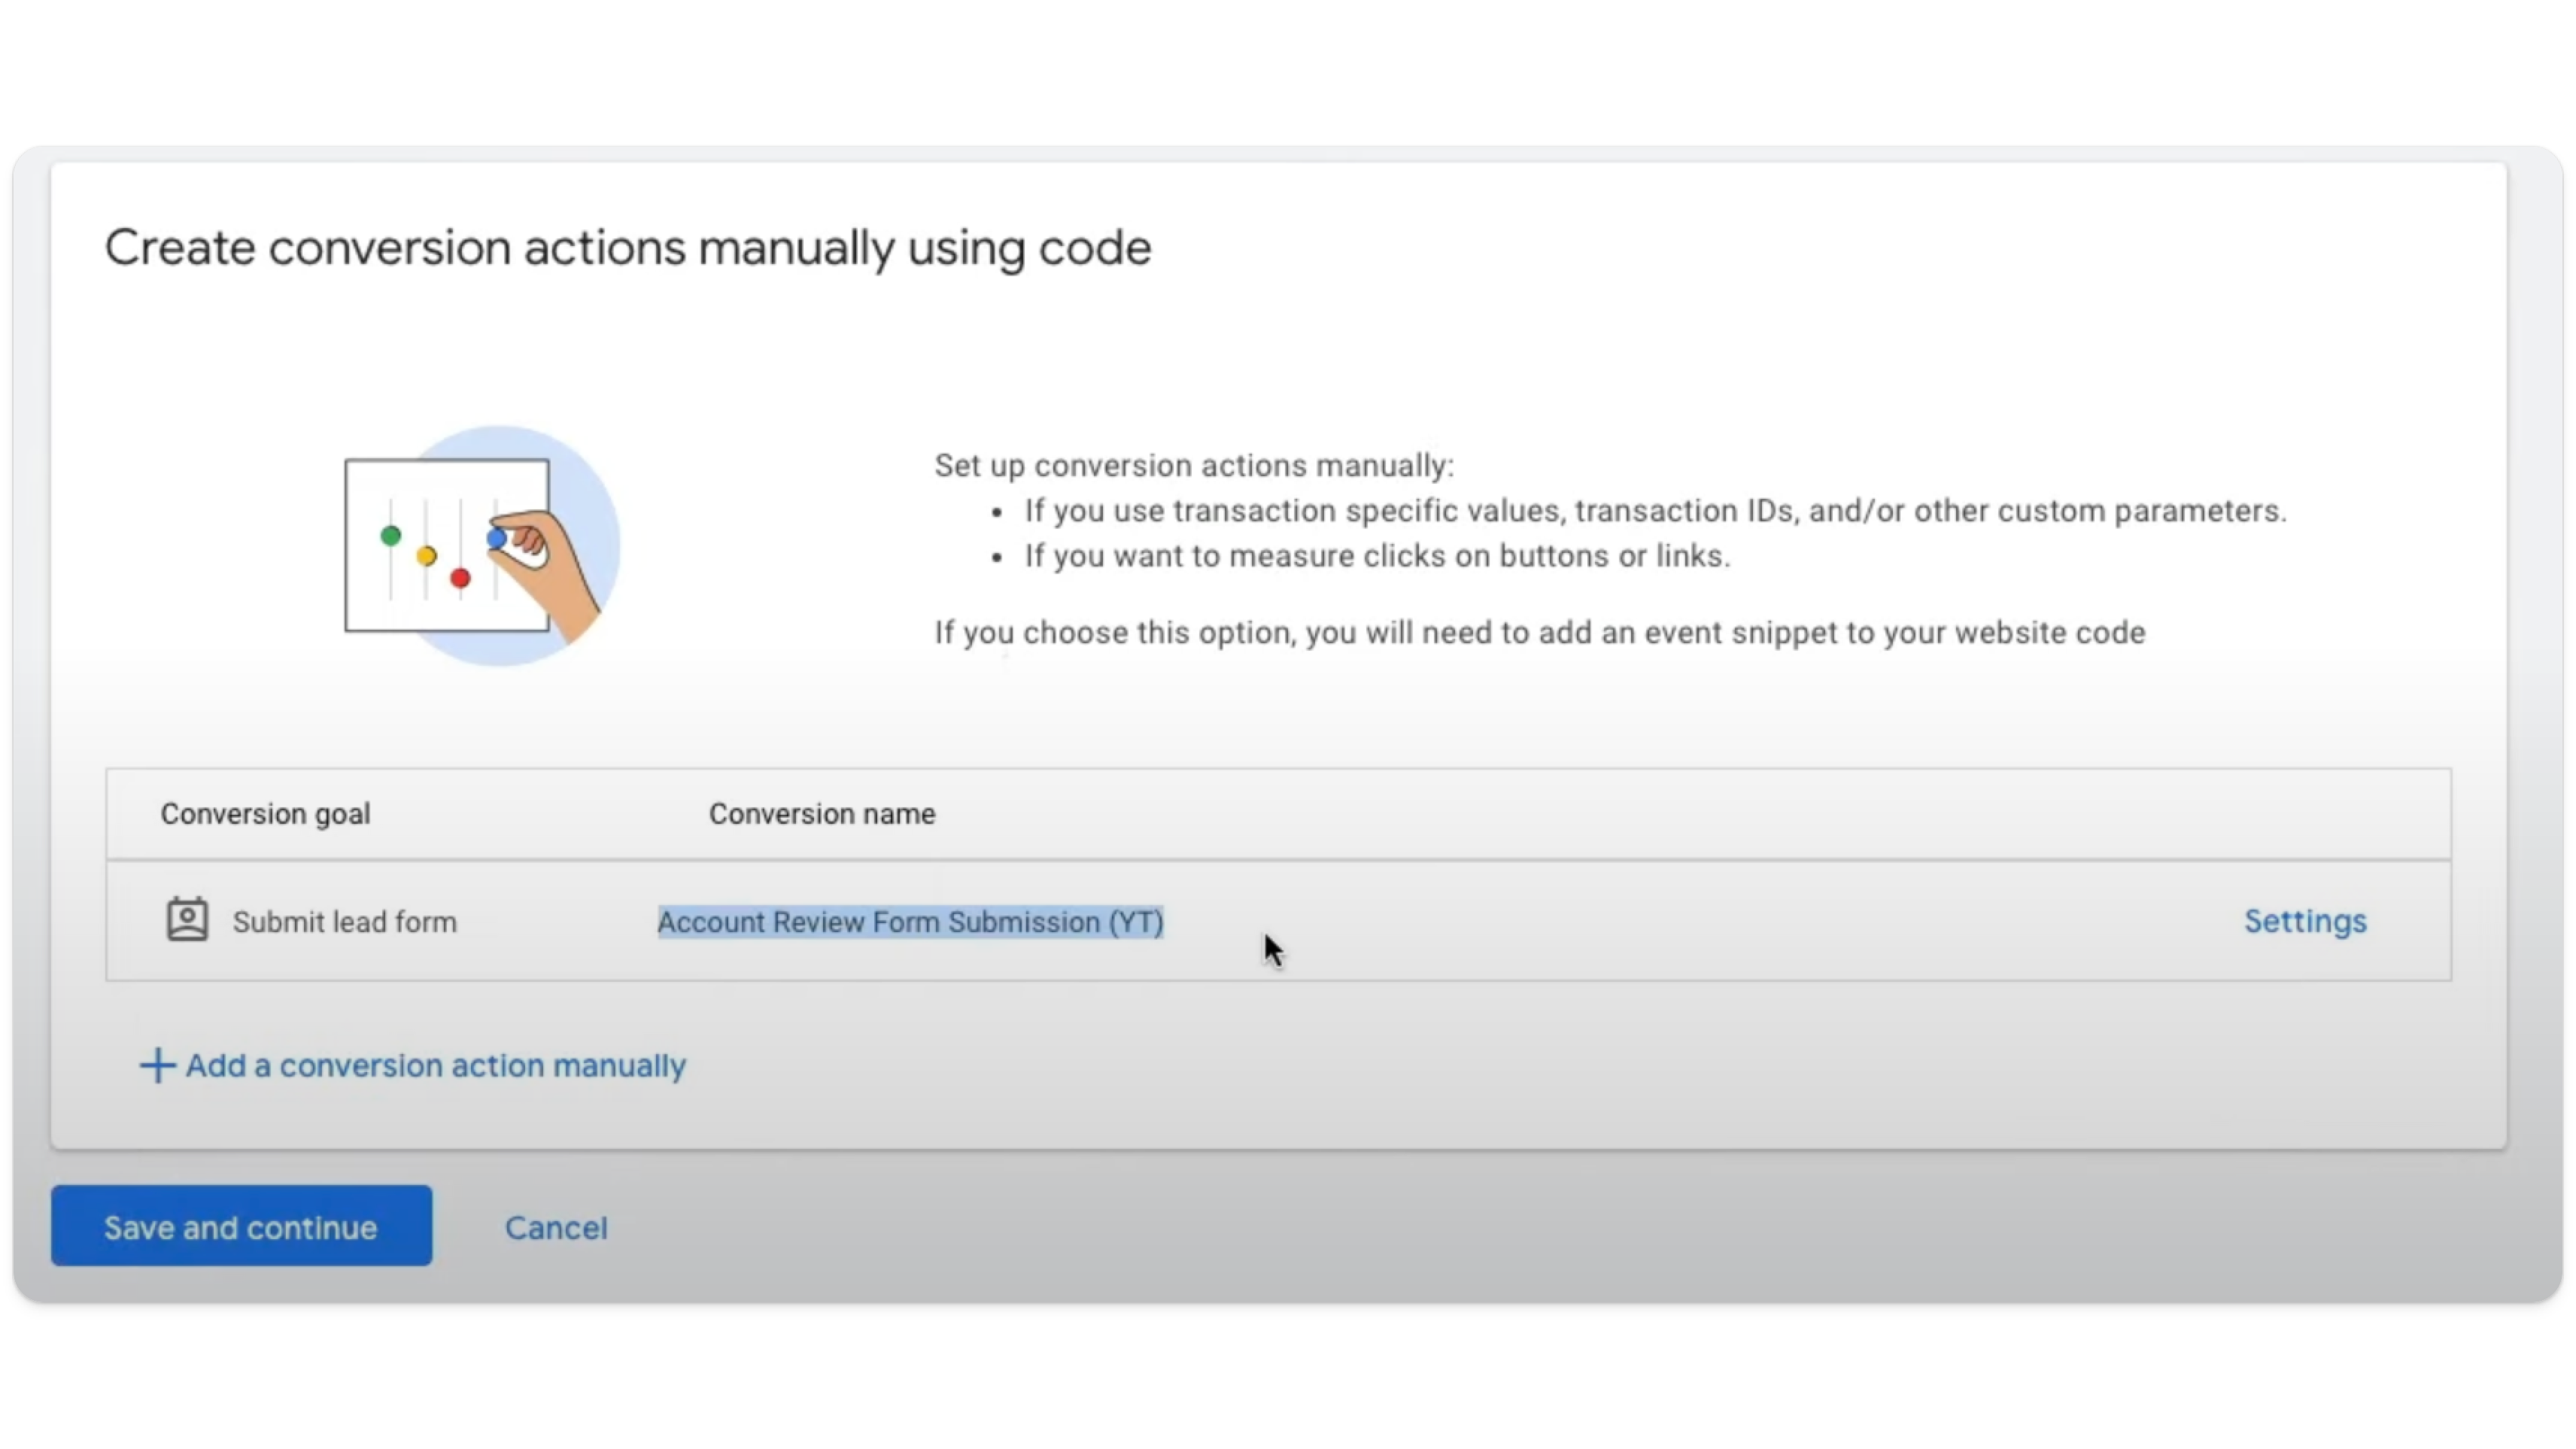
Select + Add a Conversion Action Manually
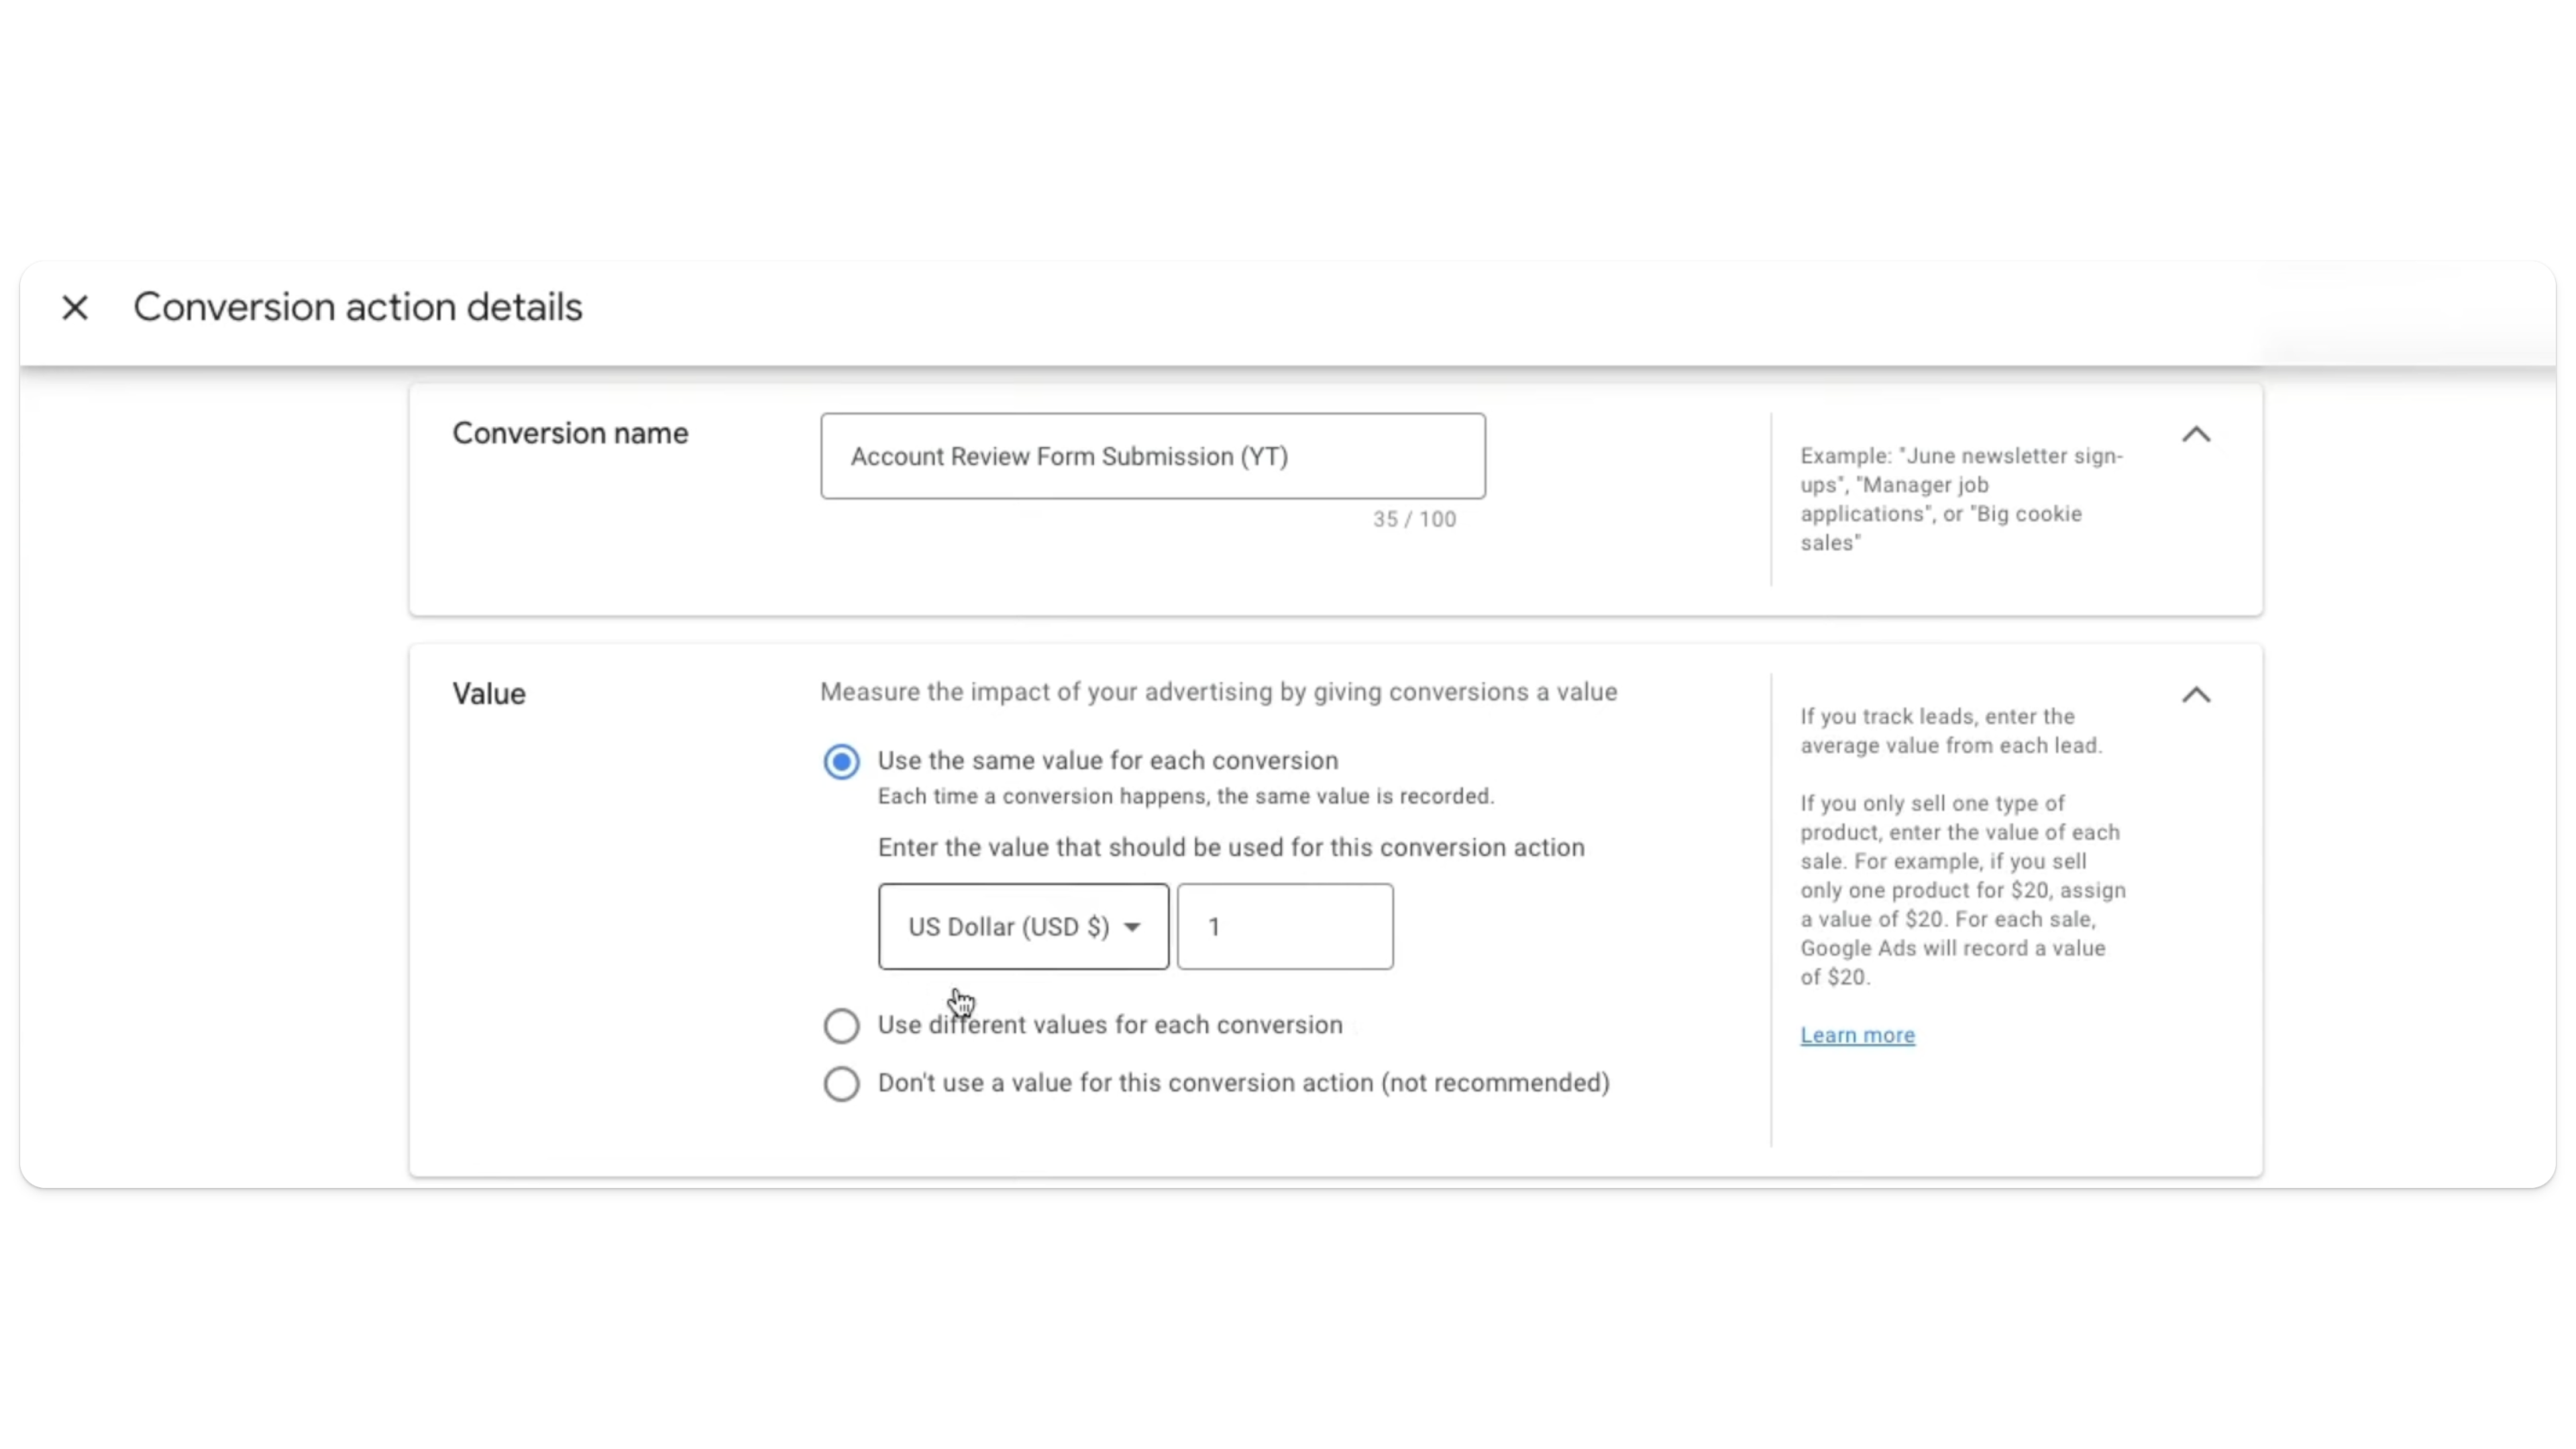
Fill in the Details:
Conversion Name: Name it something like “Account Review Form Submission.”
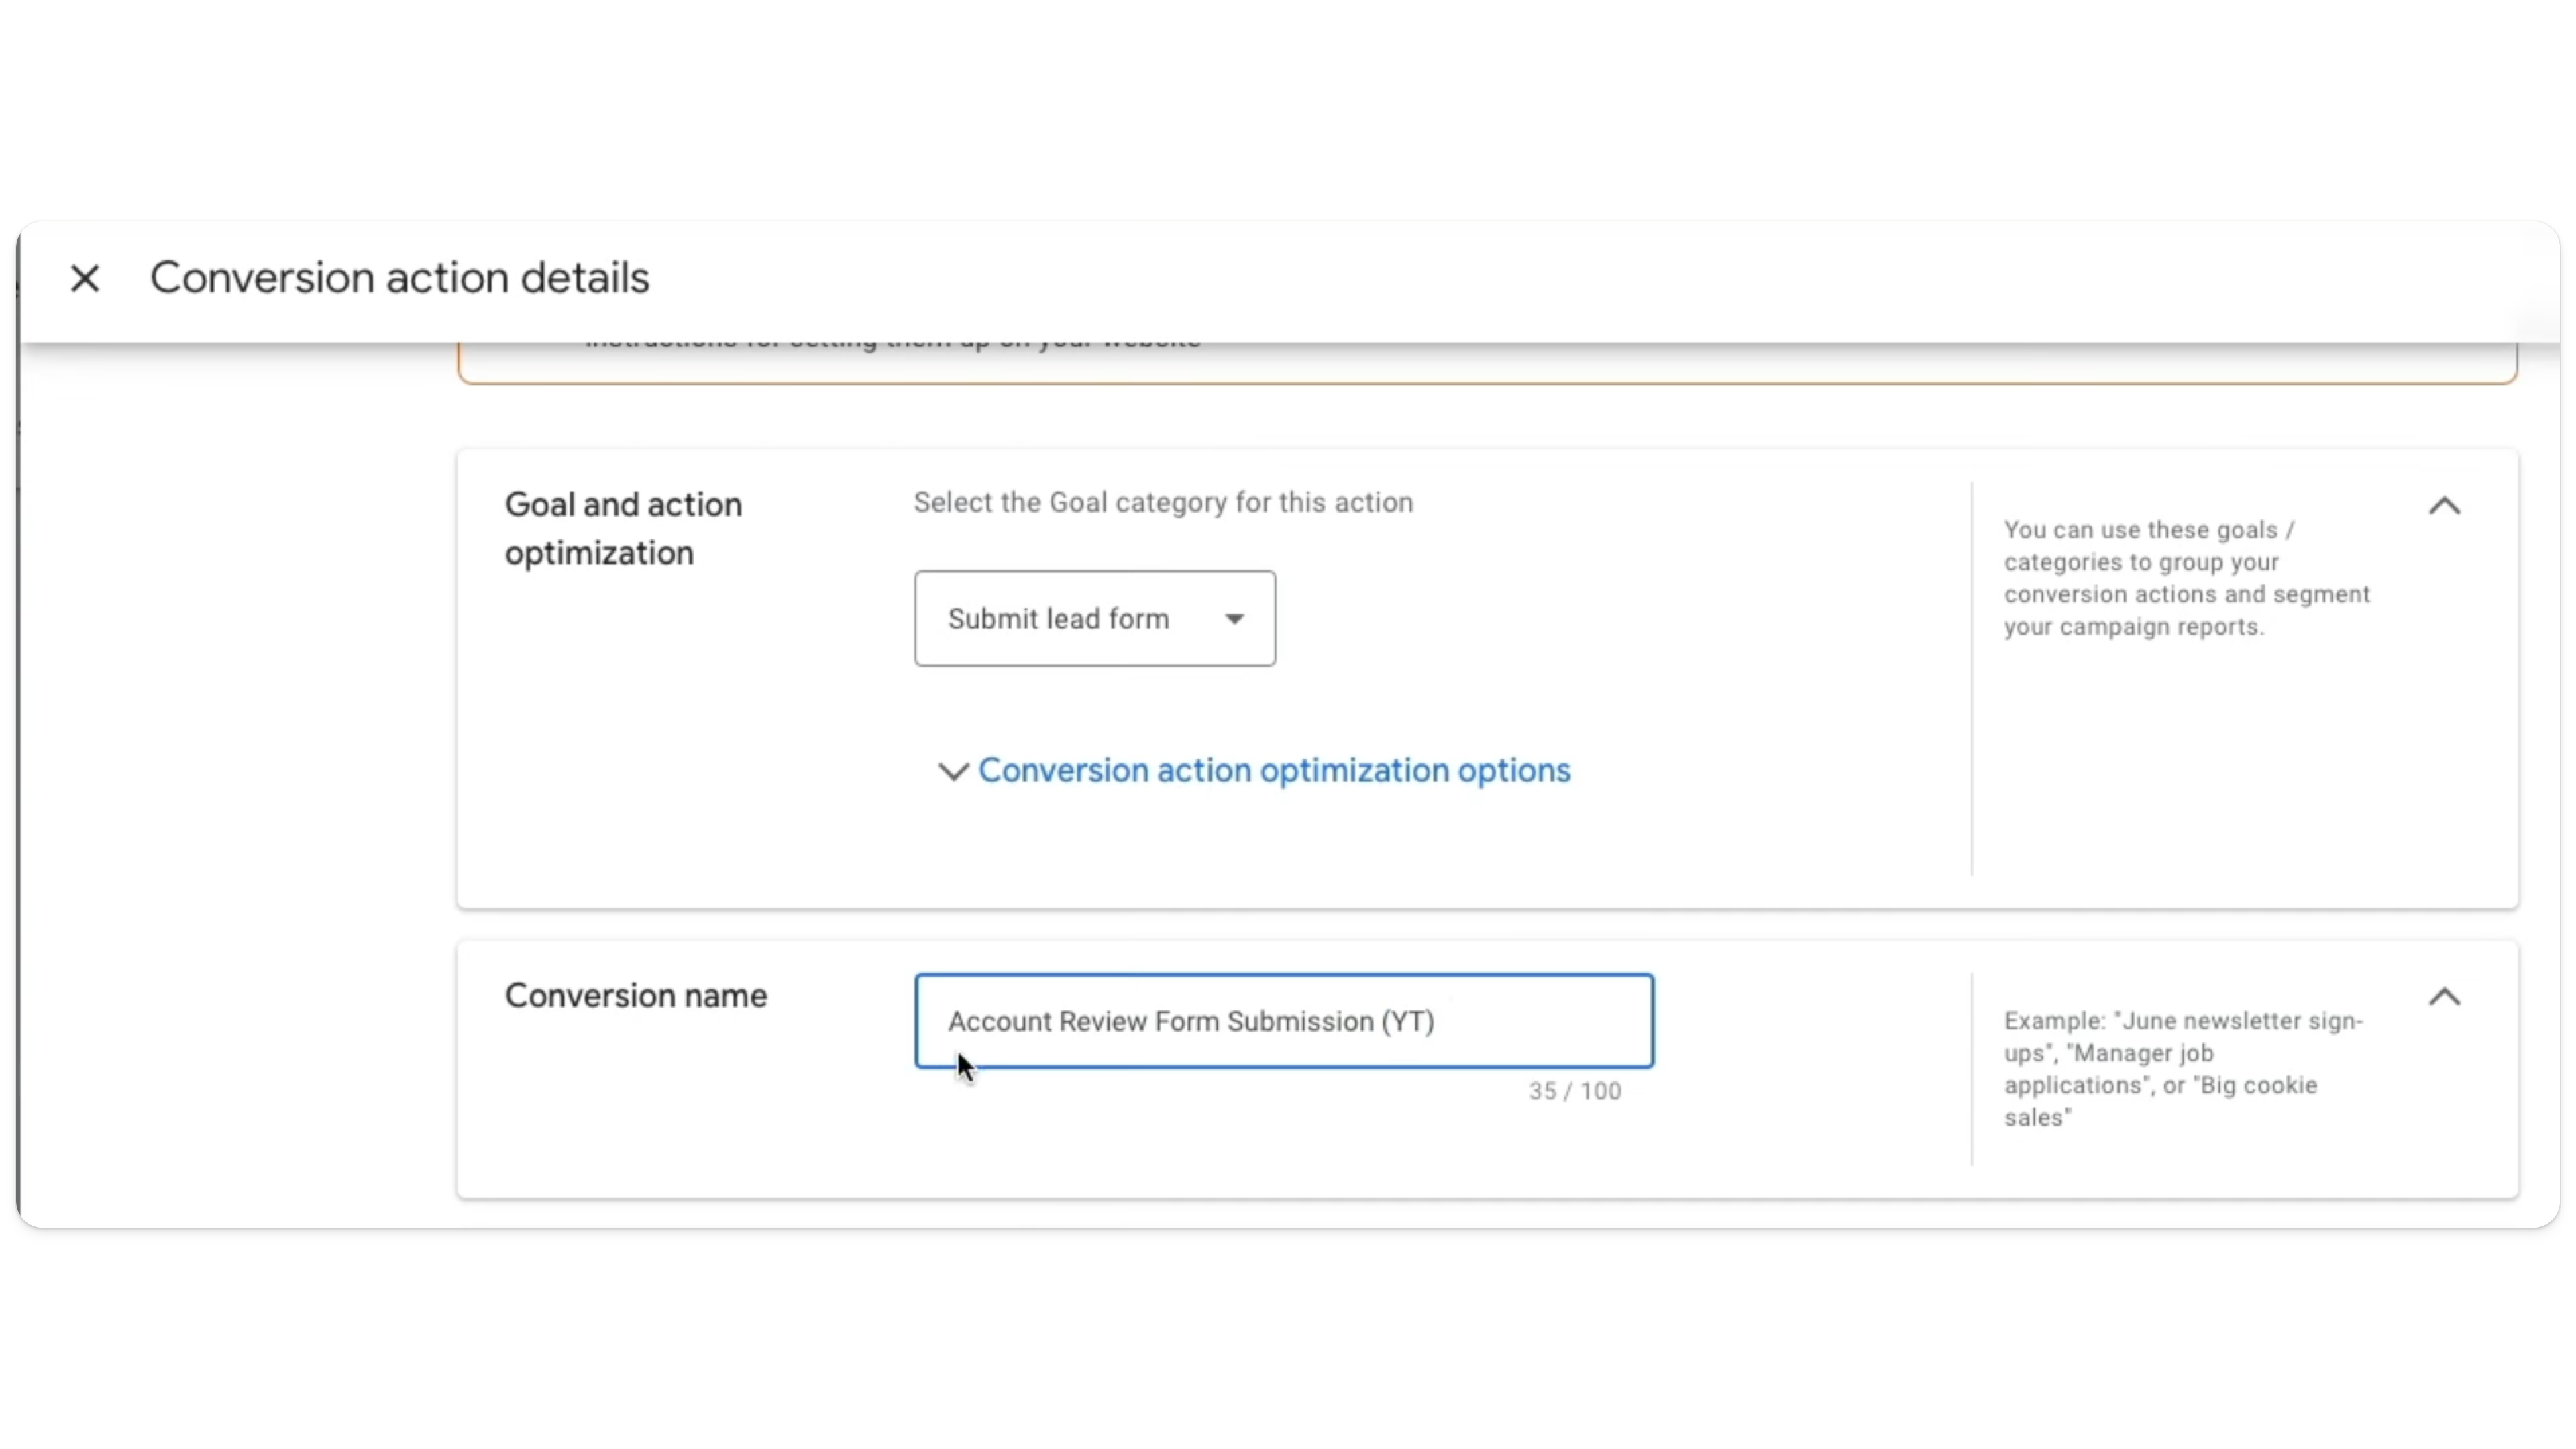
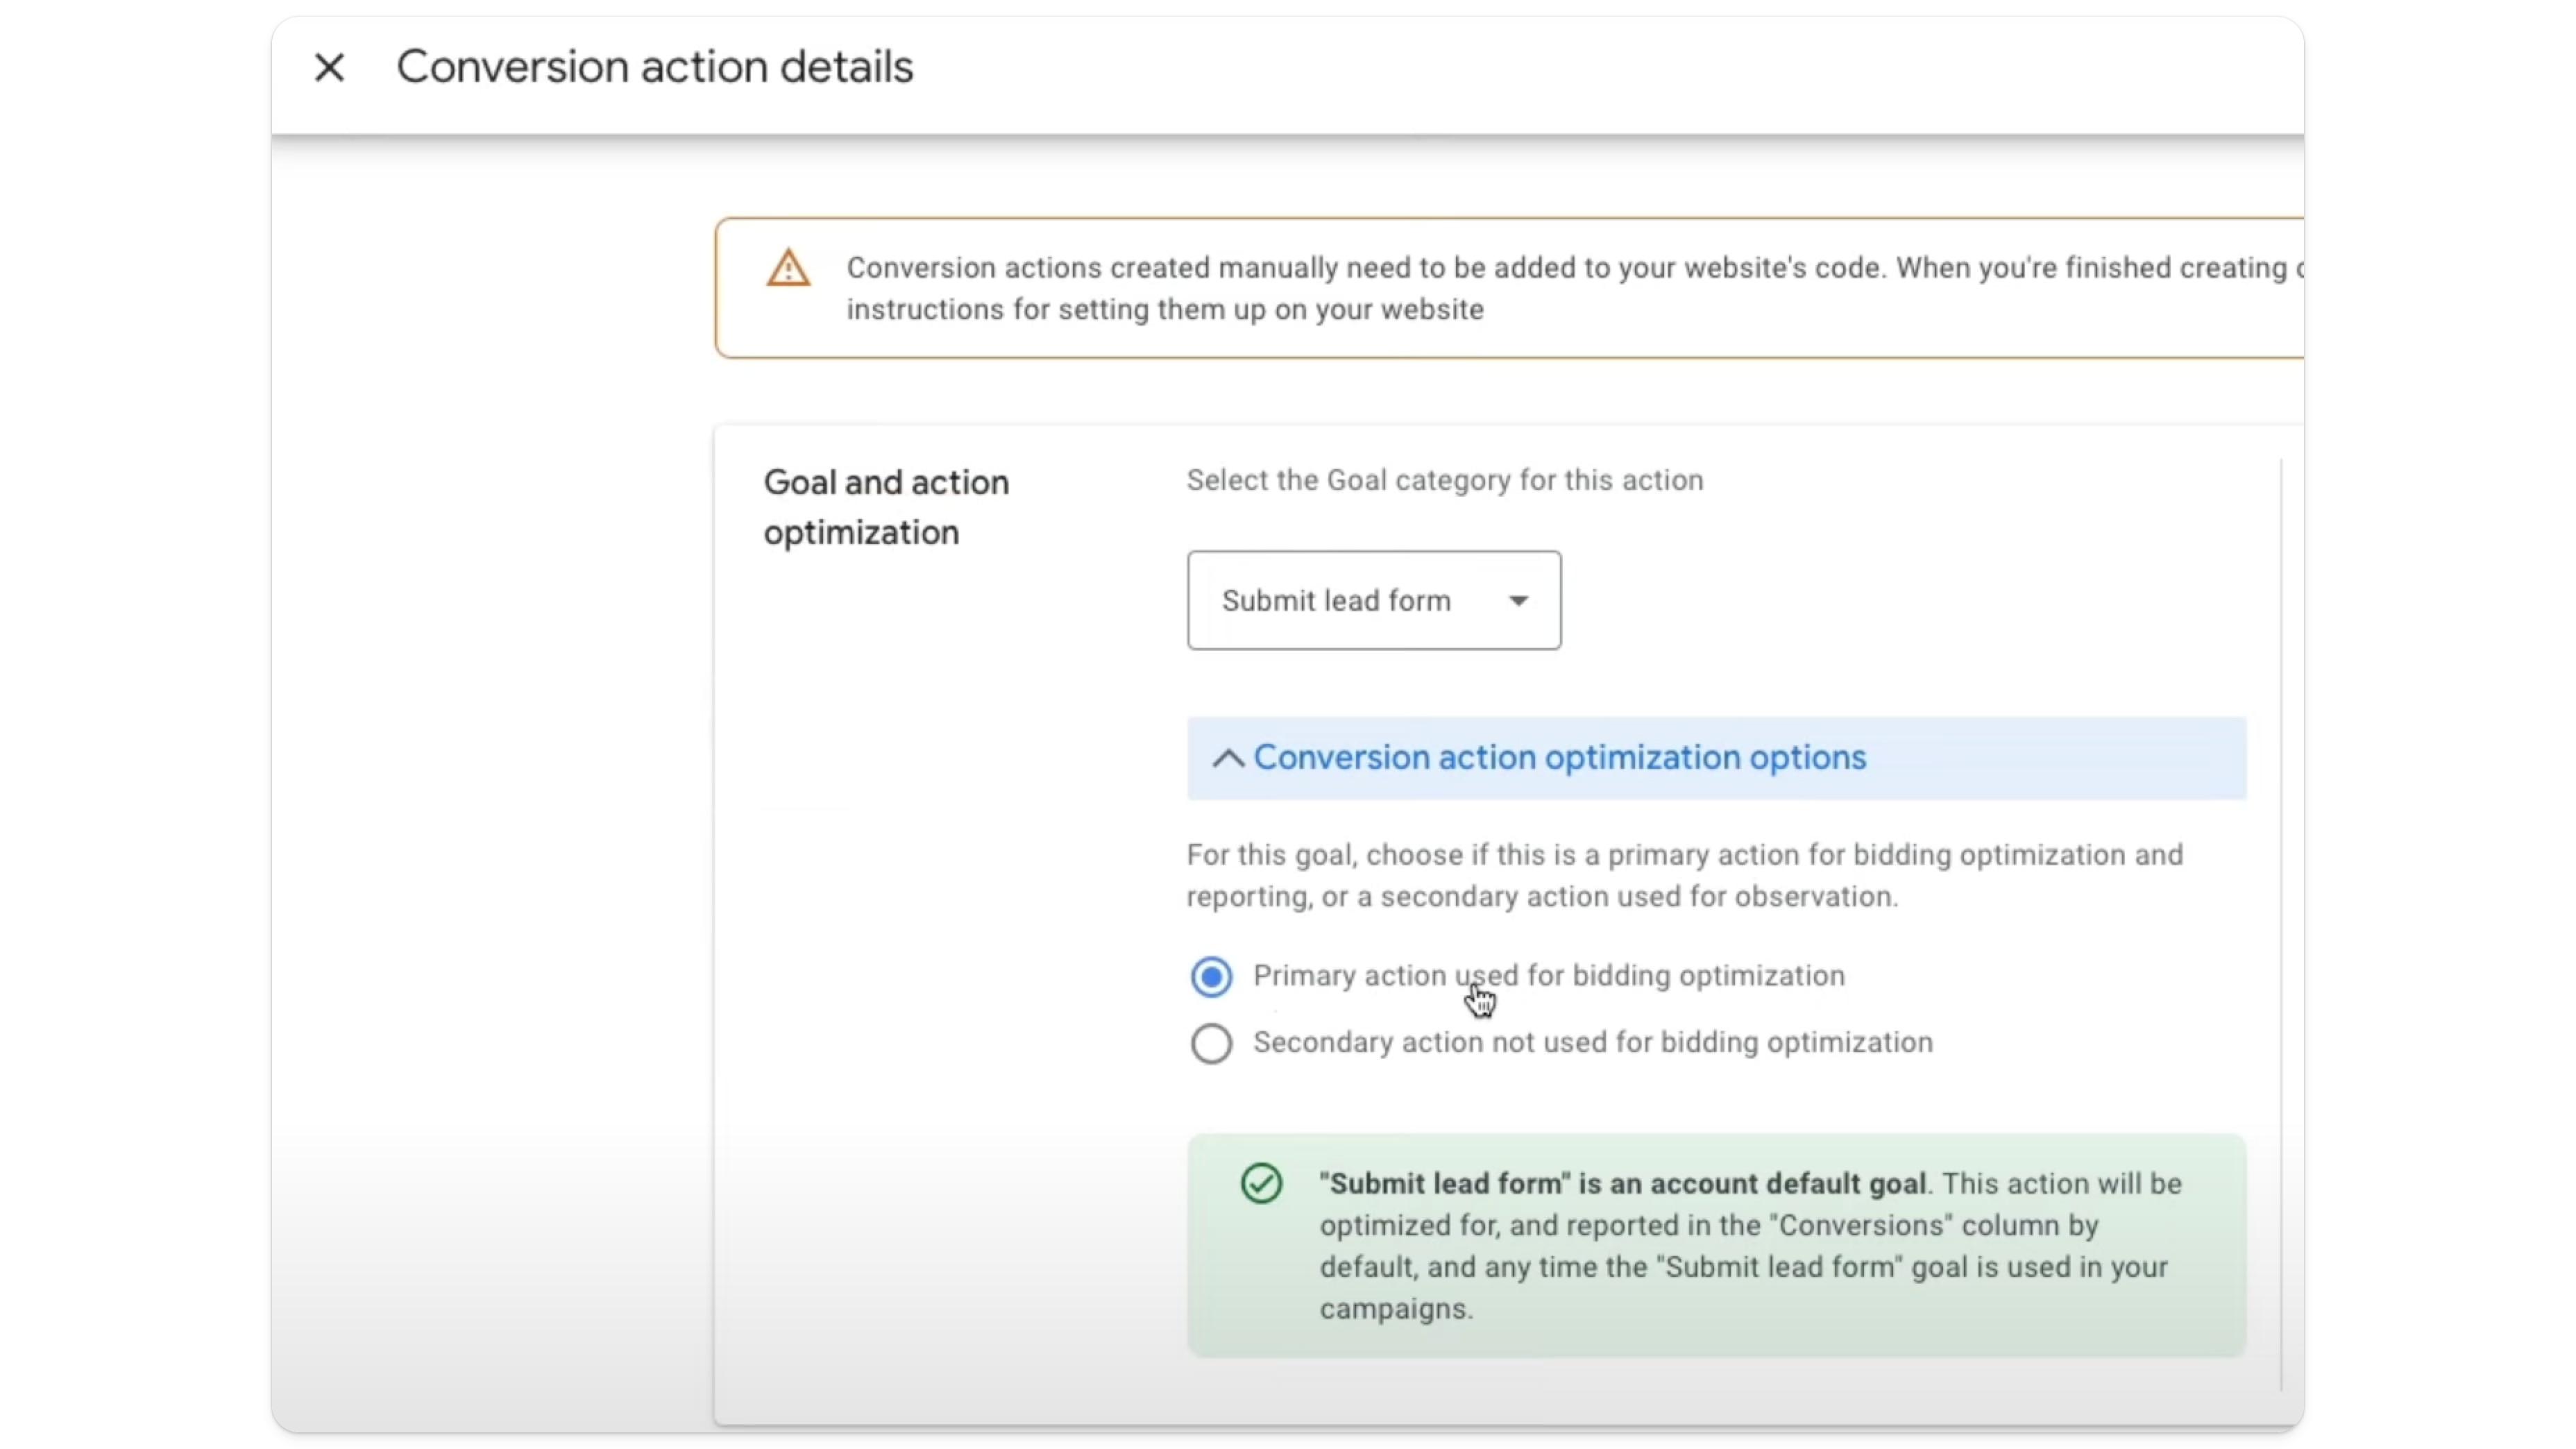
Category: Select Submit Lead Form to classify the action. You’ll also want to set this as a primary action, as this allows Google’s smart bidding to learn off of the conversion.
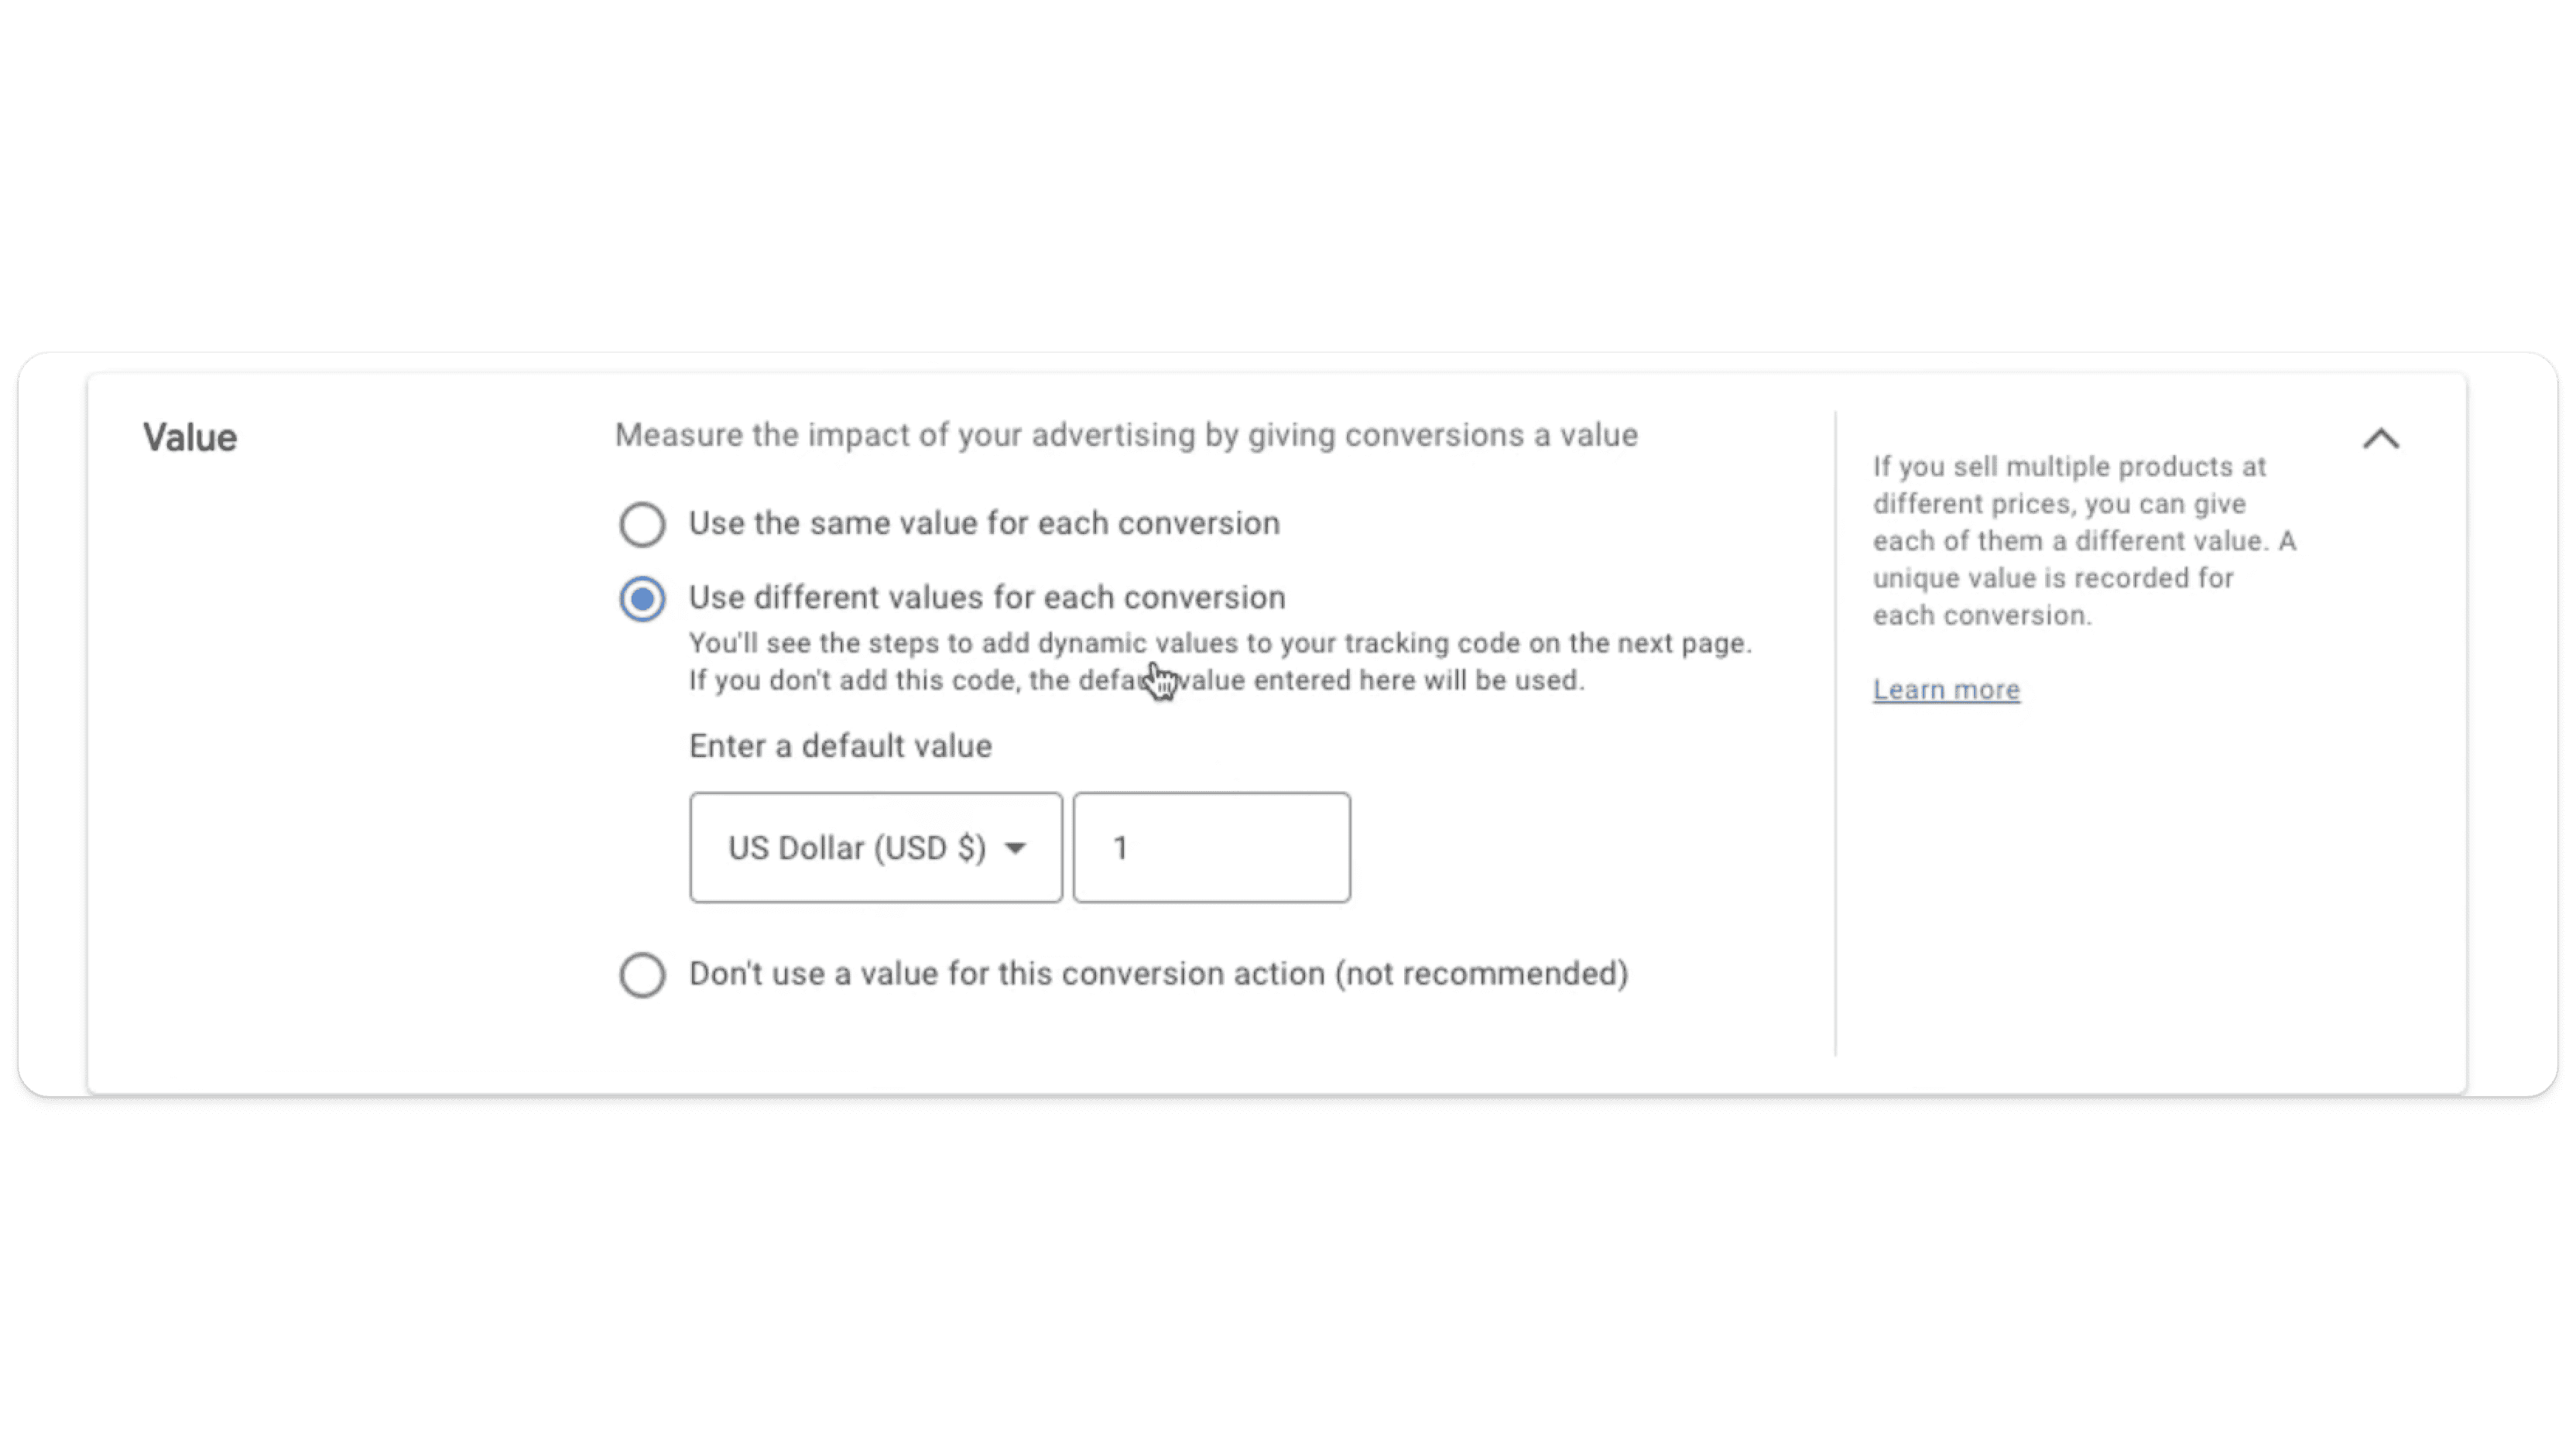
Value: Assign a fixed value (e.g., $1 per lead) or leave it blank if each lead is equally valuable.
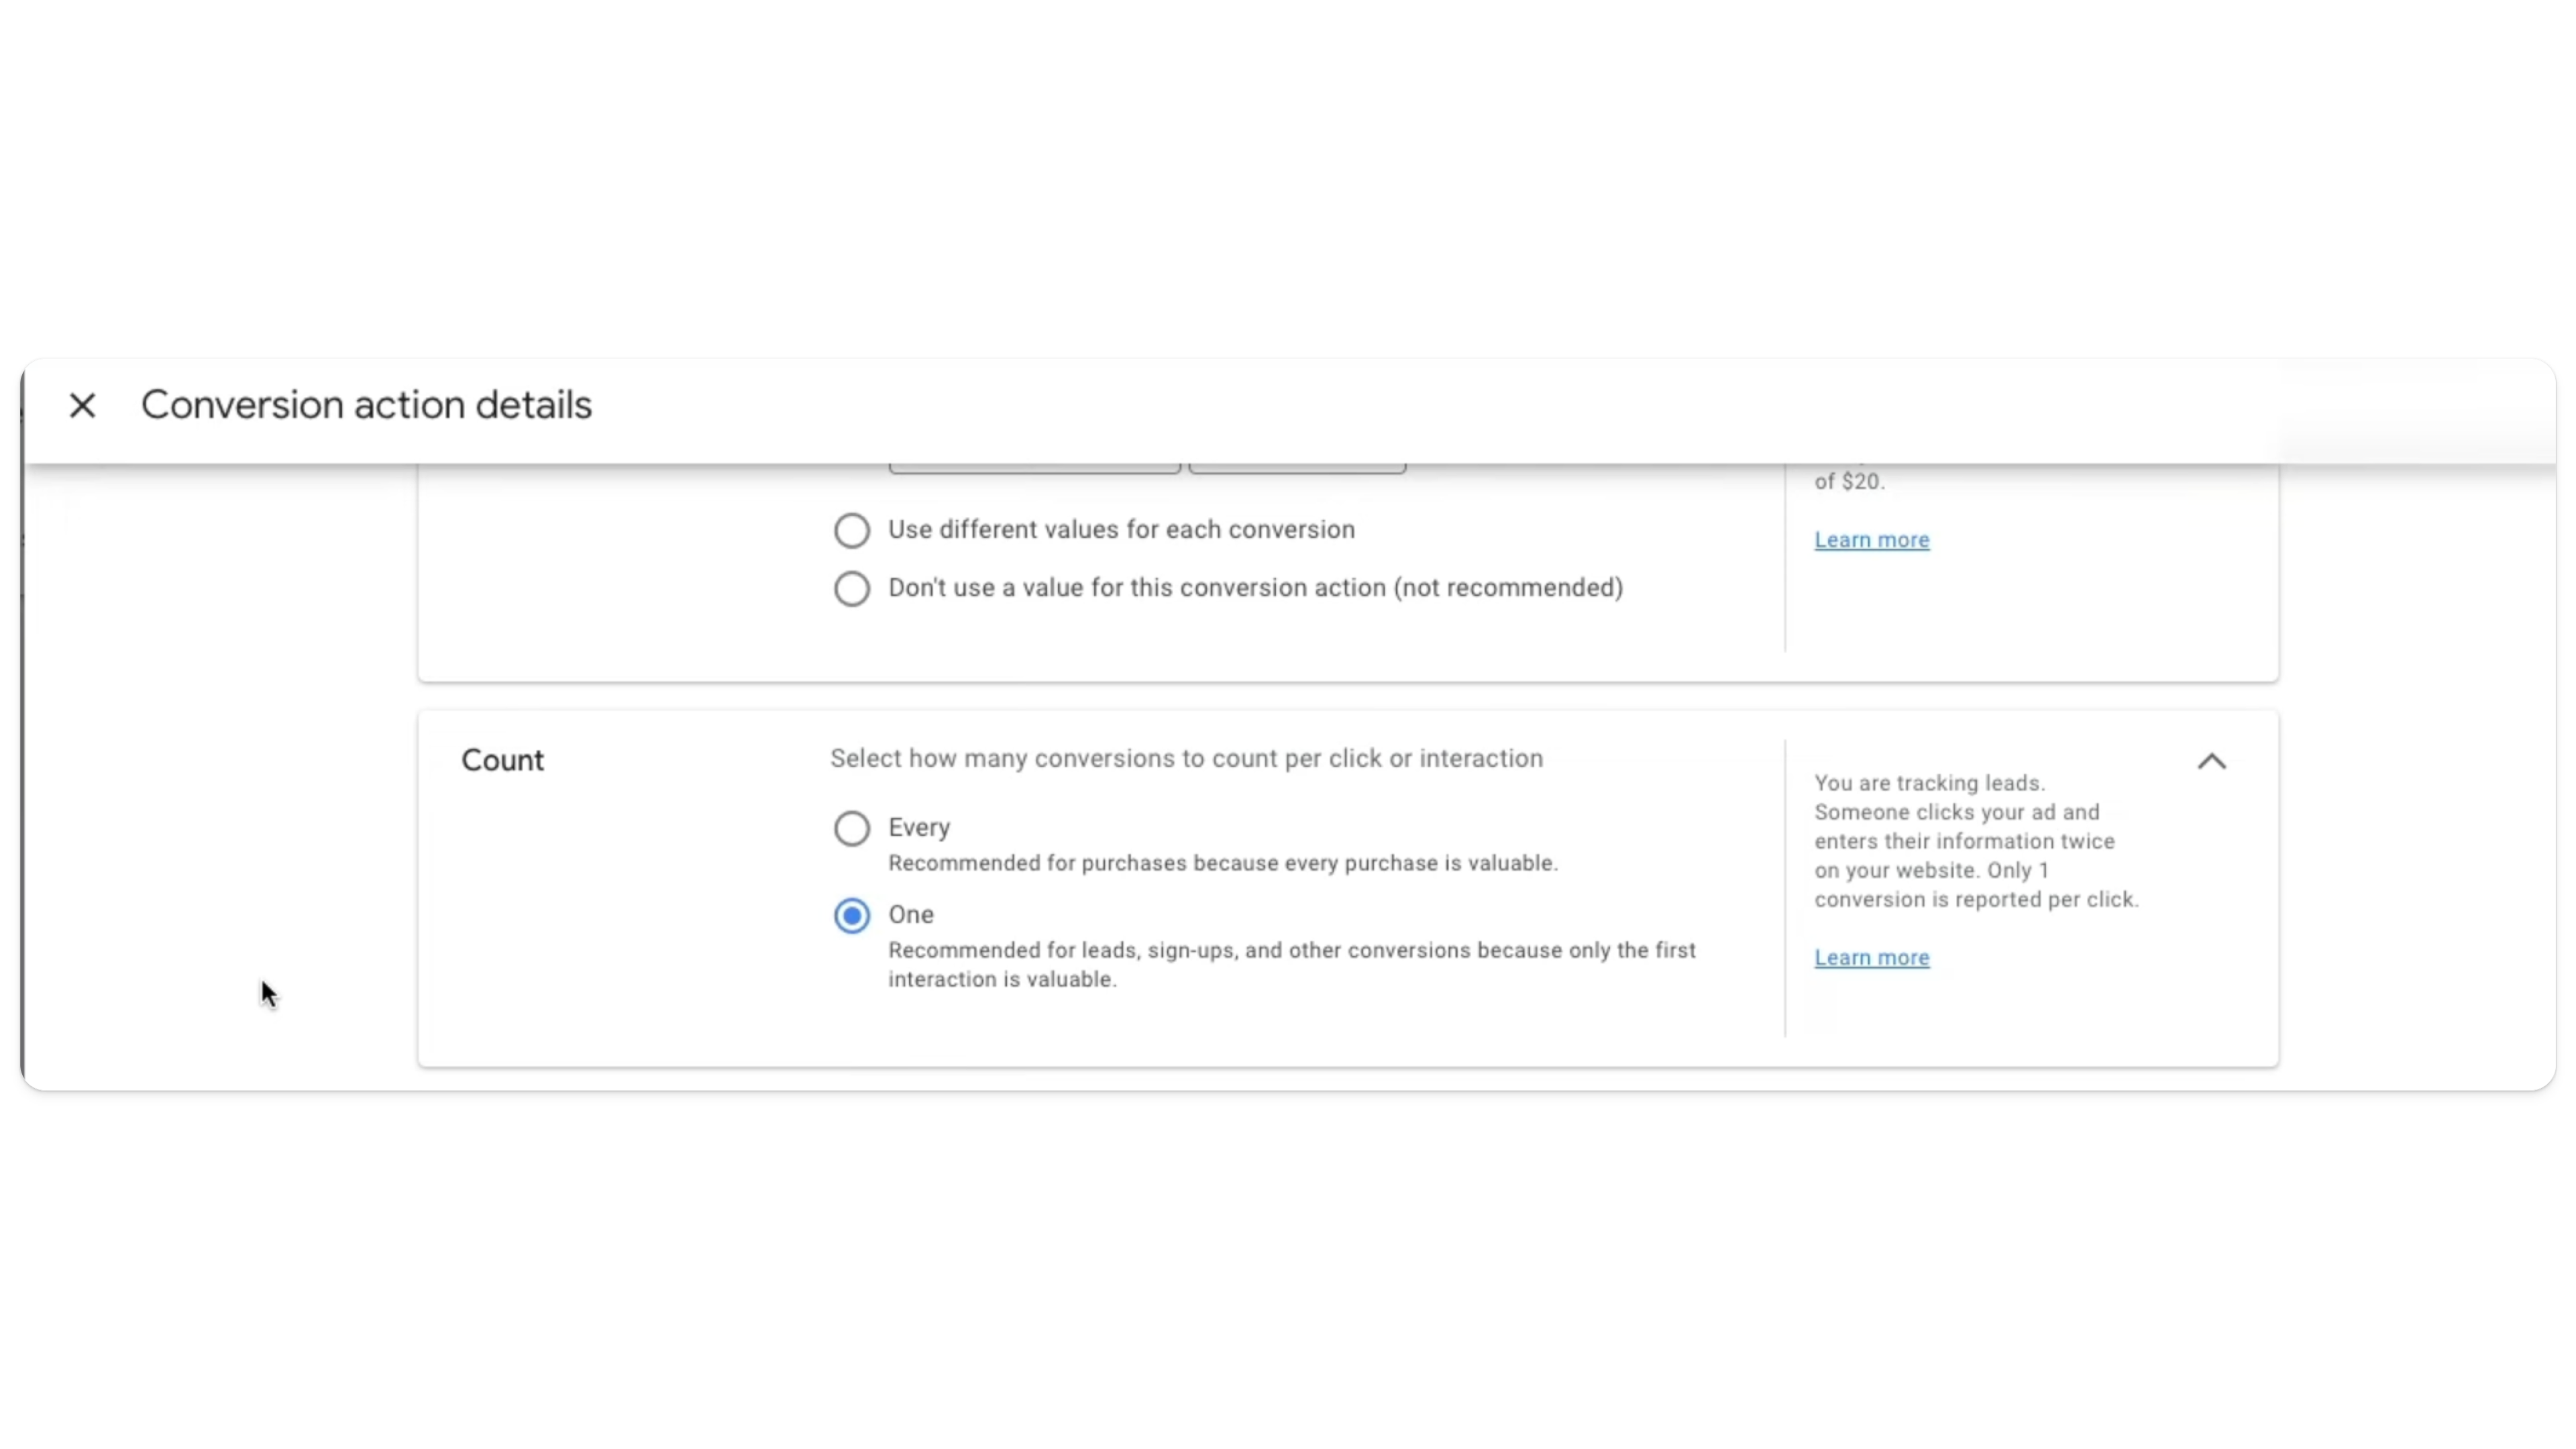
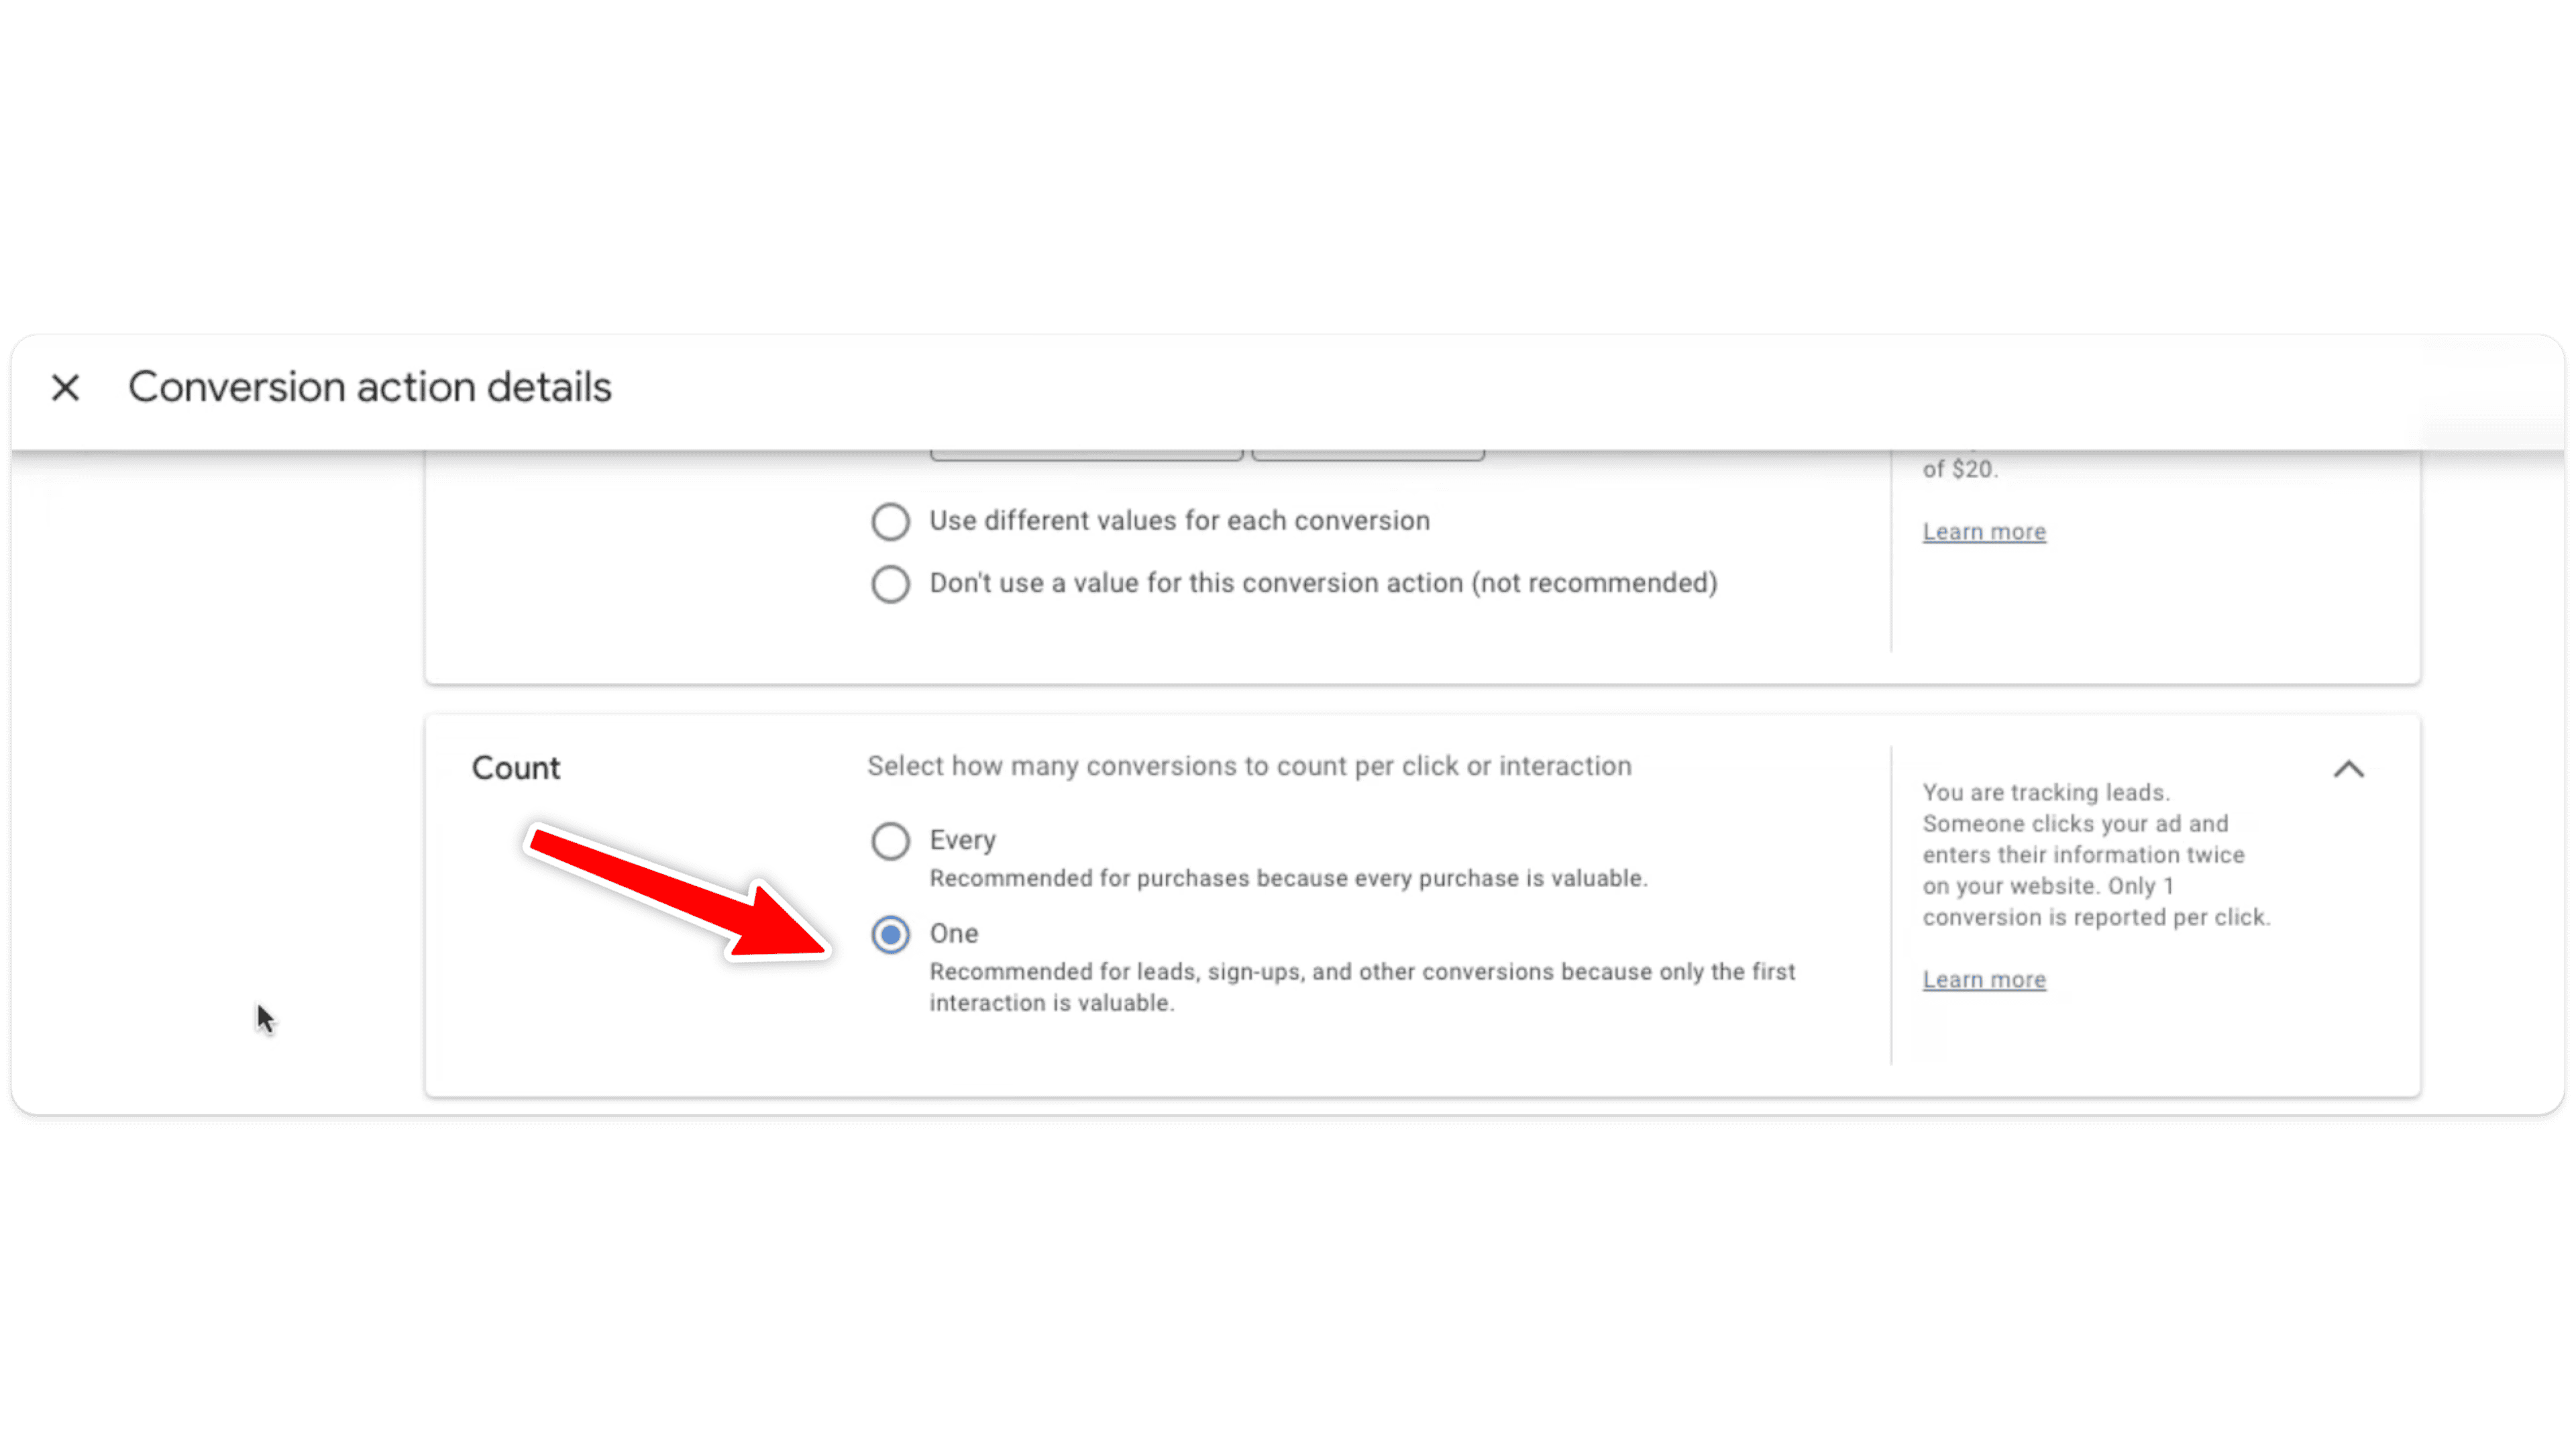
Count: Set this to One to track only unique form submissions.
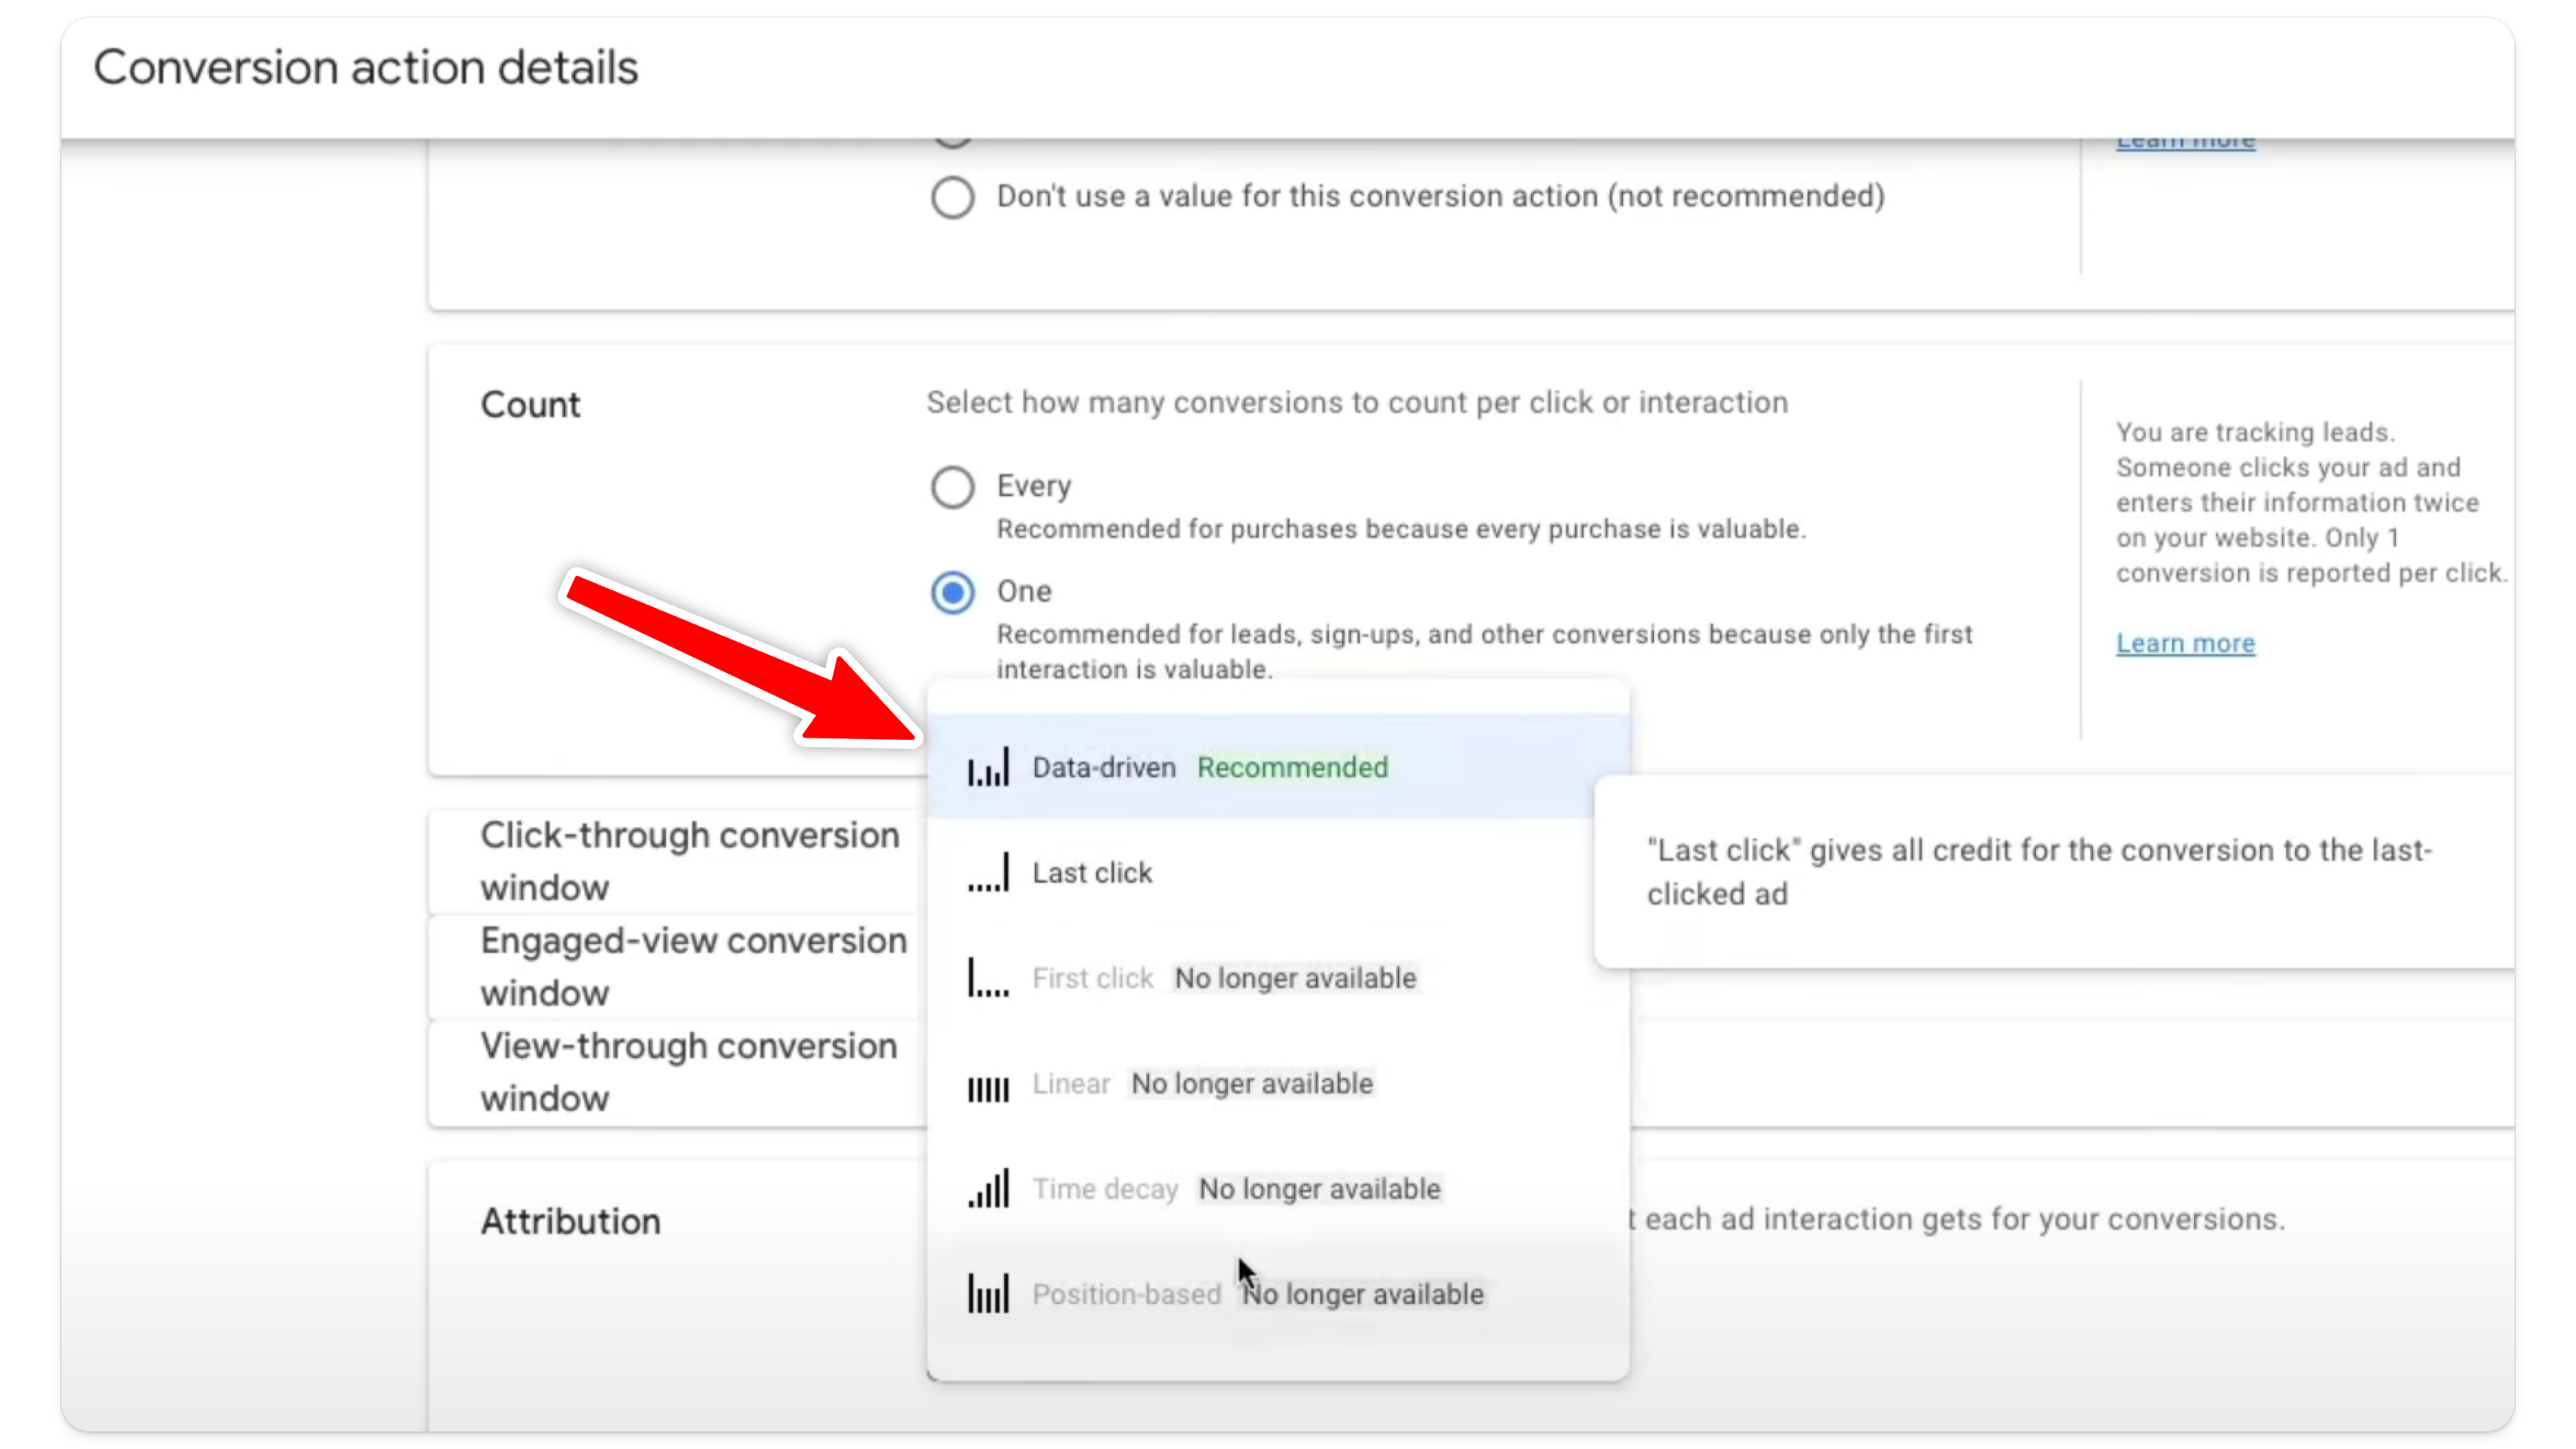
Choose an Attribution Model:
Select Data-Driven Attribution for the most accurate credit allocation. This model analyzes your data to assign credit to touchpoints in the user’s journey.
Turn off Enable Enhanced CPC.
Save and Continue.
Step 2: Configure the Conversion Tag in Google Tag Manager
Once your conversion action is set up in Google Ads, it’s time to implement the tracking tag in GTM (Google Tag Manager). Ideally, you will already have an active Google Tag Manager account. If that’s the case, you can go ahead and select this option:
Add a Conversion Linker Tag
The Conversion Linker Tag ensures that Google Ads can attribute conversions to the correct ad clicks. You’ll need the Conversion Linker for any interaction you set up in Tag Manager, so it’s good to ensure it is properly installed before moving forward.
Open GTM (Google Tag Manager) and Create a New Tag:
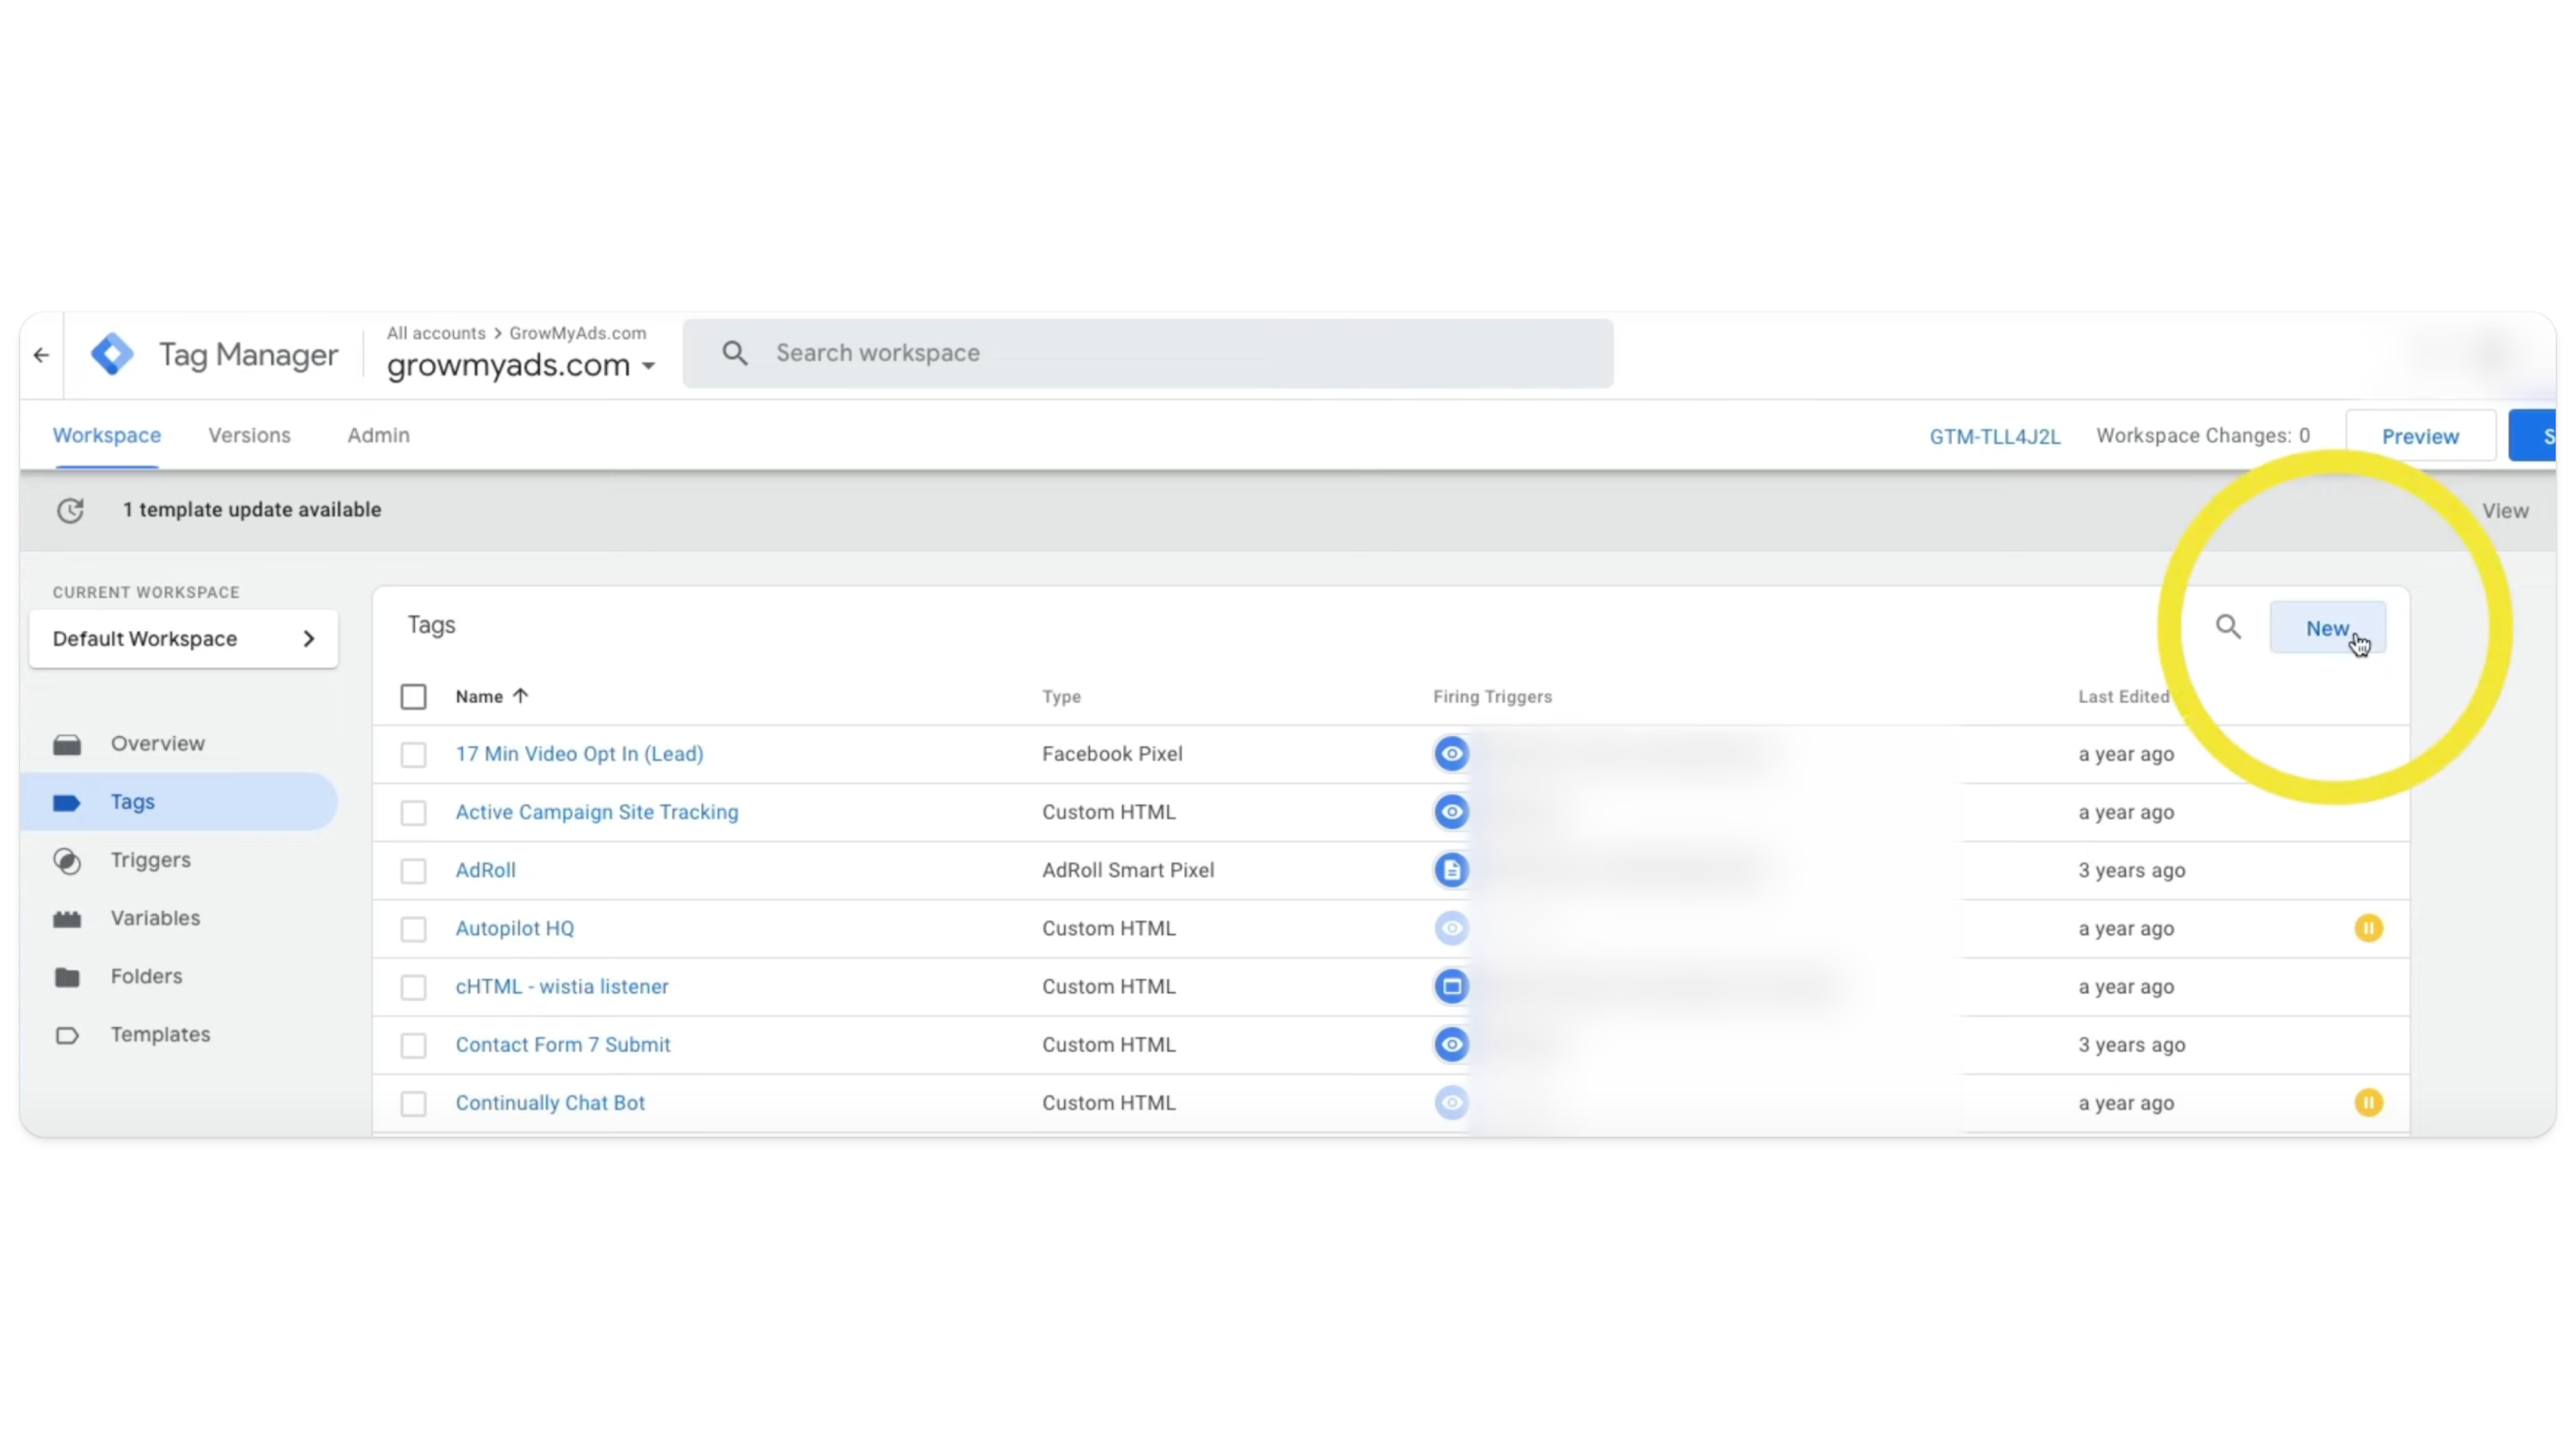
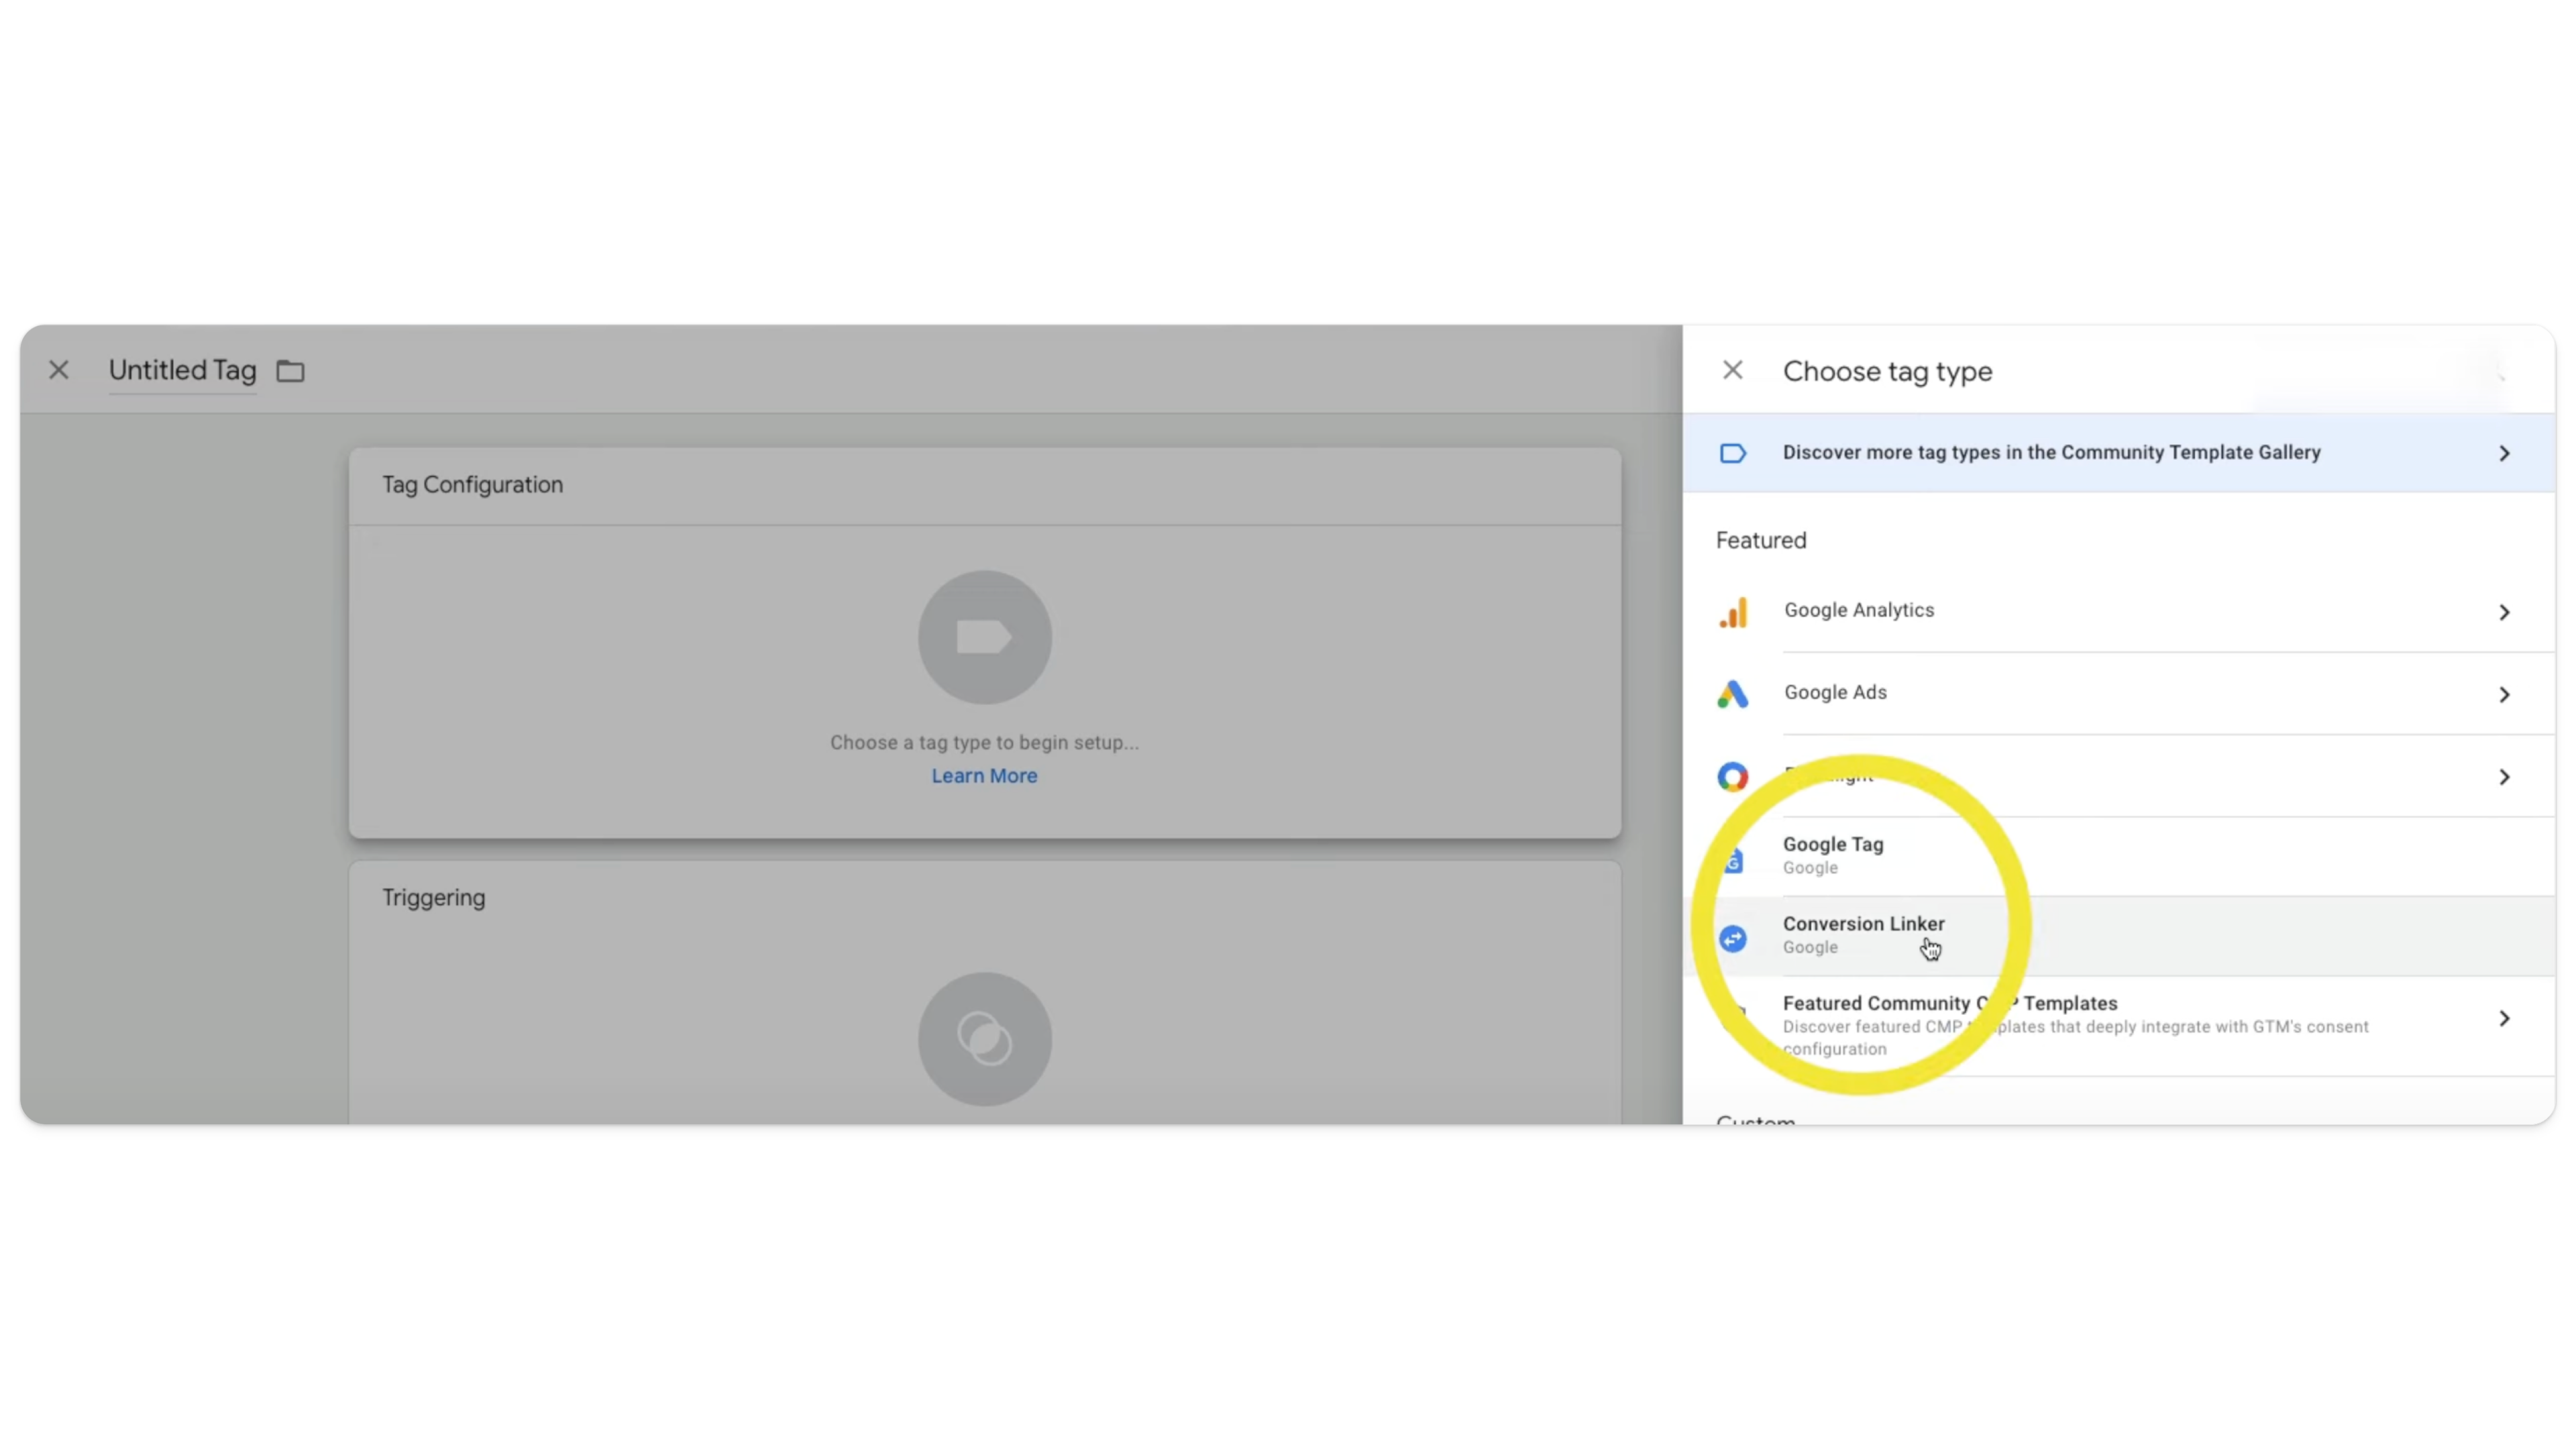
Click Tags > New > Tag Configuration > Conversion Linker.
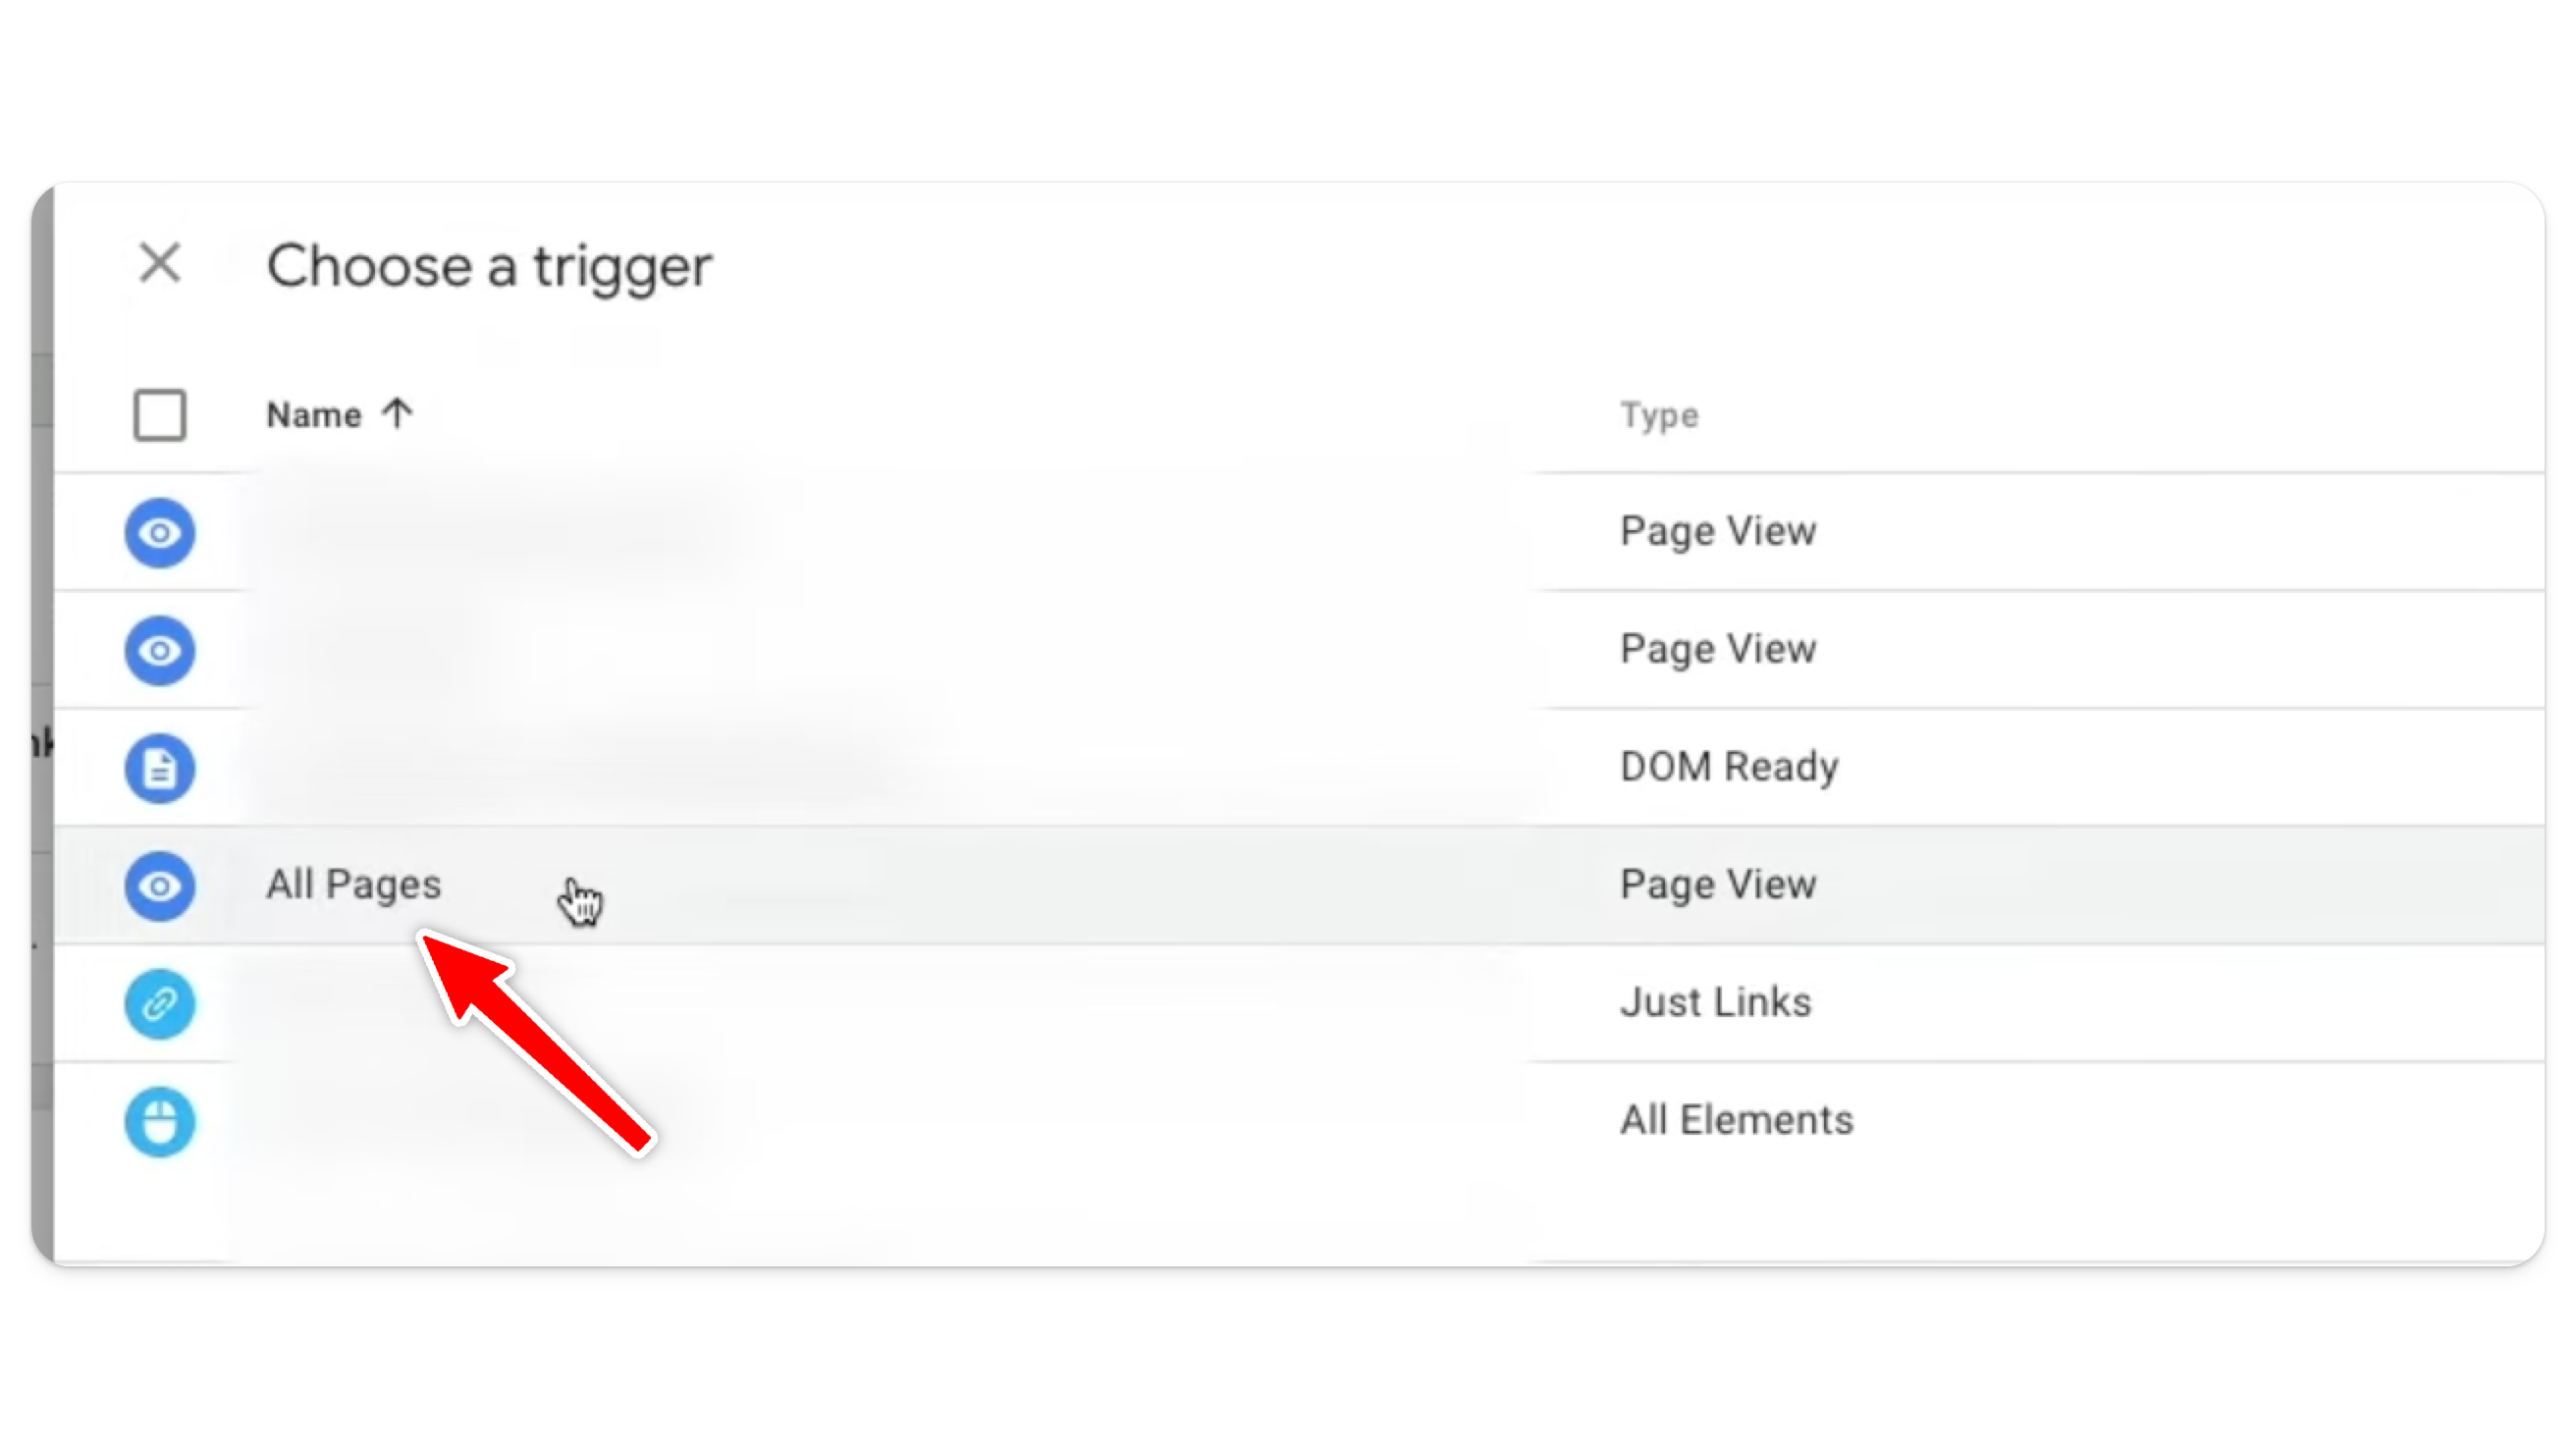
Set the Trigger:
Choose All Pages so the tag fires on every page of your website.
Save and Publish the Tag.
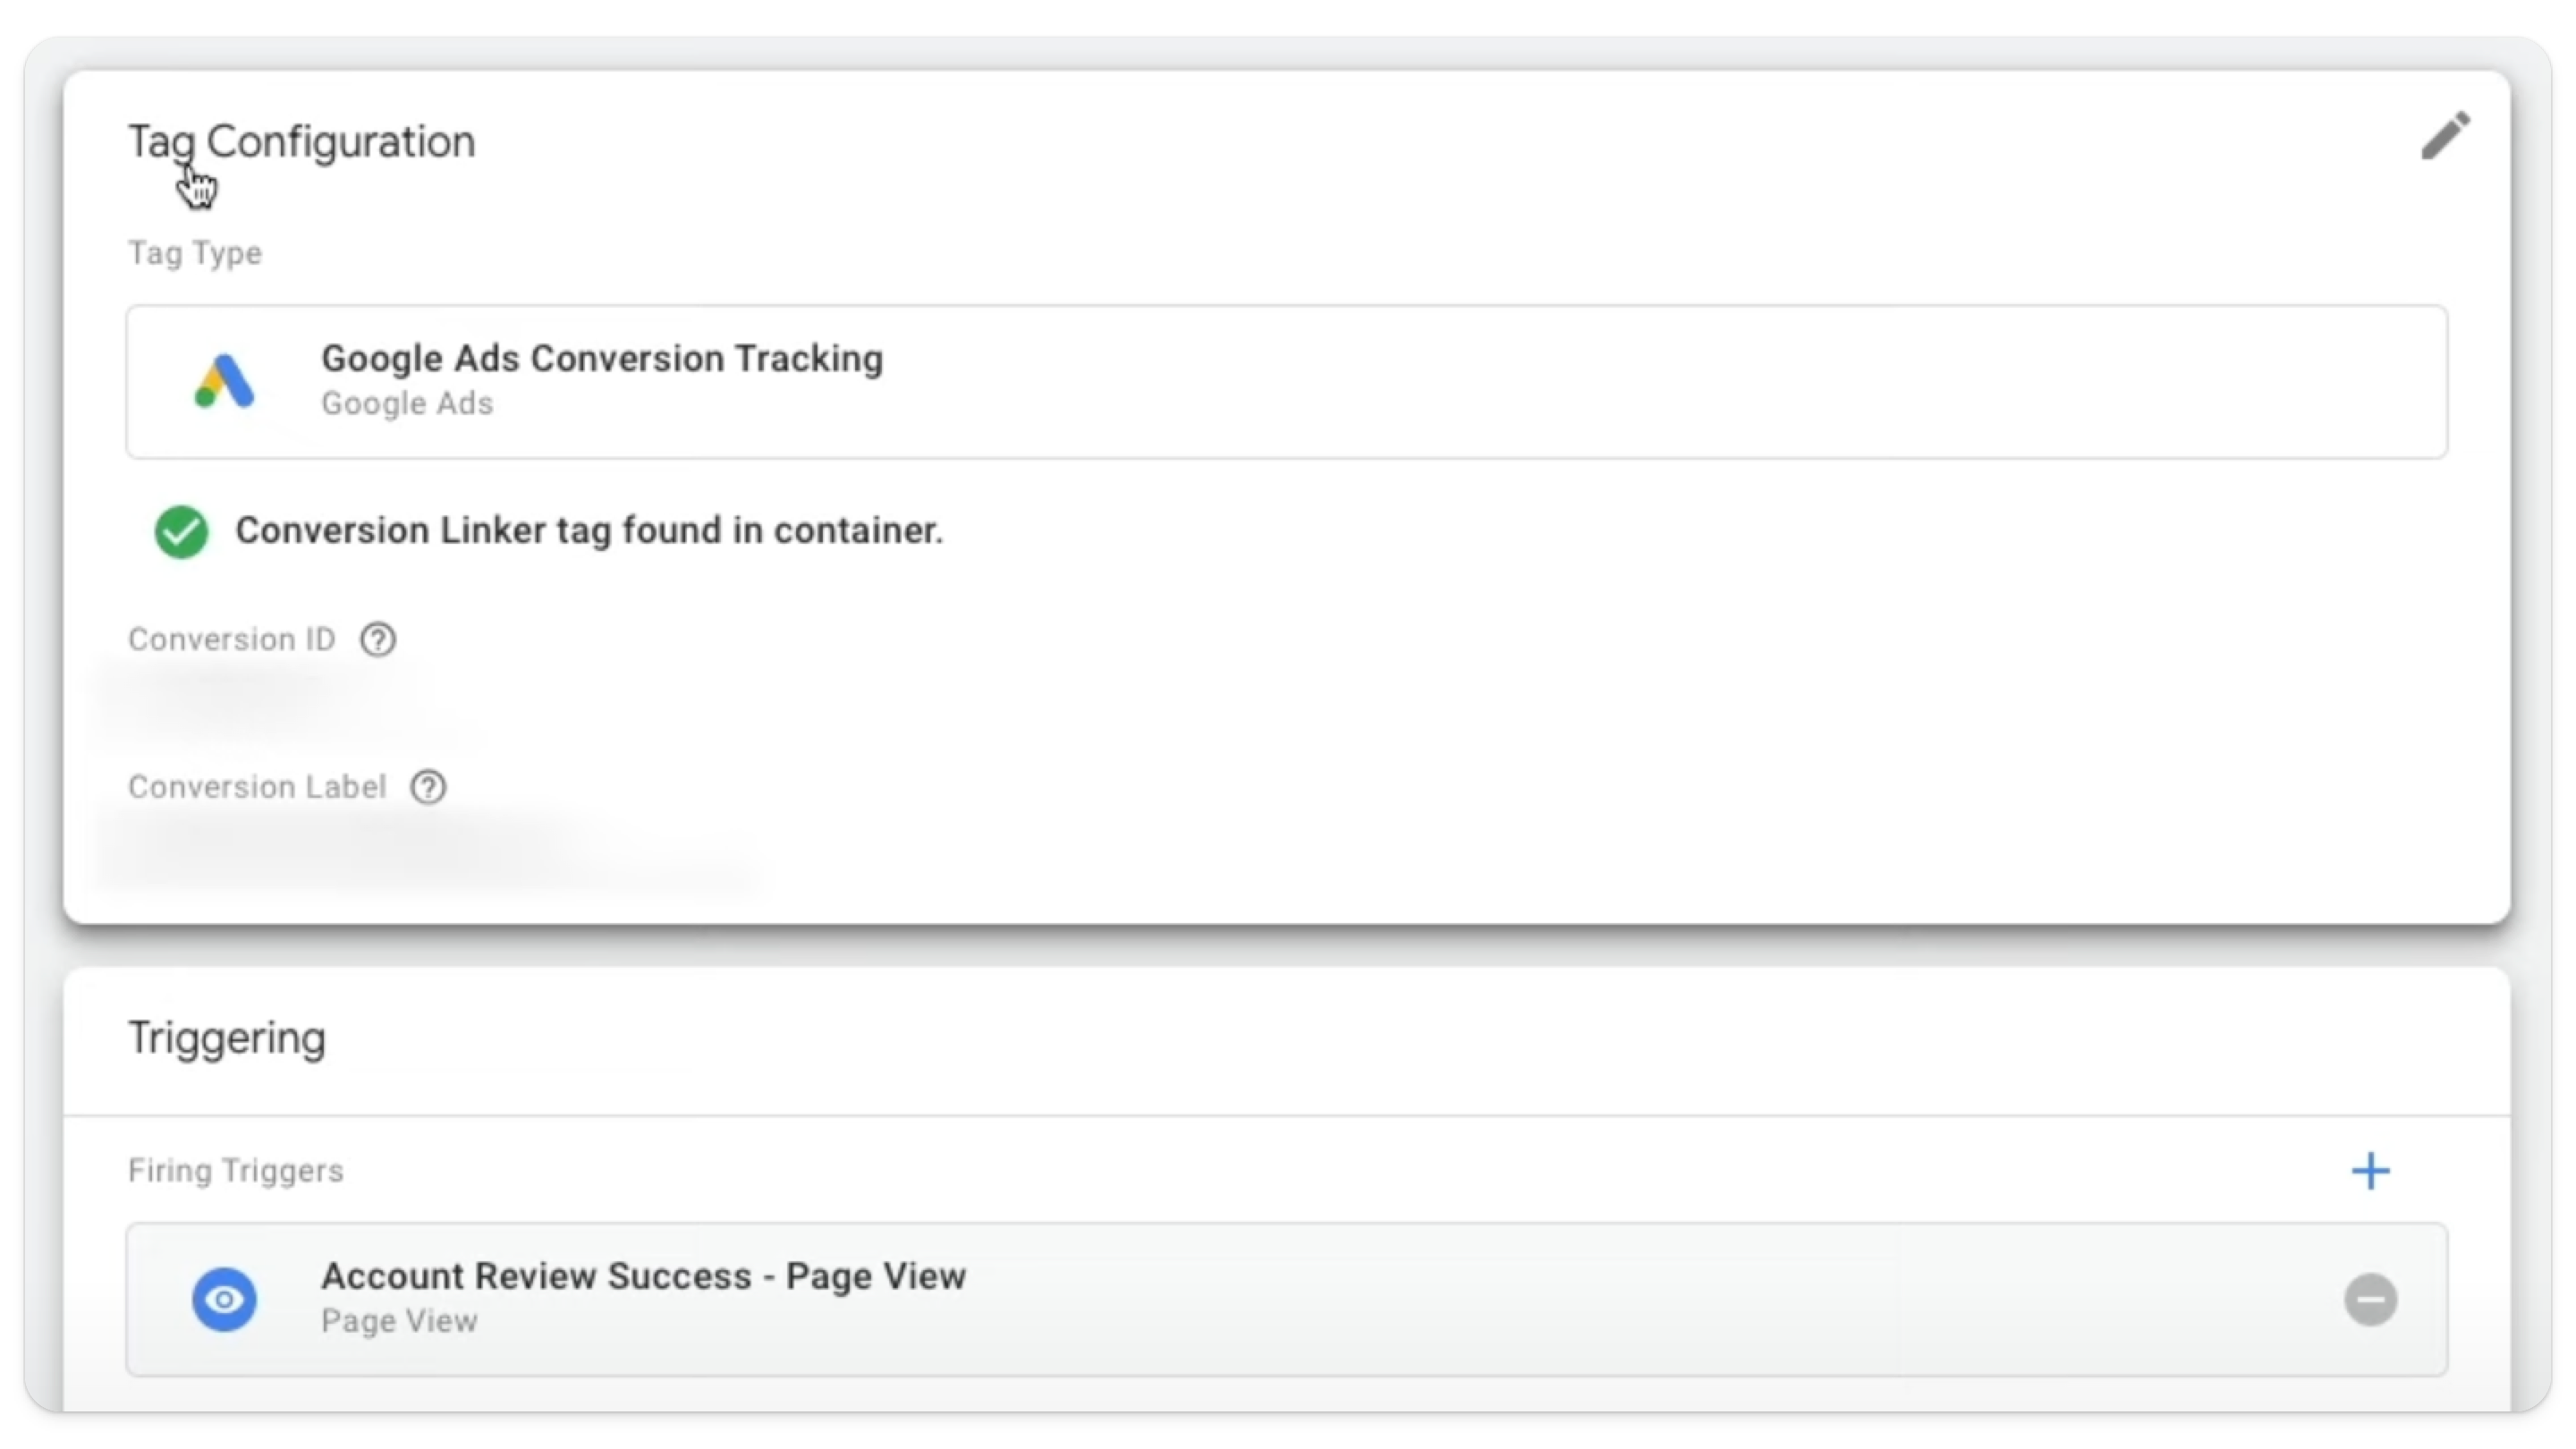
Add the Thank You Page Conversion Tag
This tag only fires when users land on the thank you page, triggering the form submit event.
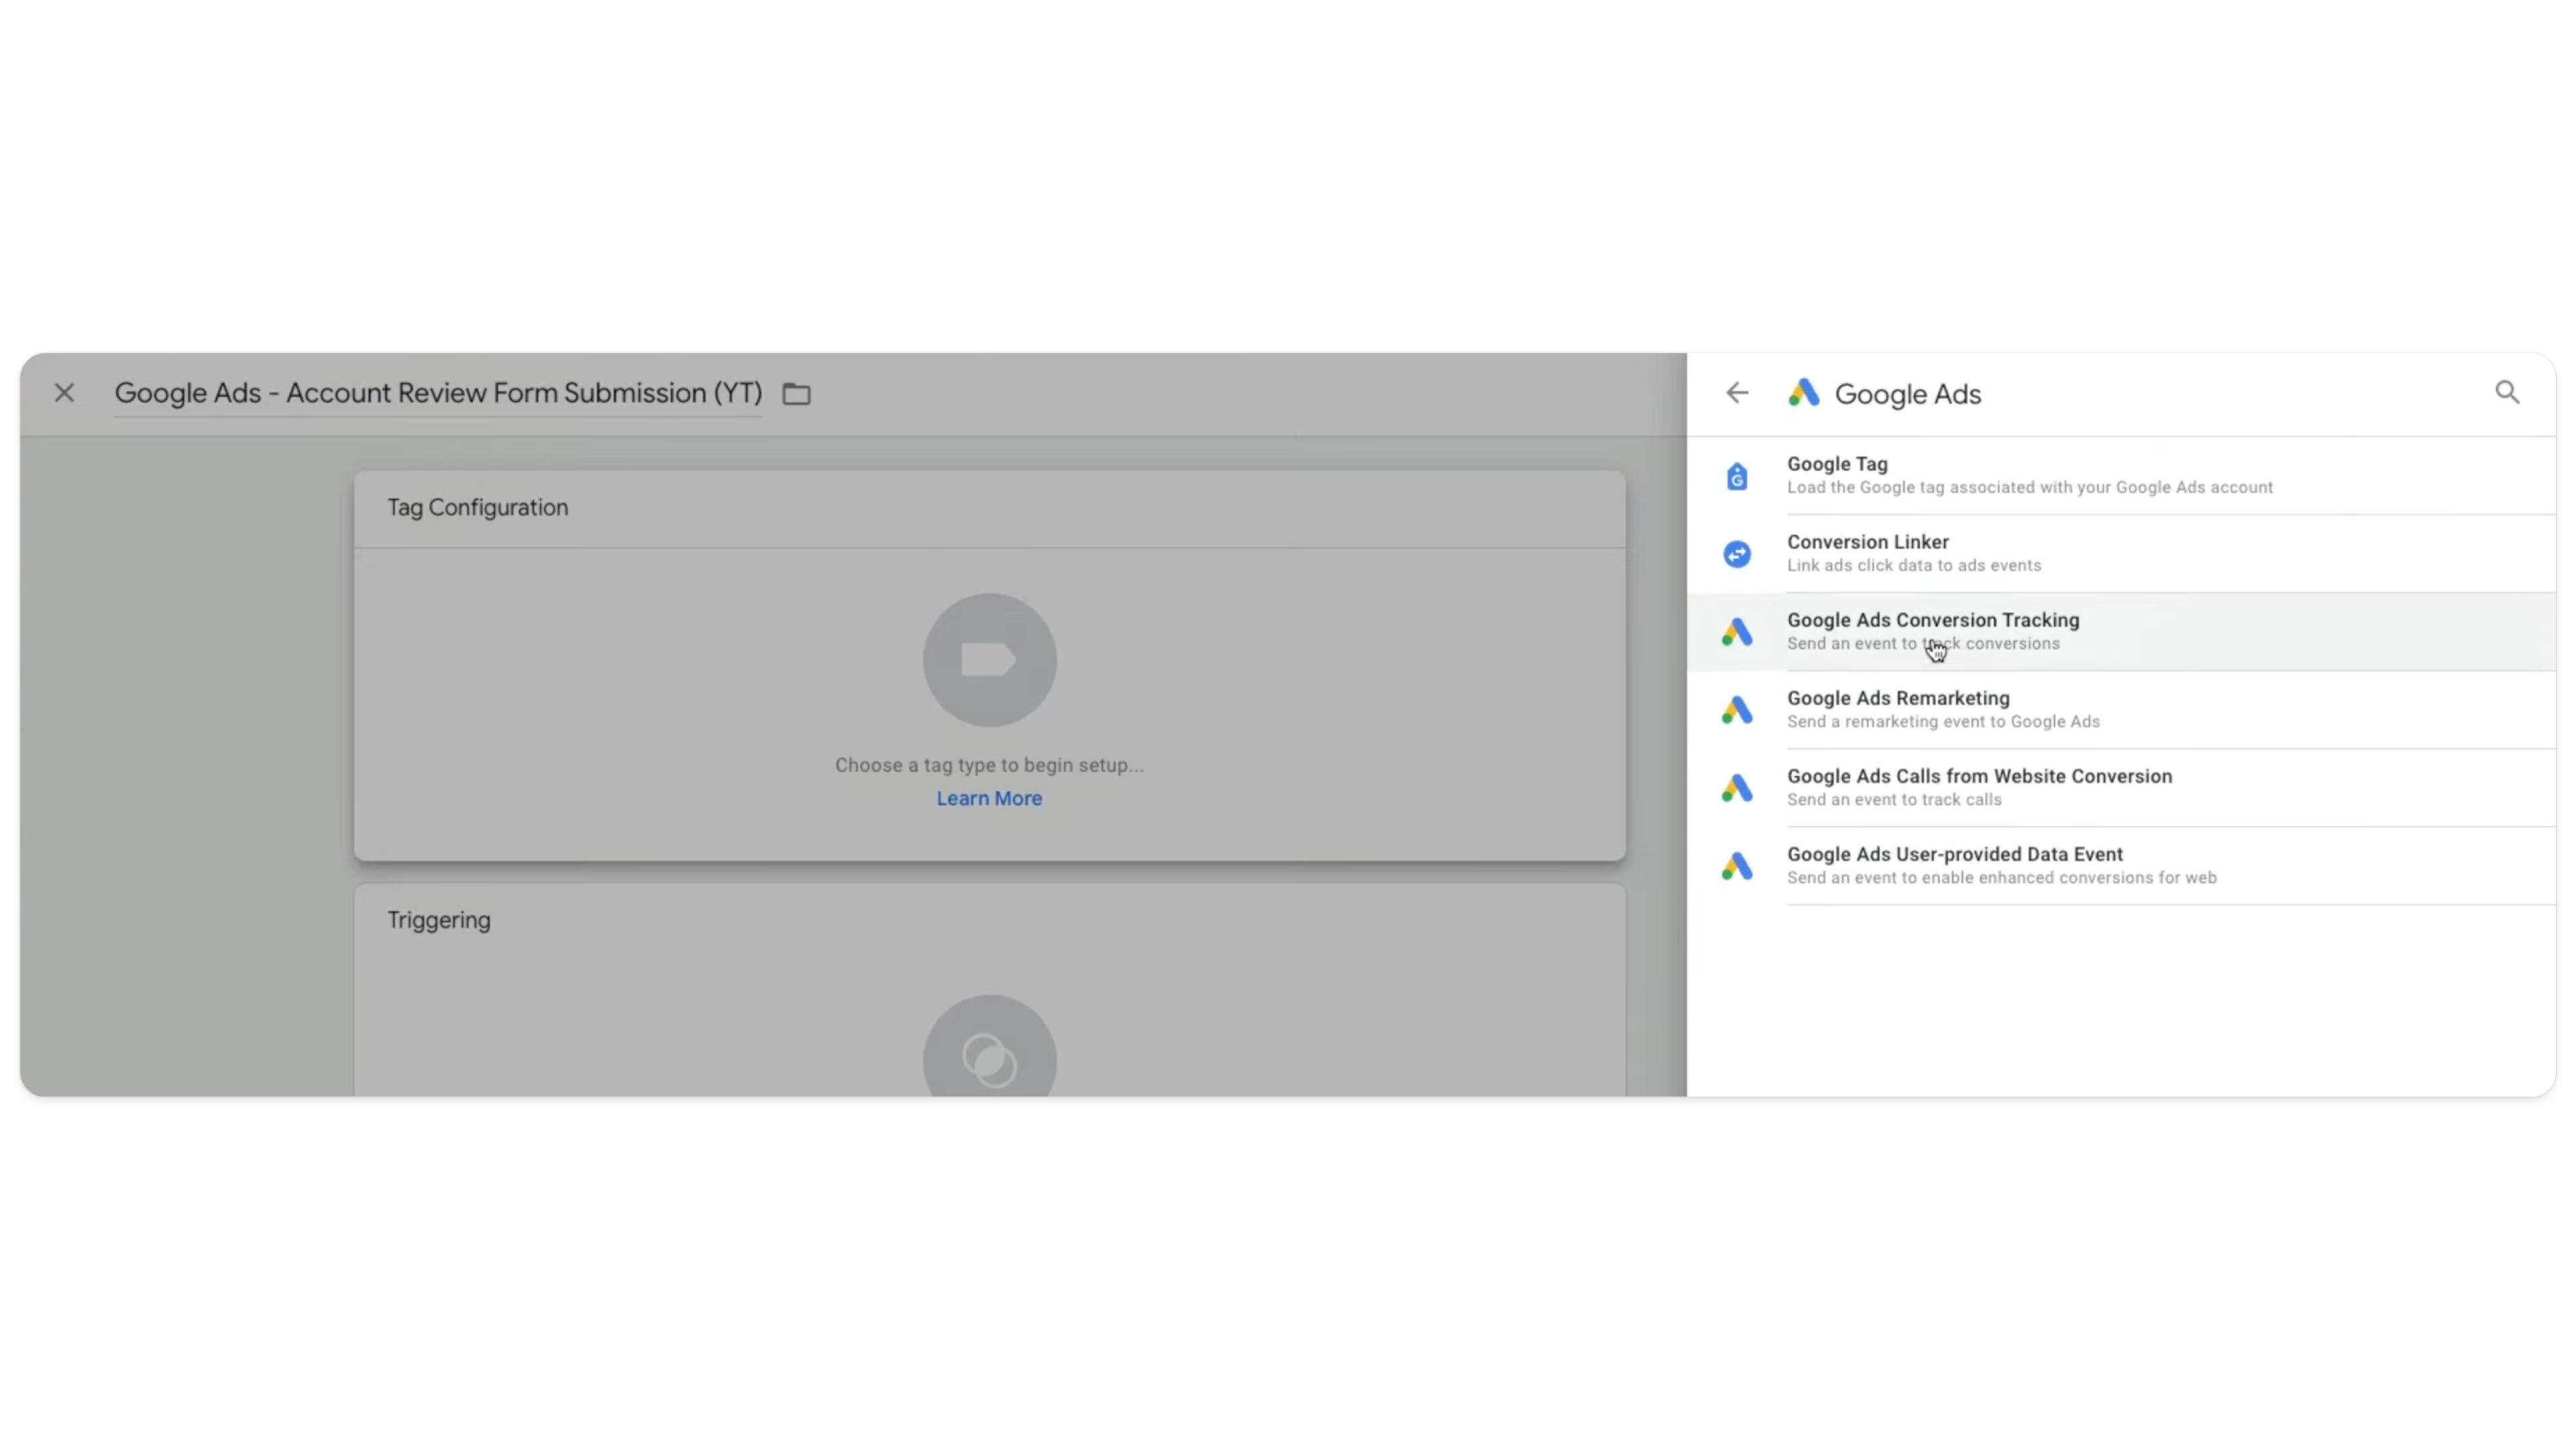
Create a New Tag:
In Google Tag Manager, go to Tags > New > Tag Configuration > Google Ads > Google Ads Conversion Tracking.
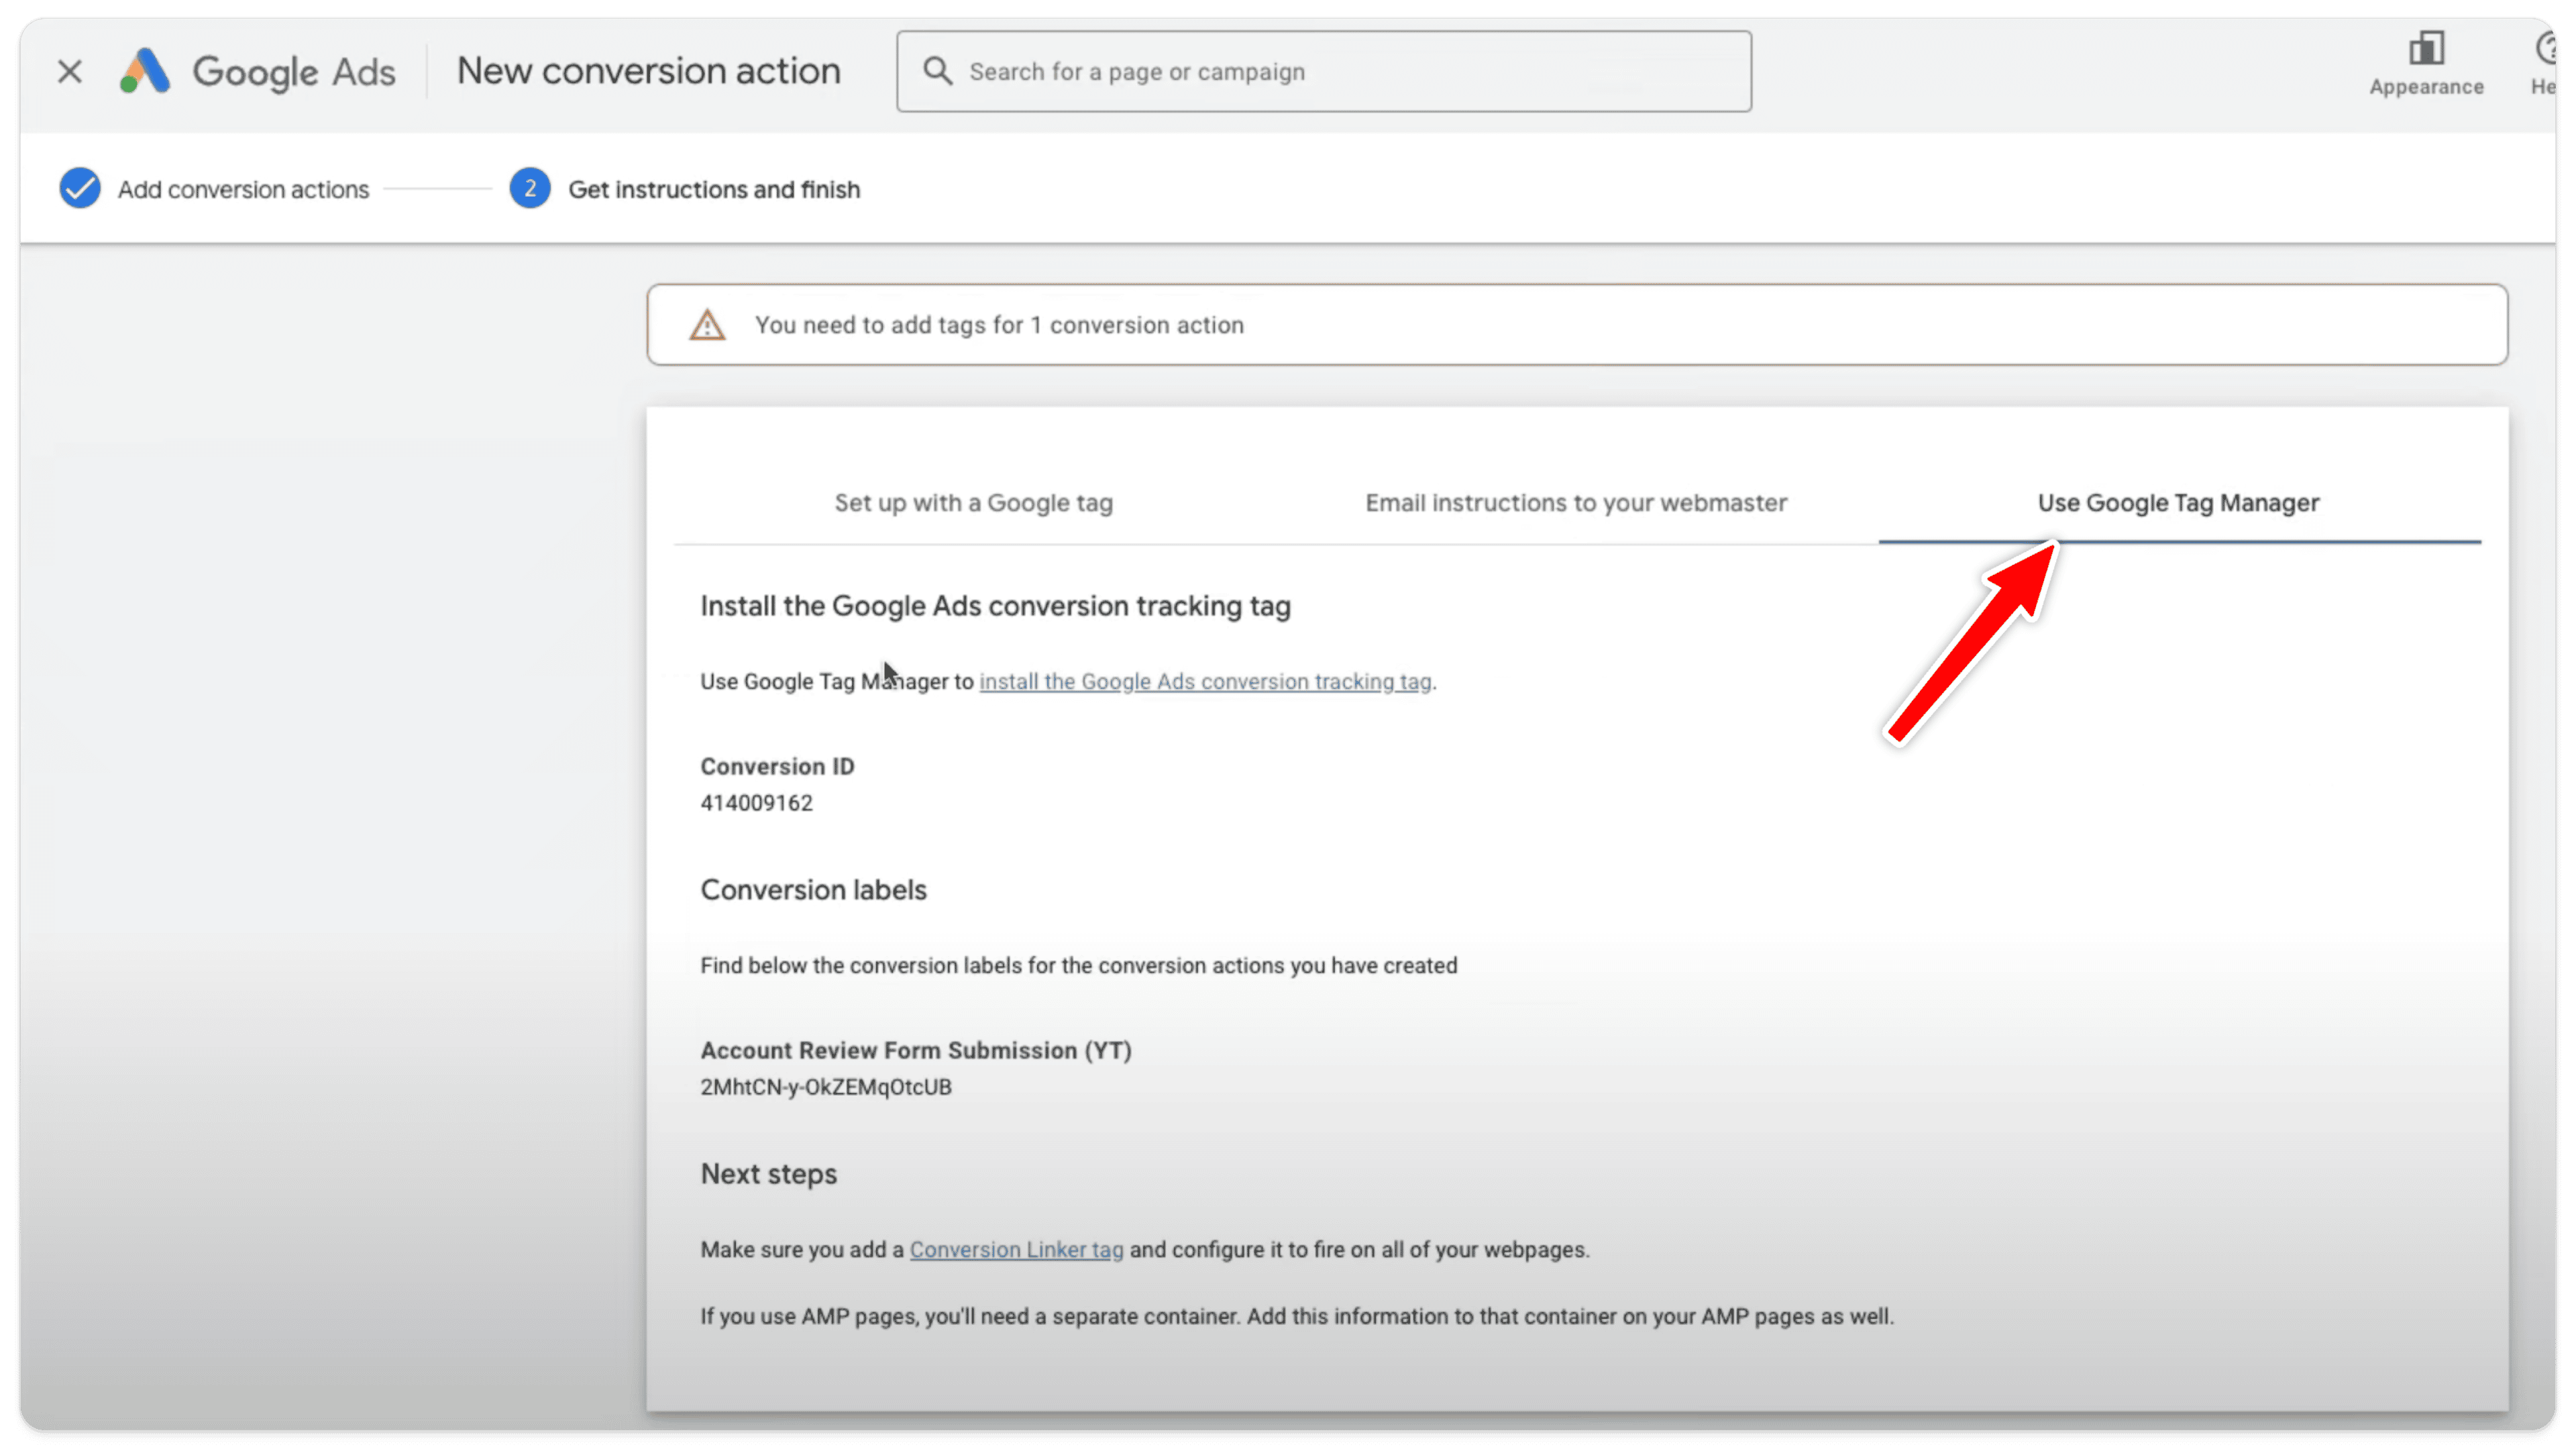
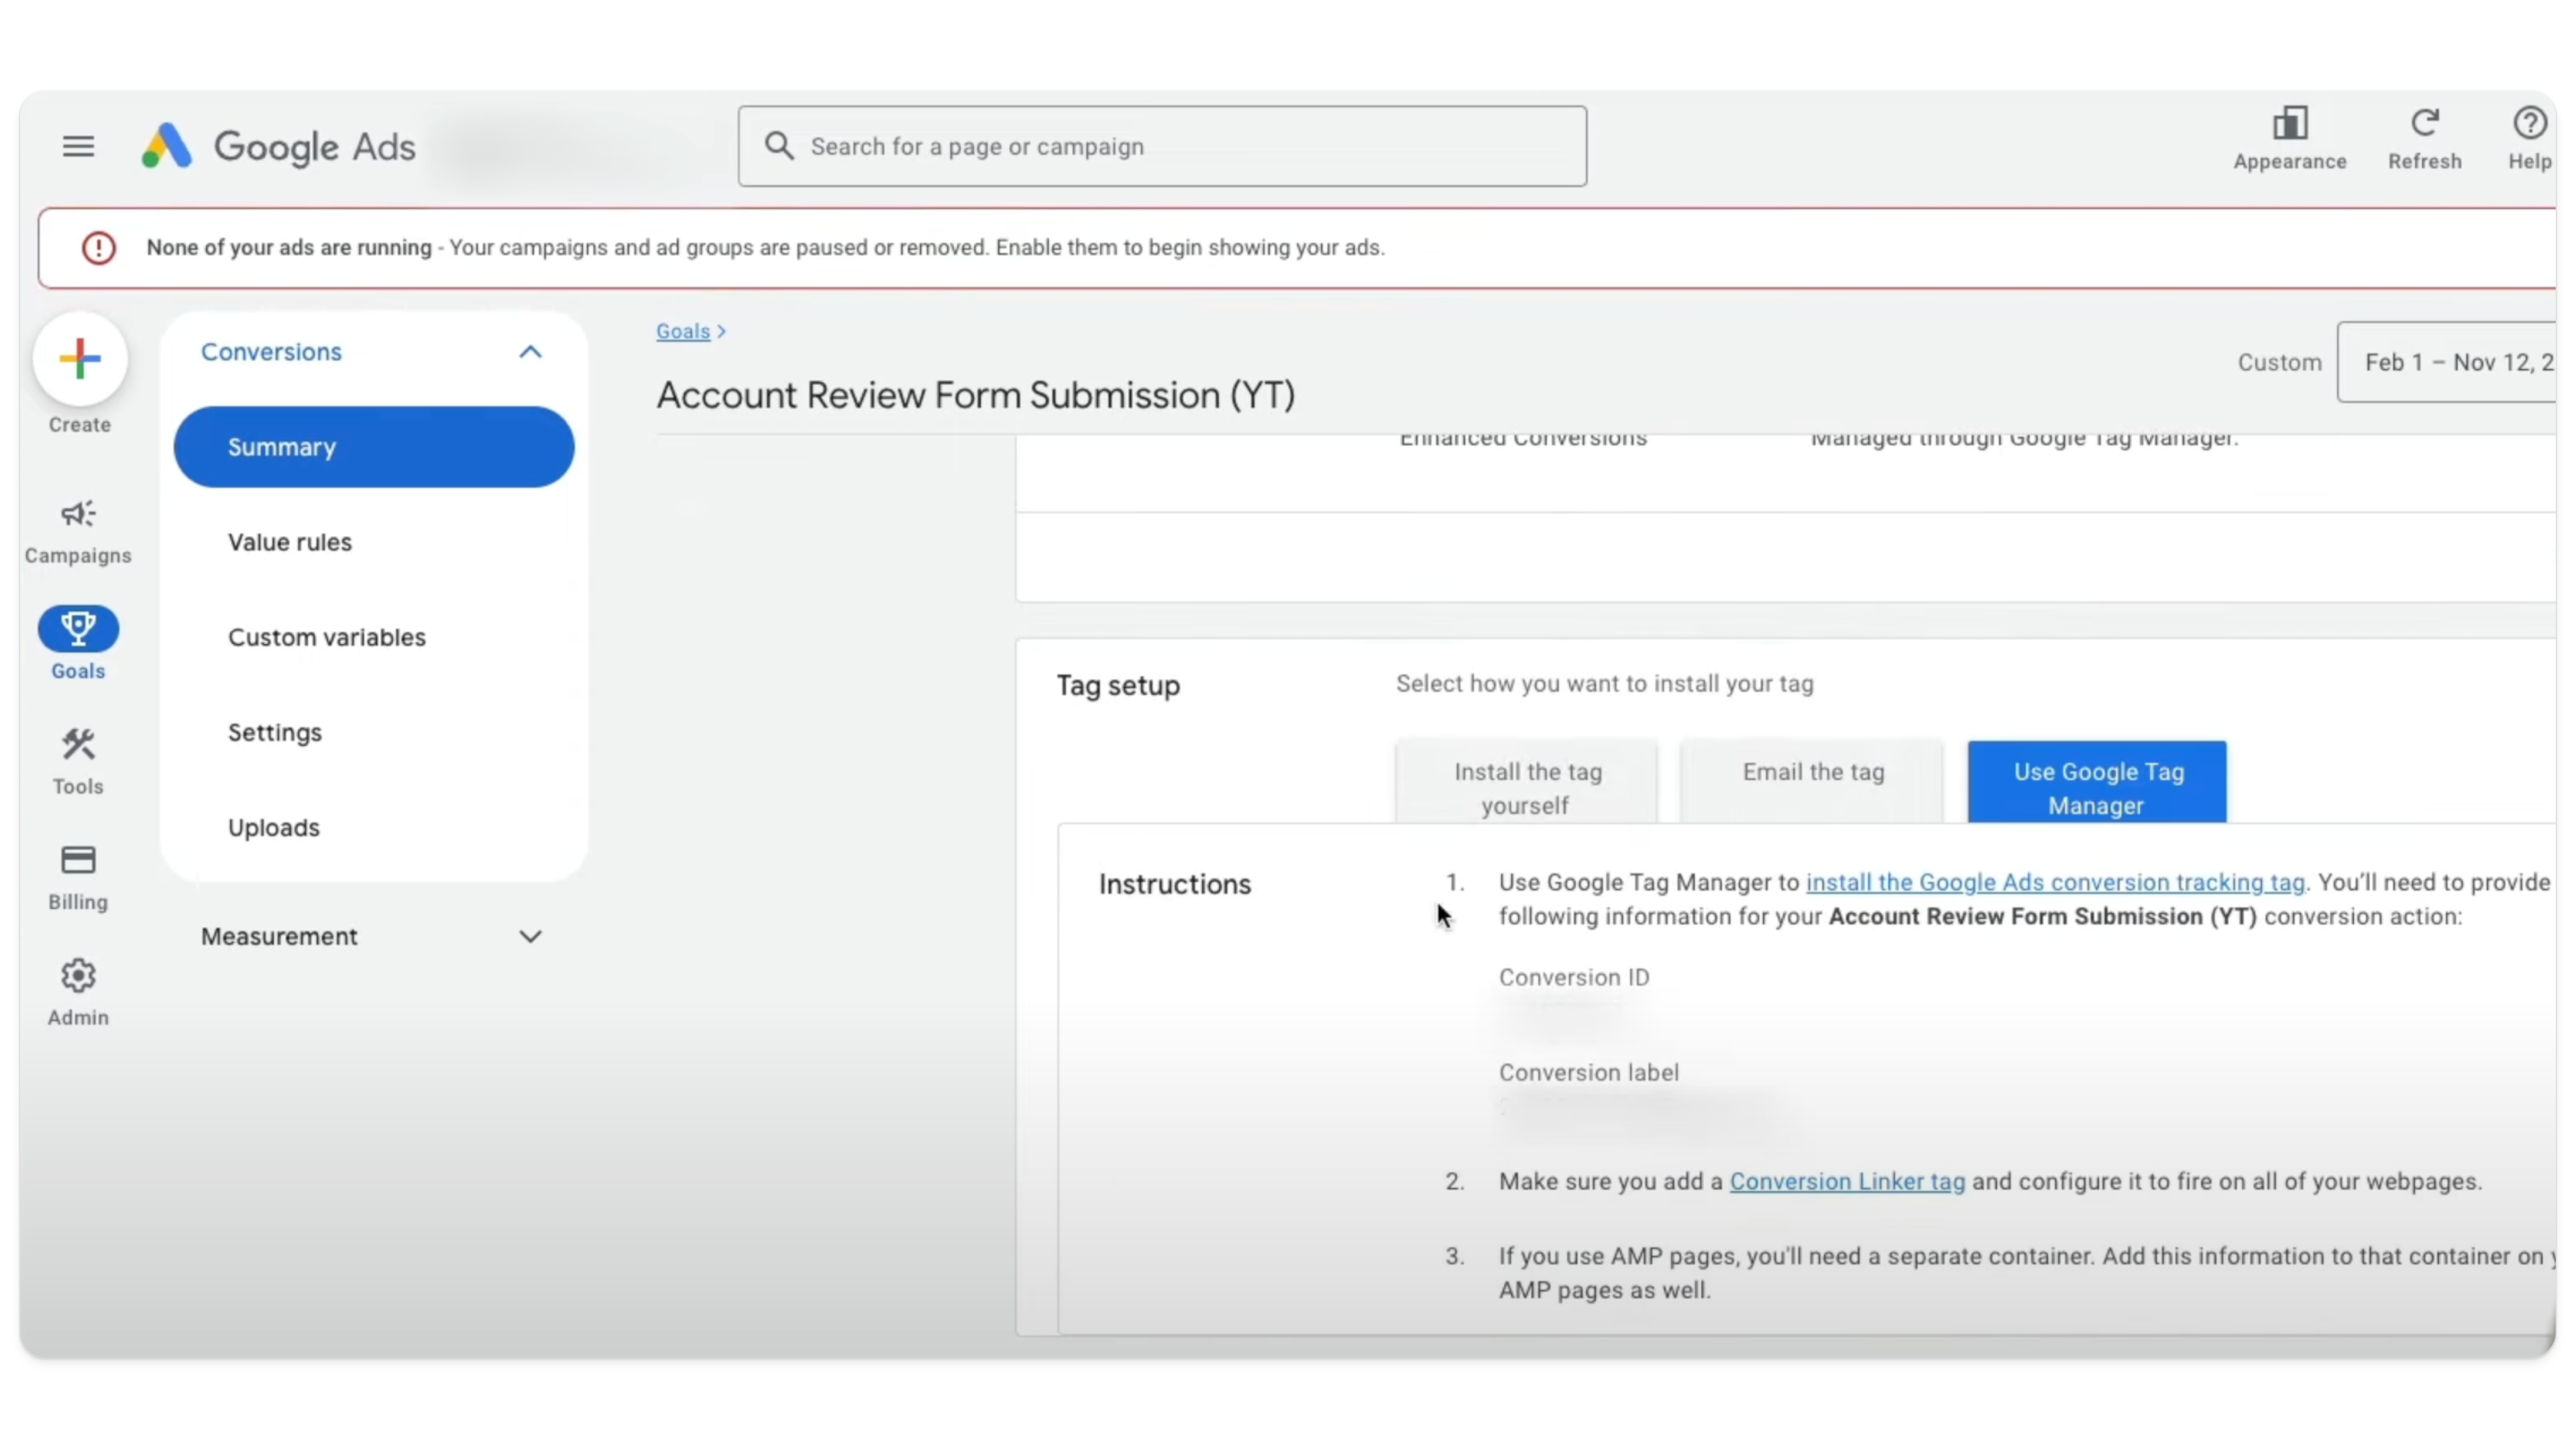
Enter Conversion ID and Label:
Copy the Conversion ID and Conversion Label from your Google Ads conversion action setup and paste them into their respective fields.
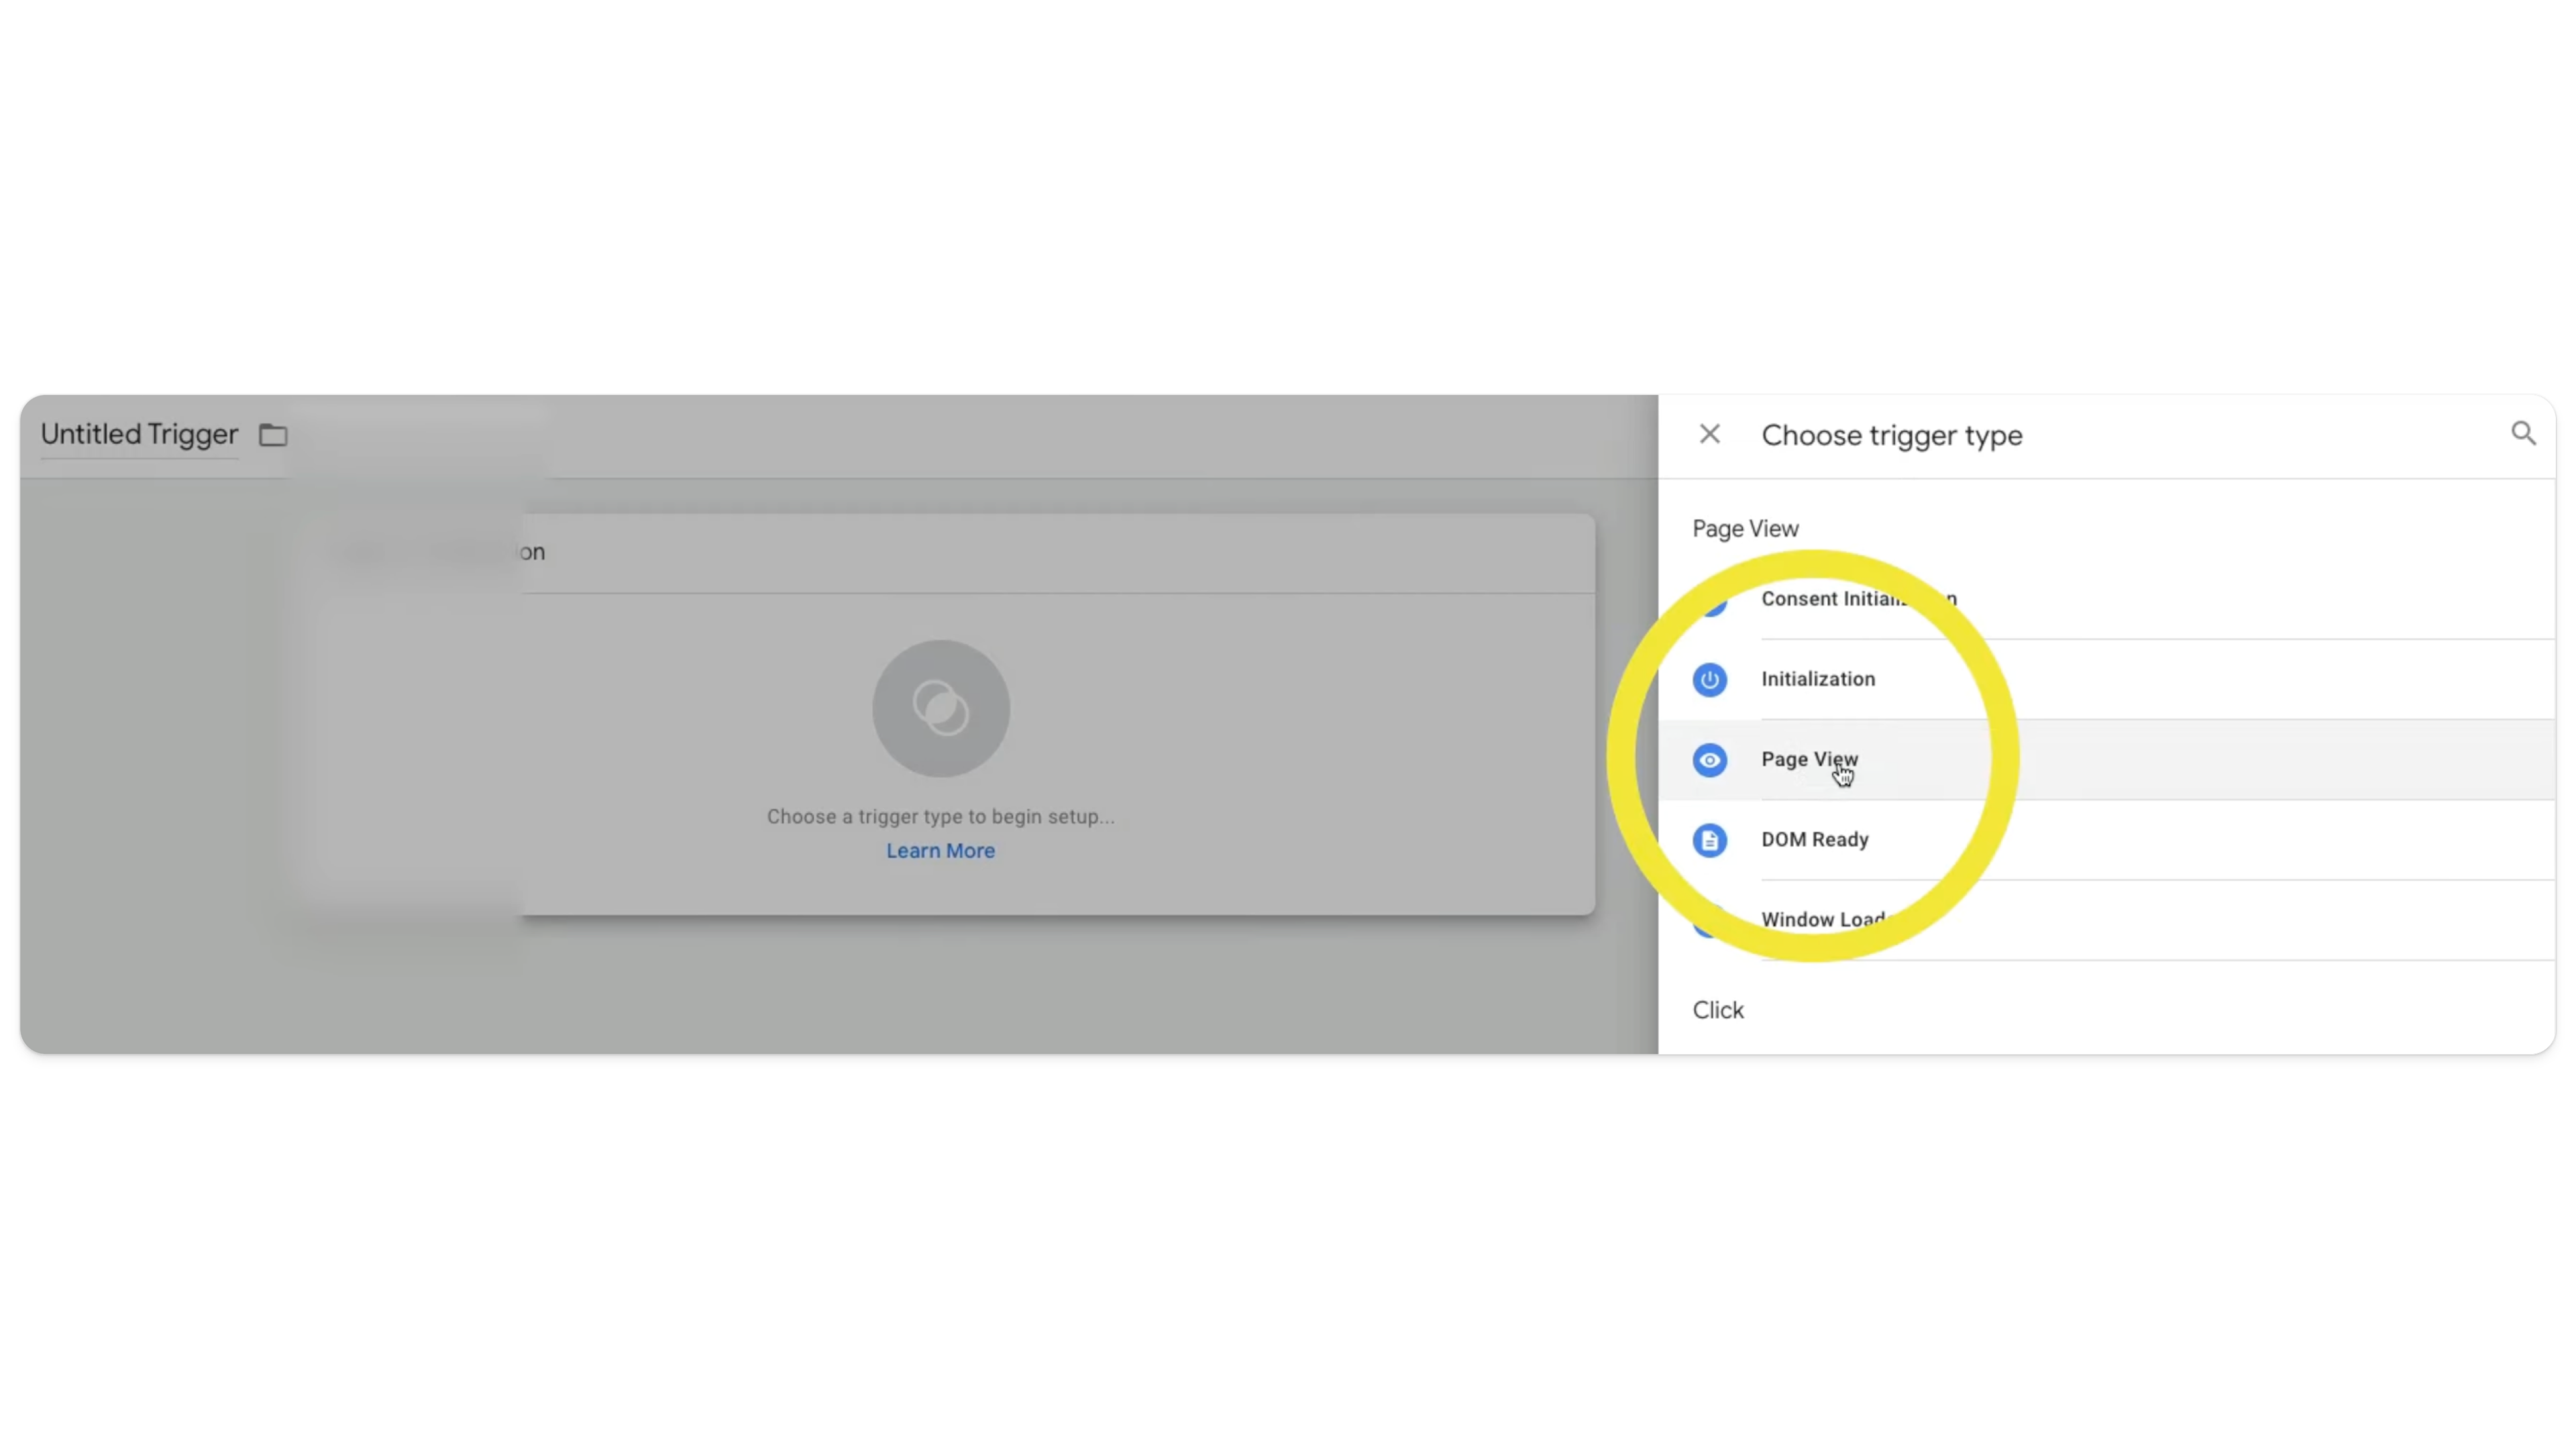
Set the Trigger:
Select + > Trigger Configuration > Page View
Configure the trigger to fire only on pages where the URL contains your thank you page identifier (e.g., /thank-you or /success — this will be unique to your page).
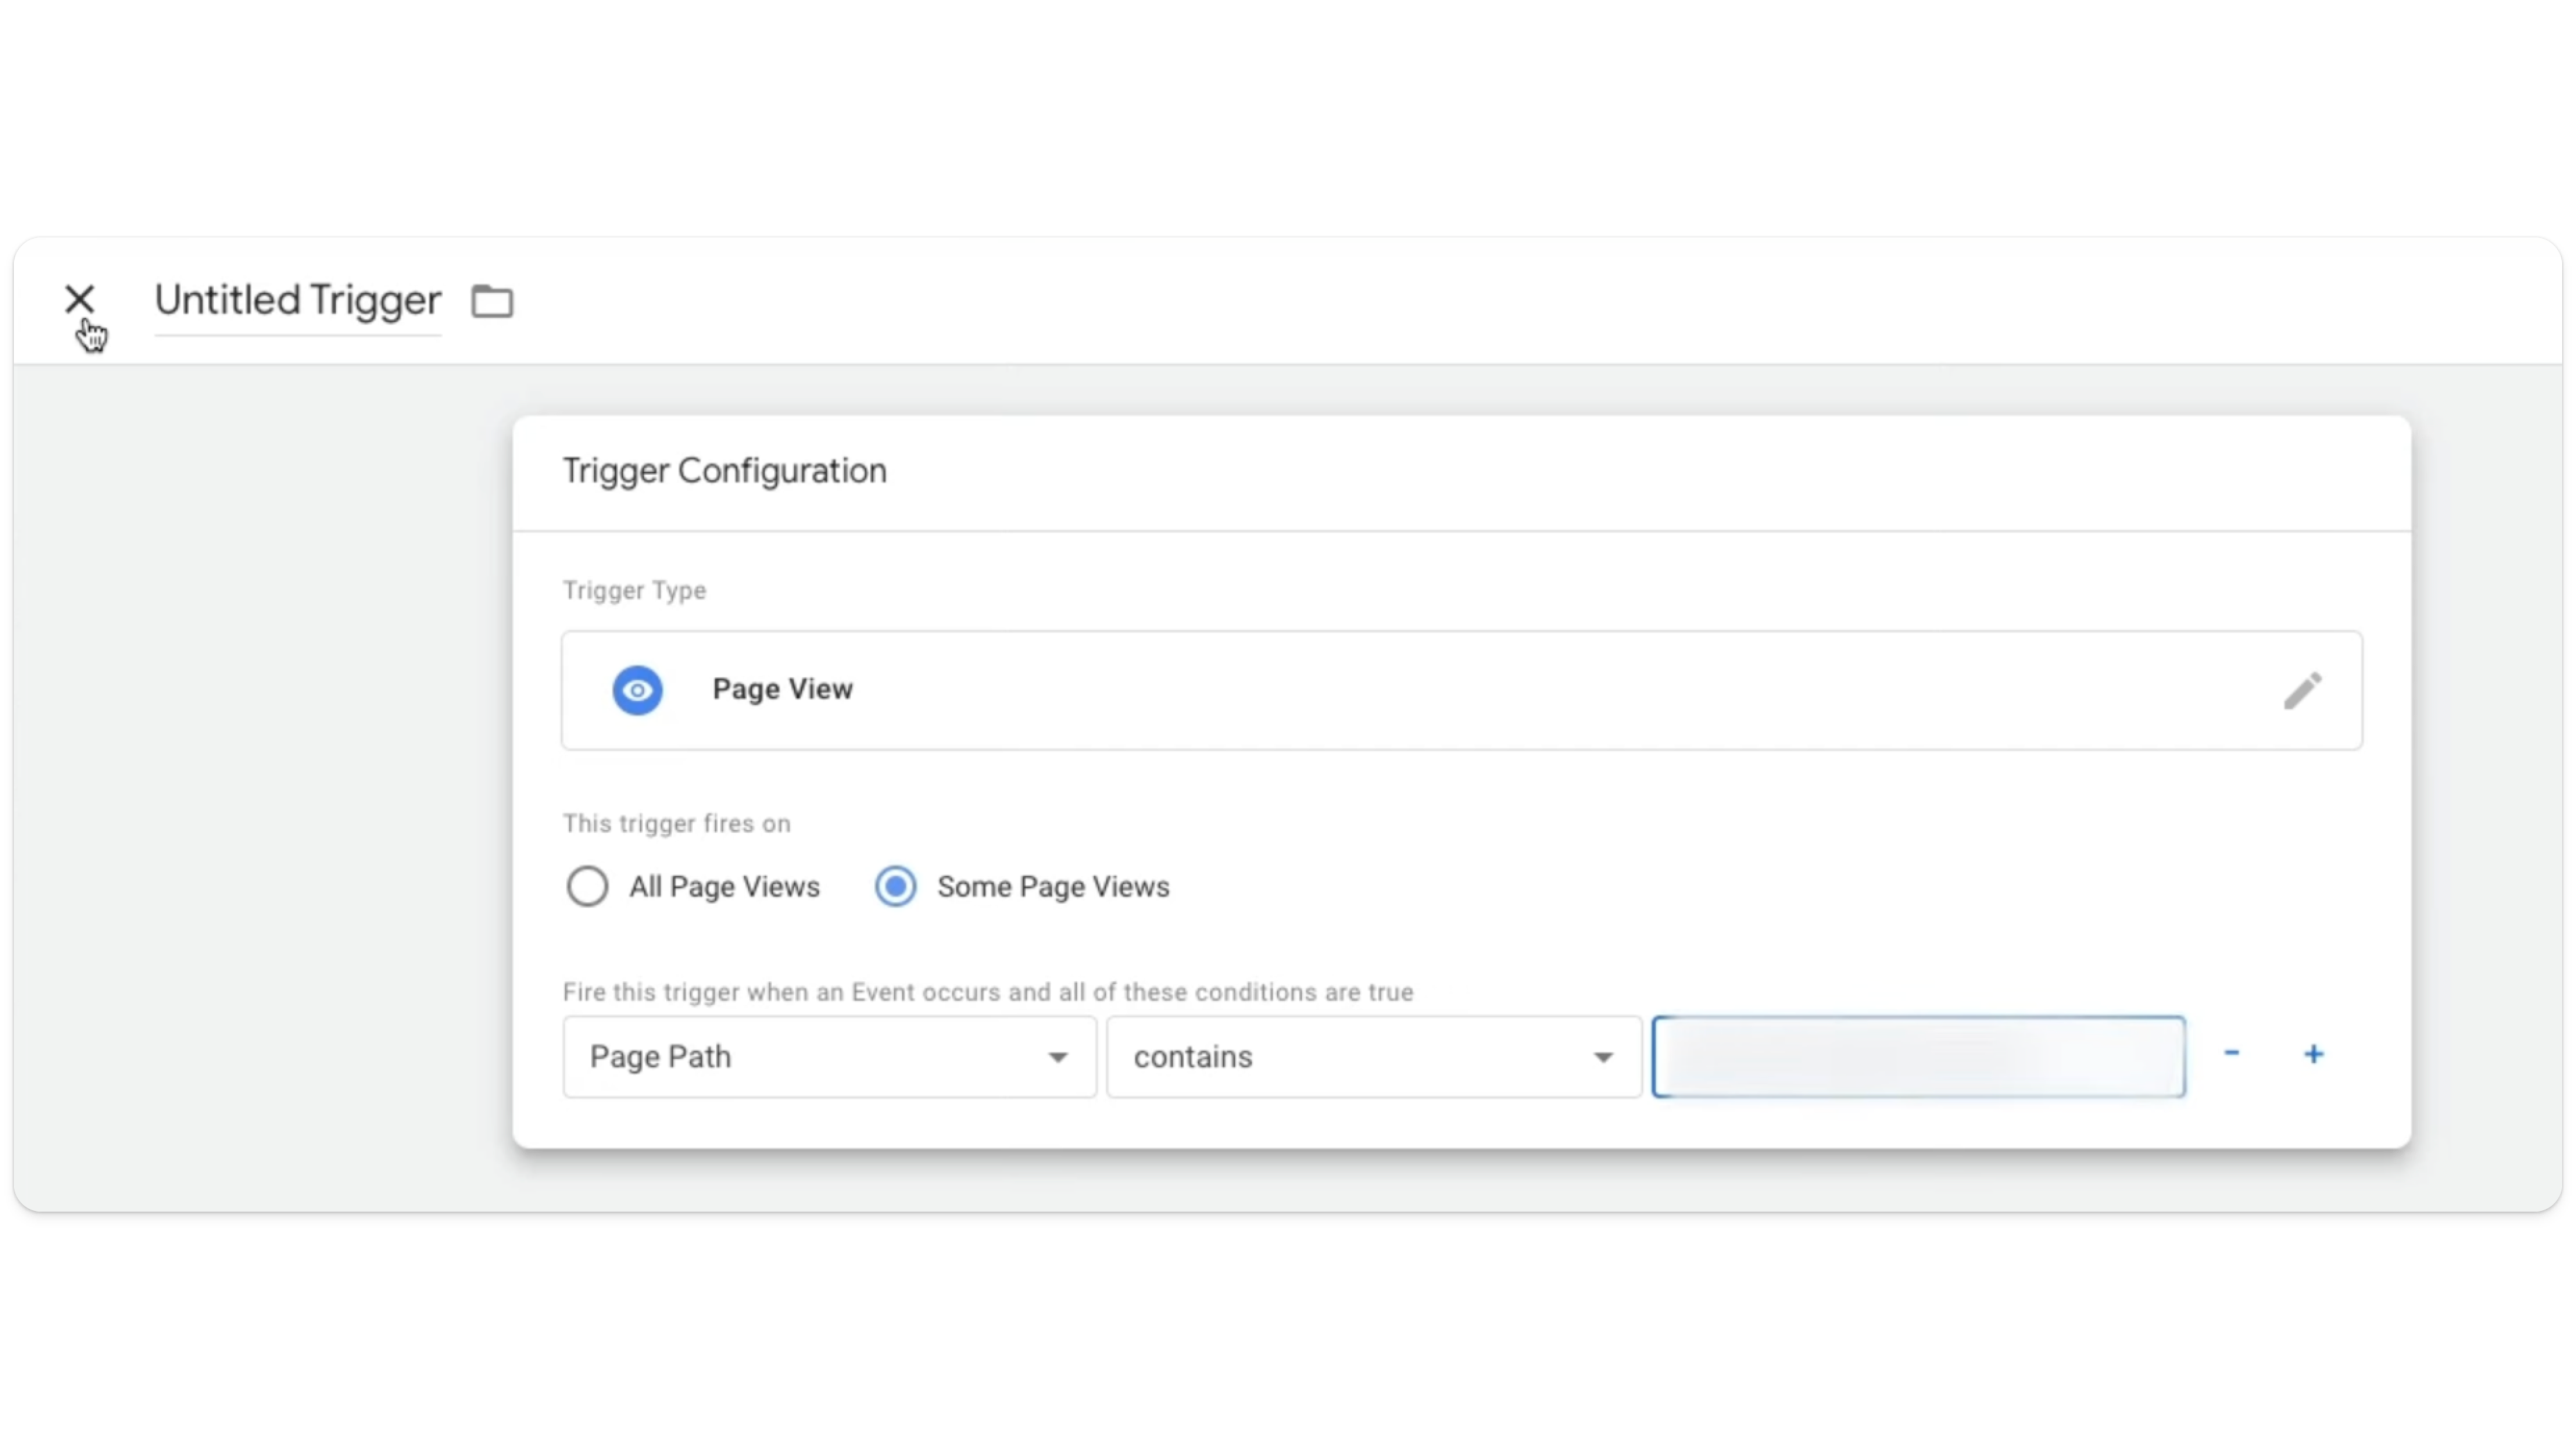
Save.
Taken together, you should now have something like this:
Step 3: Test Your Setup
Testing is always a good idea, as it ensures your form tracking is set up correctly and prevents data inaccuracies.
Preview Mode in Google Tag Manager:
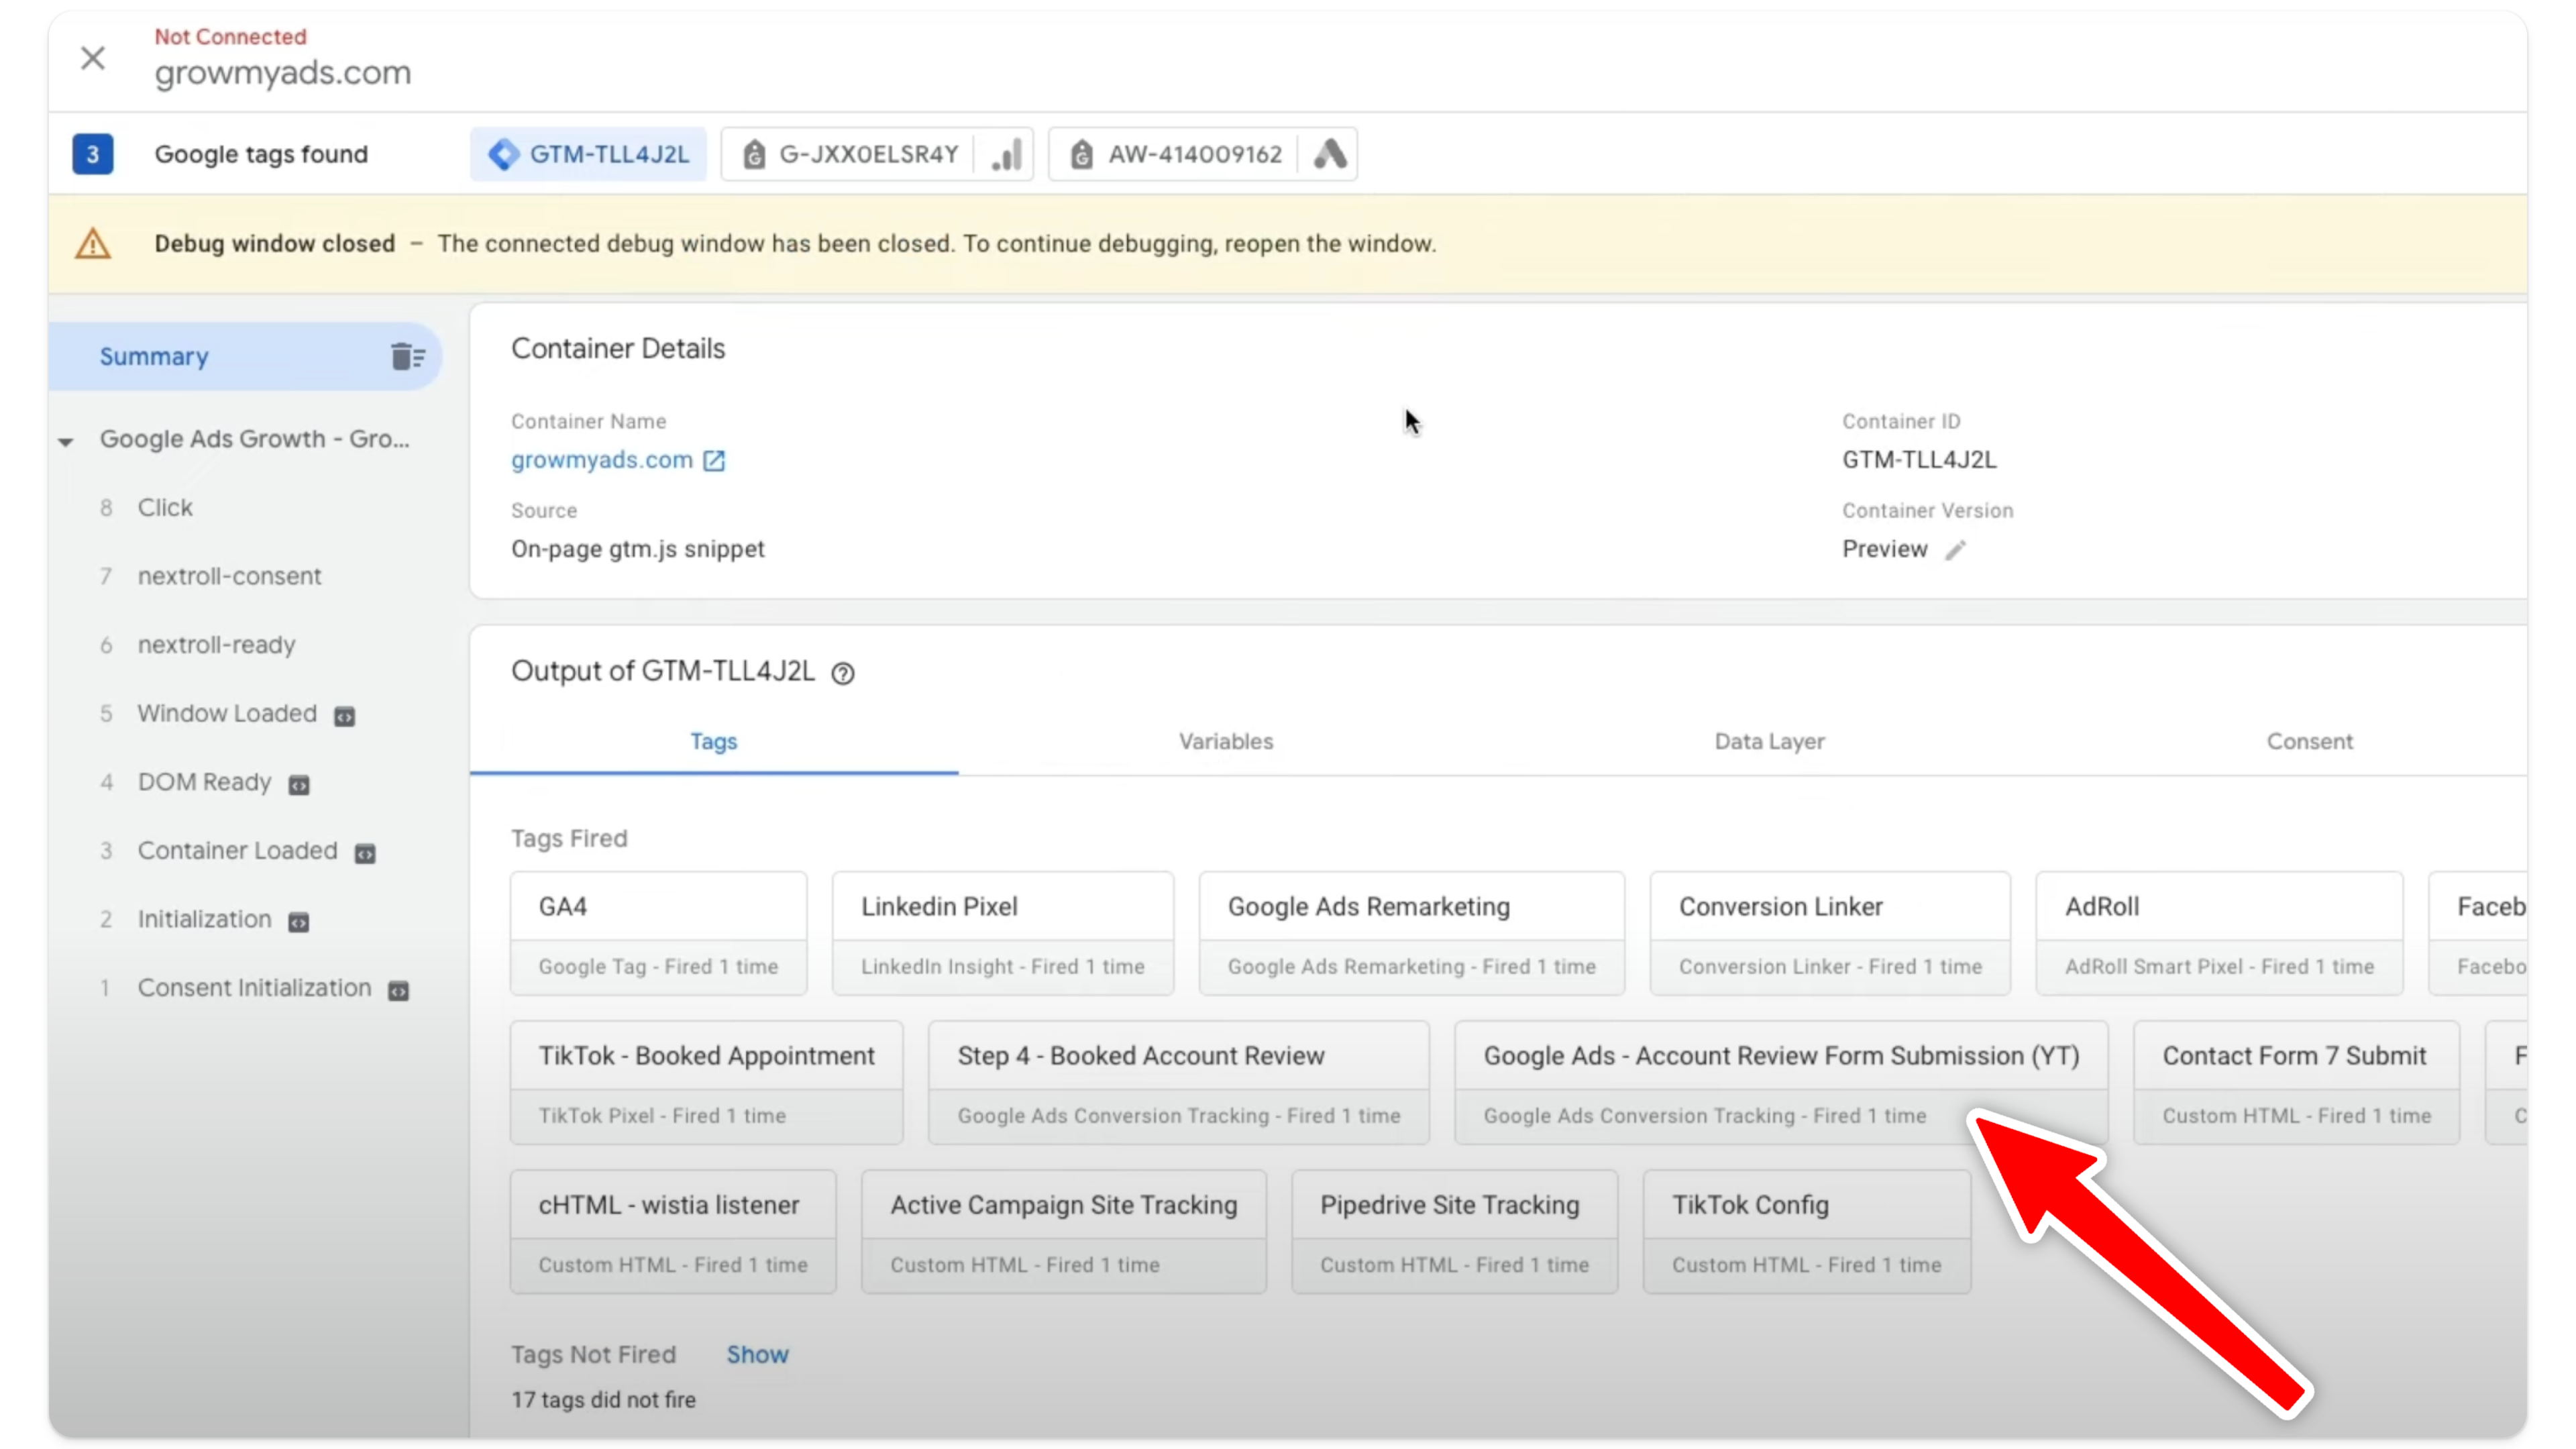
Open GTM (Google Tag Manager), and click Preview
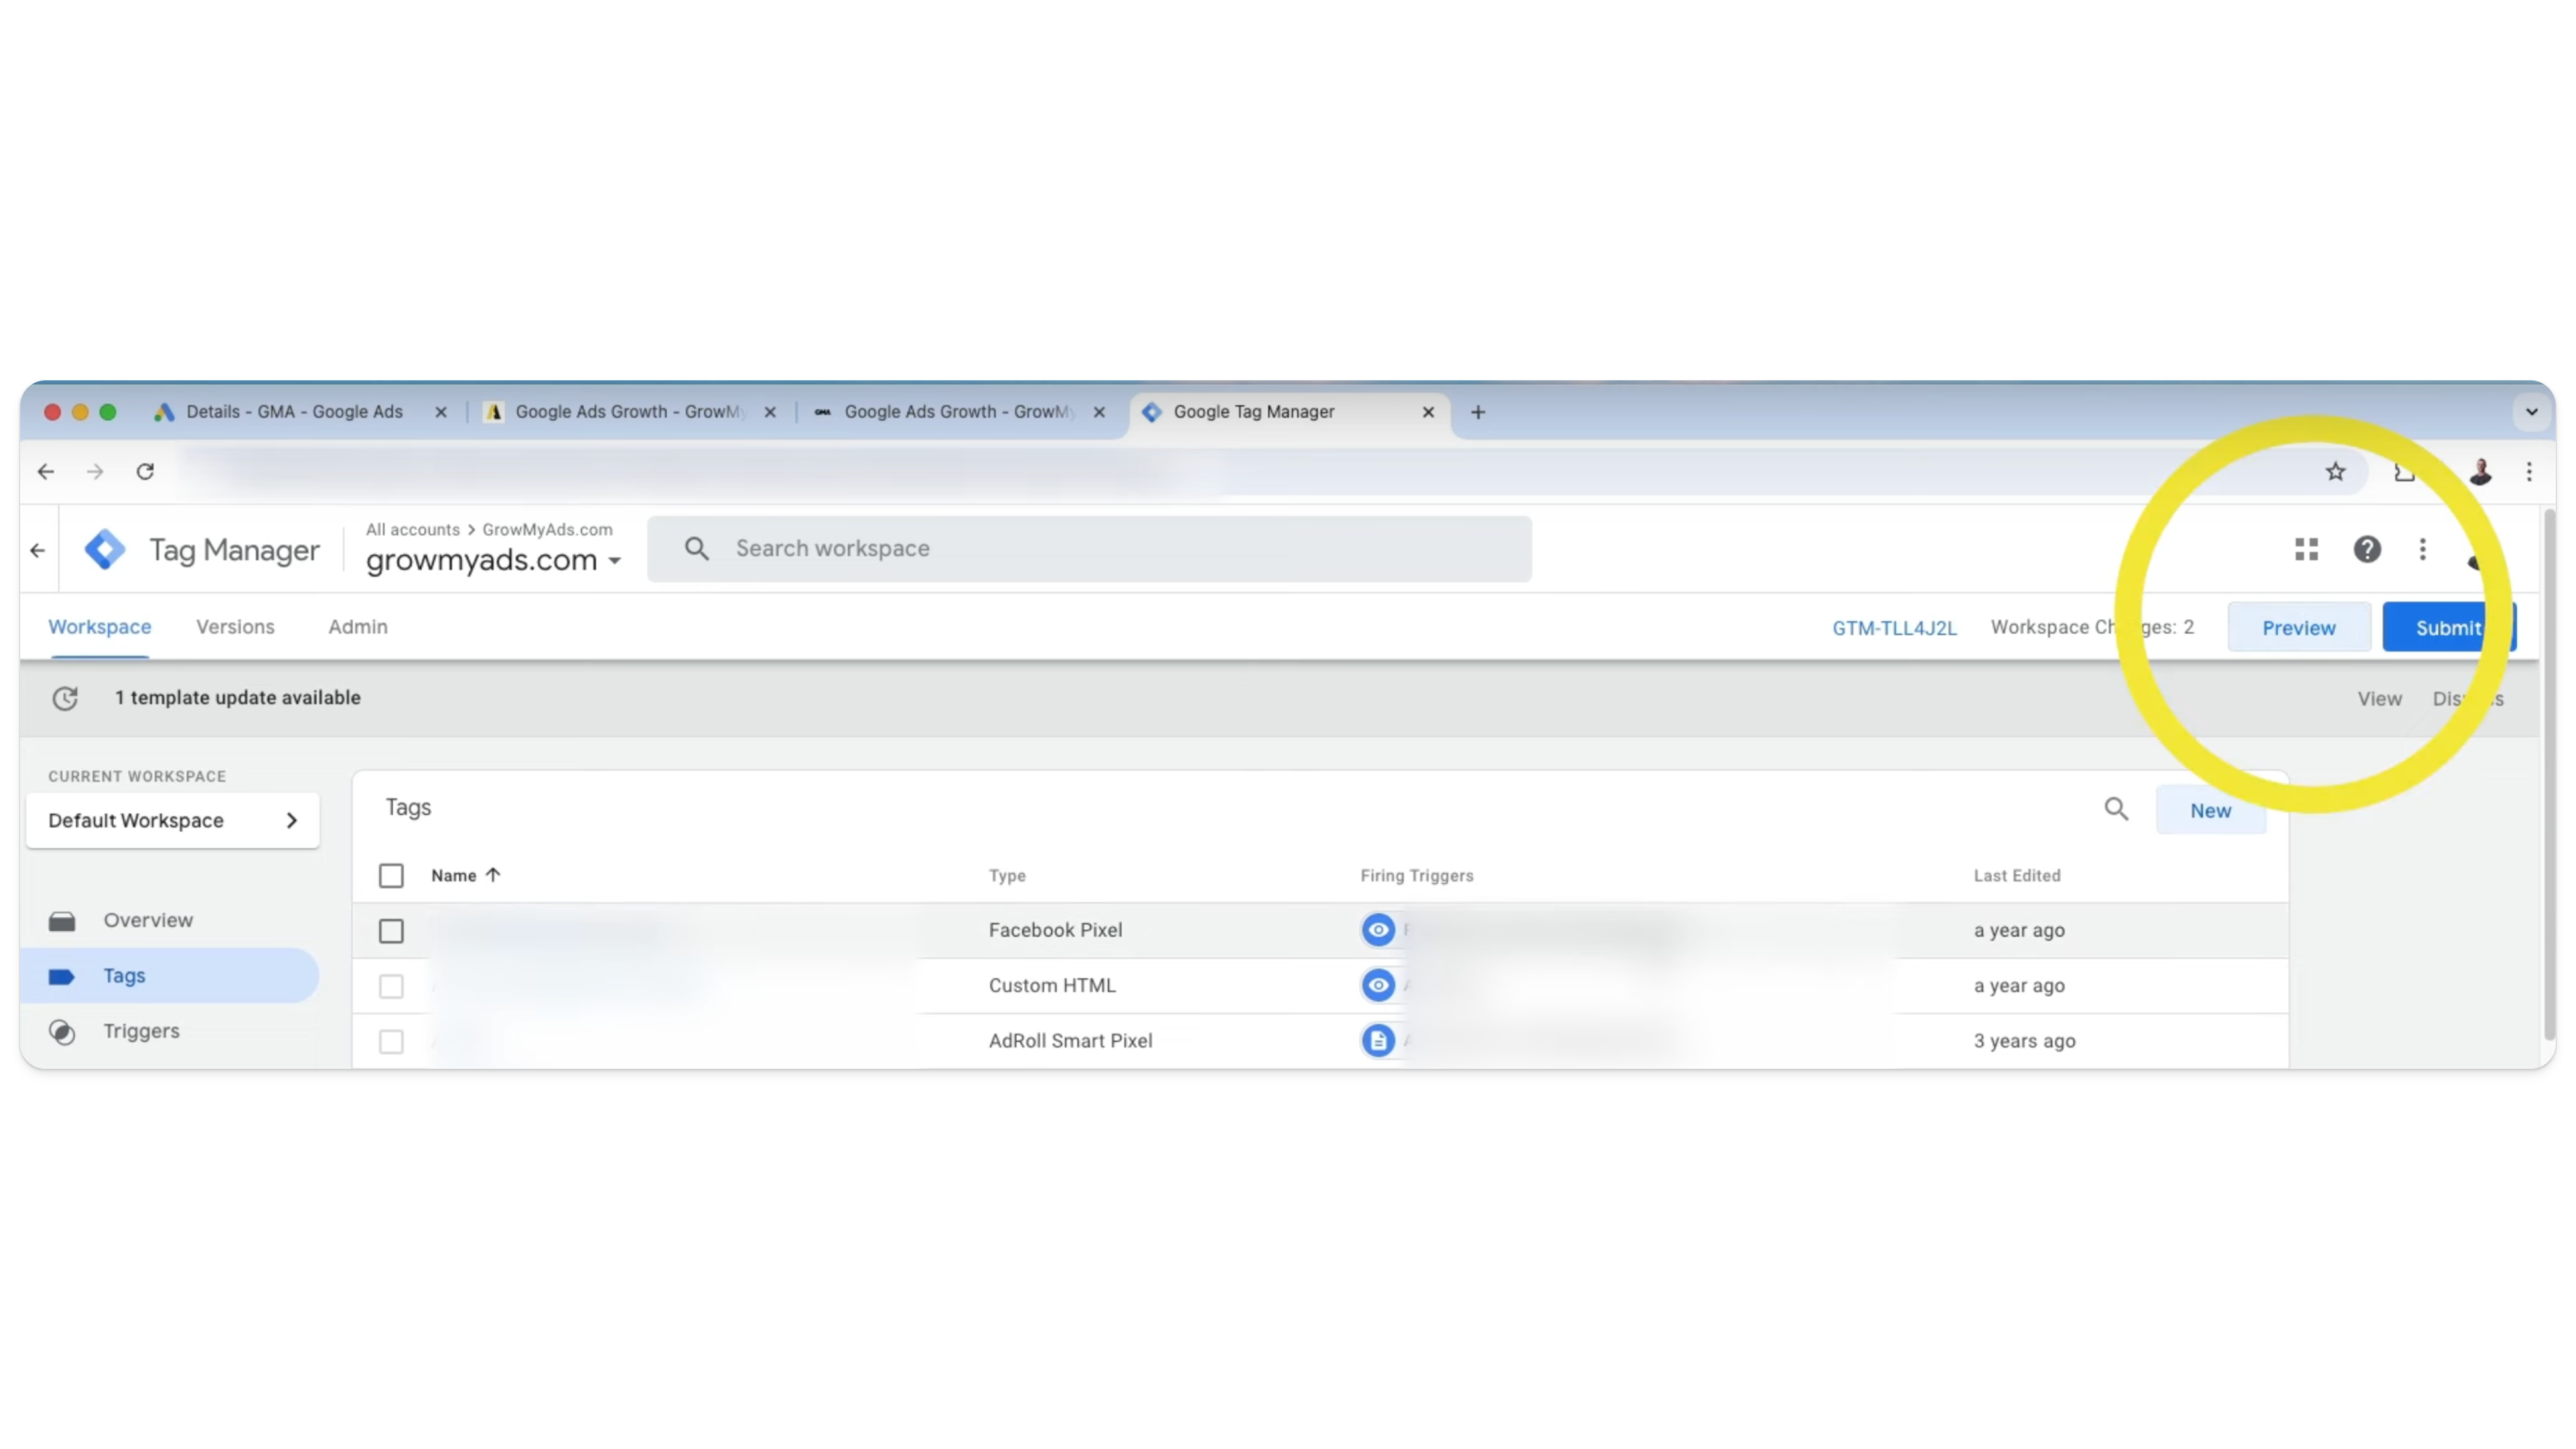
Enter your website’s URL to launch debug mode.
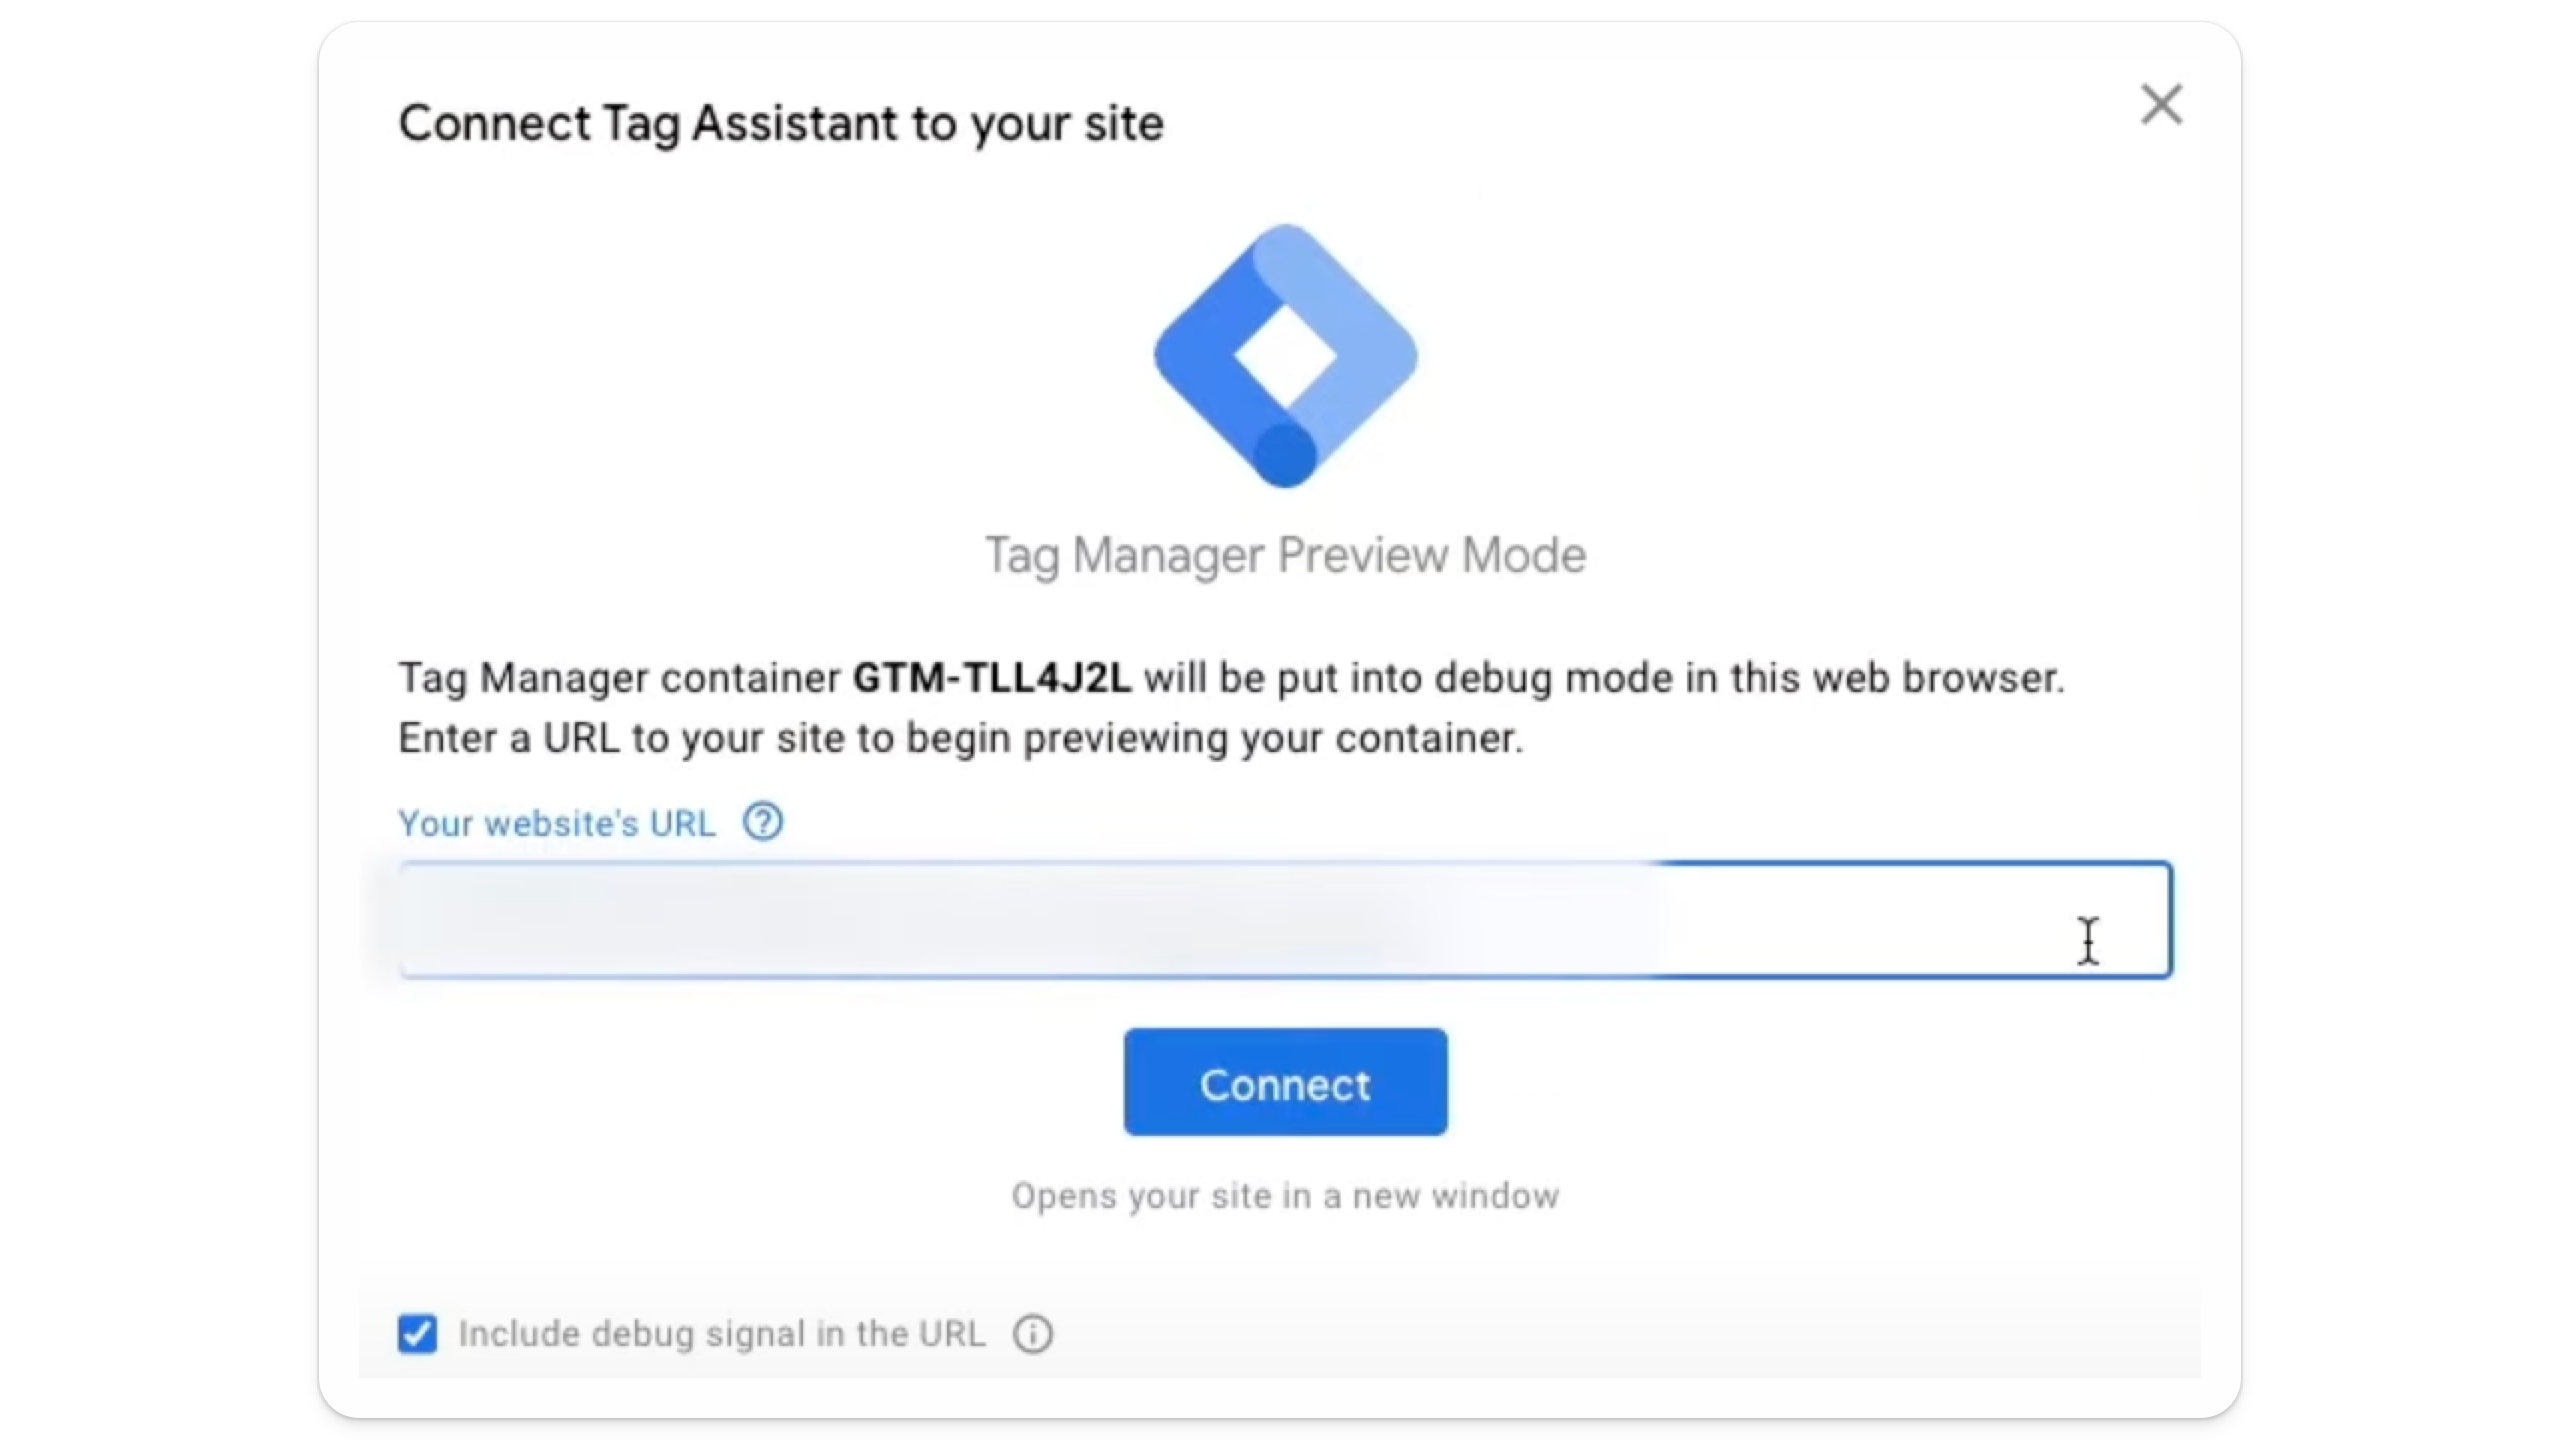
You’ll see a page that looks like this while it connects:
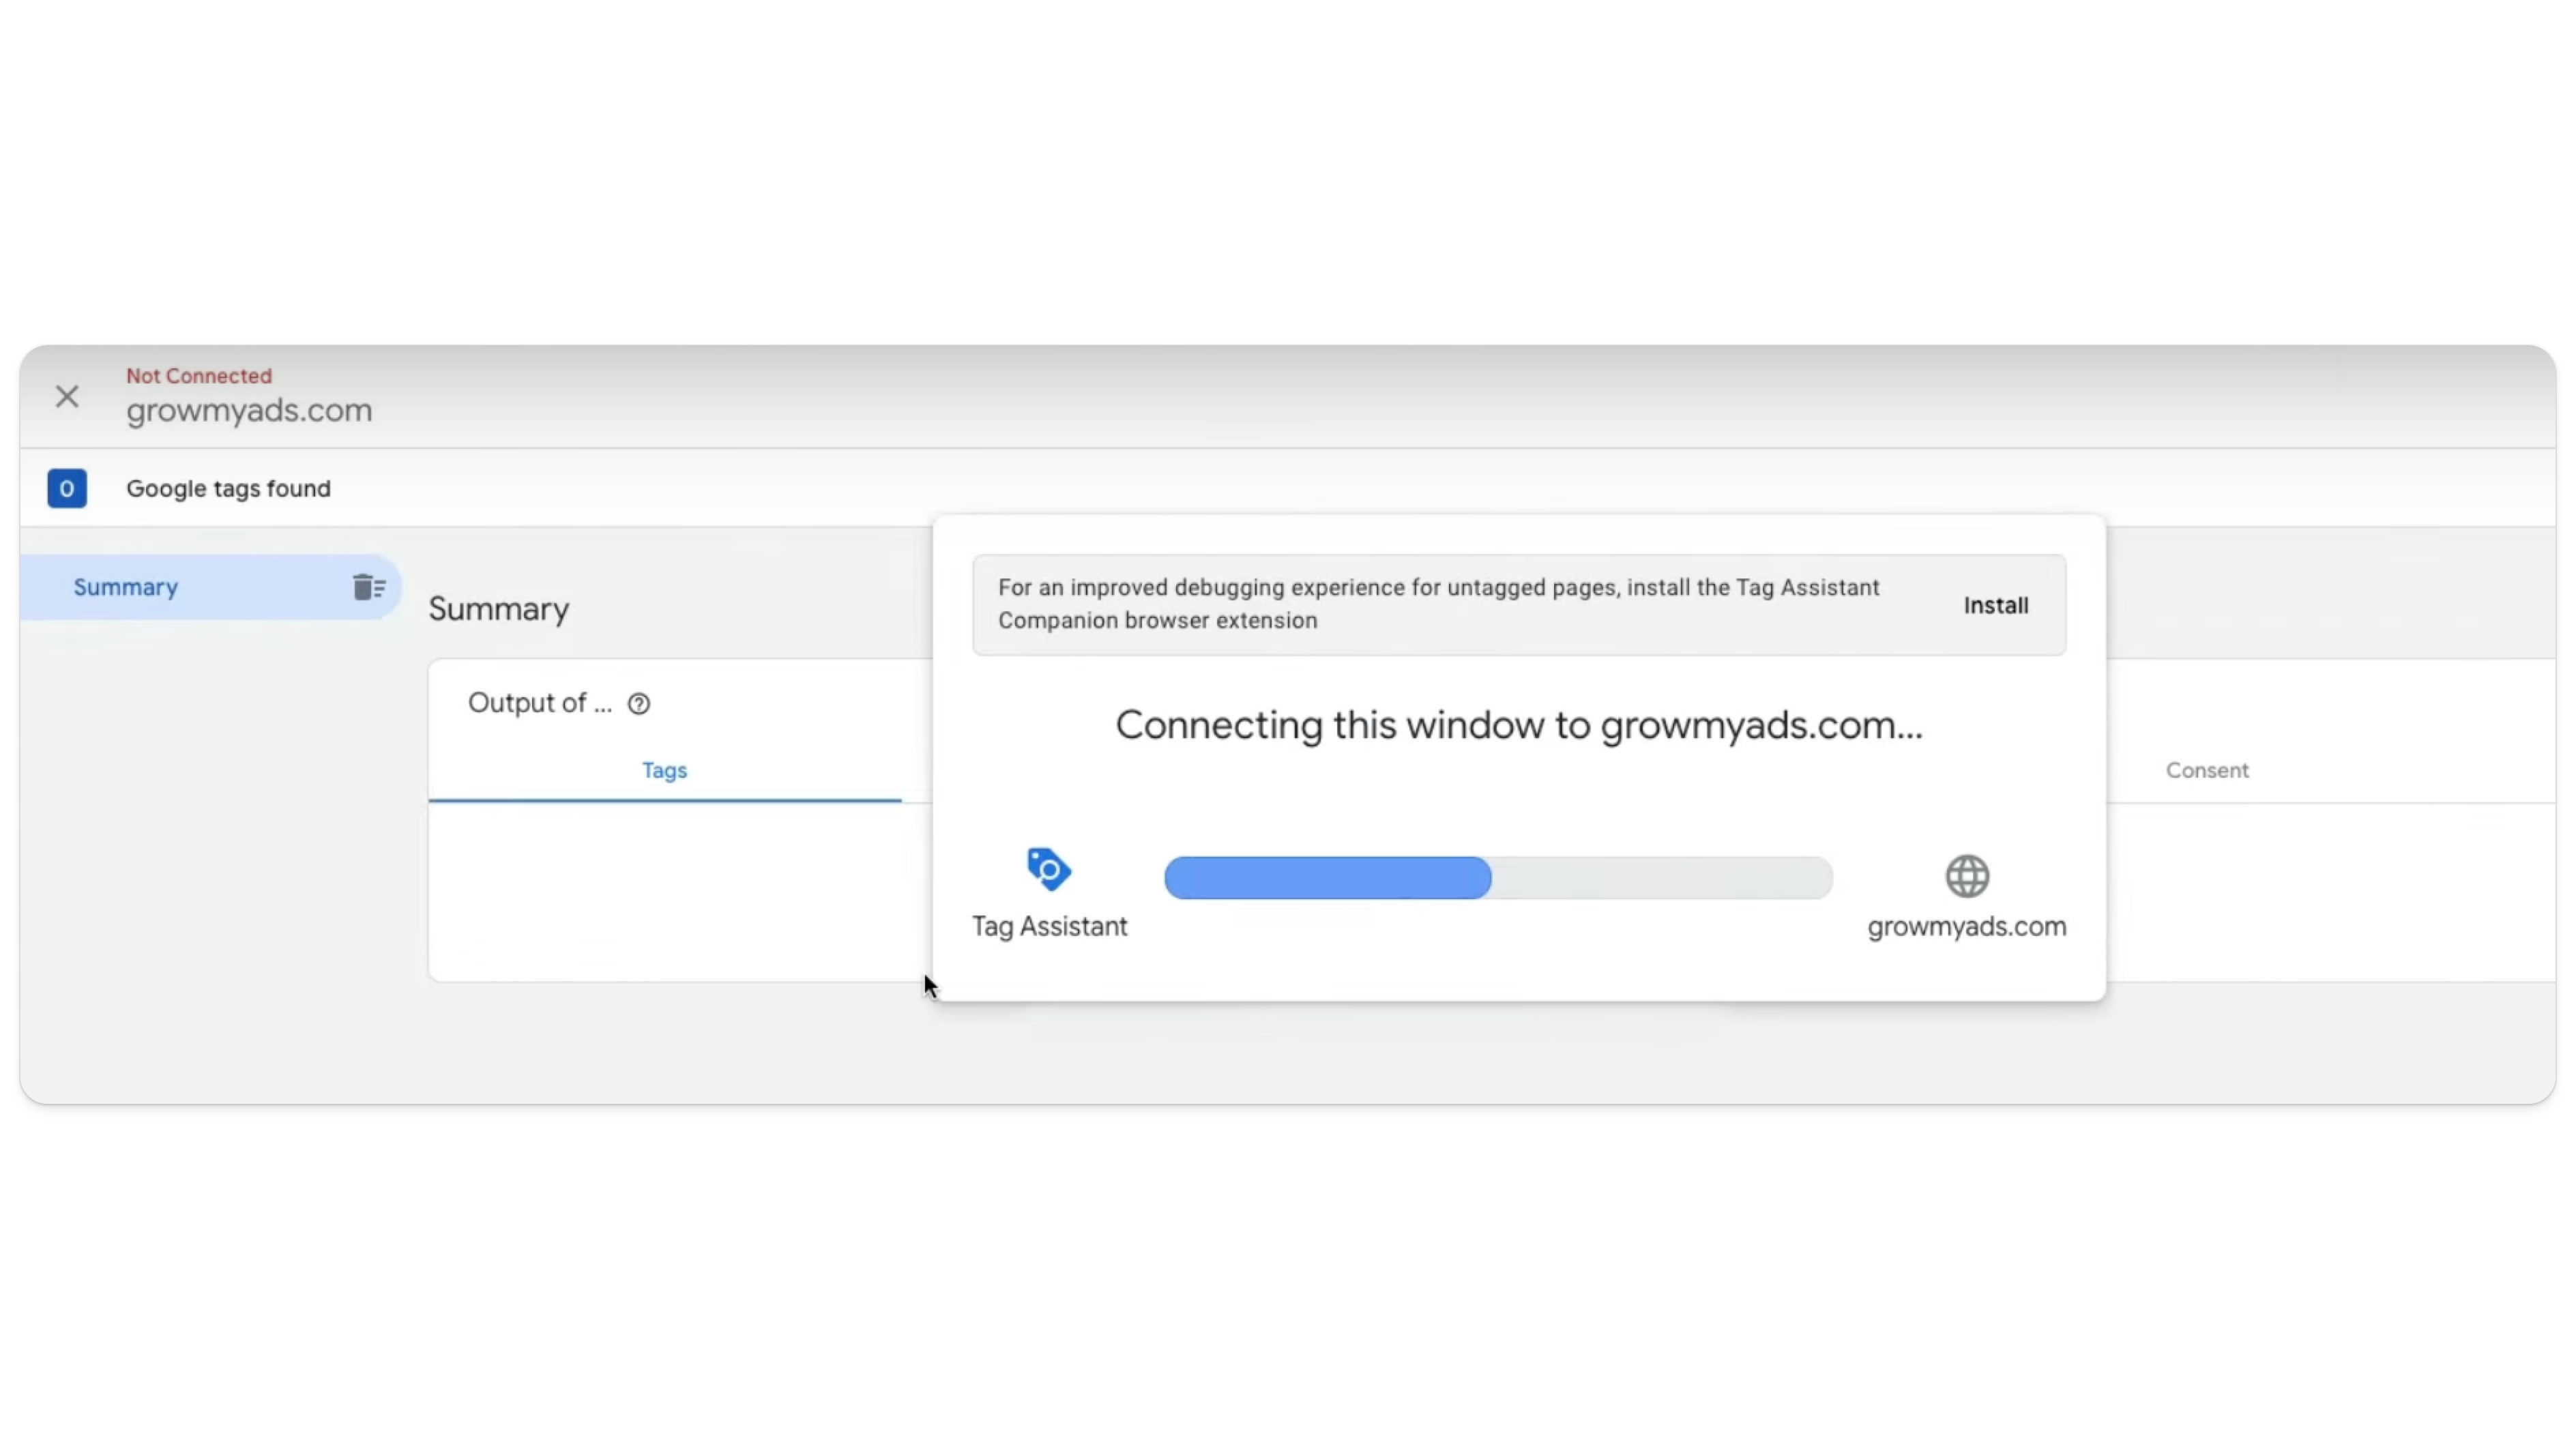
Submit a test lead form and verify that the conversion tag fires only on the thank you page. Again, your thank you page should be your form submission trigger. If your conversion tag is firing, it means it’s pushing that conversion back to Google Ads, which is exactly what you want. This is that tag for us:
Tracking Form Submissions: Best Practices
1. Design a High-Value Thank You Page
Your thank you page is not only your form submission trigger — it should also serve to confirm the user’s action and guide them toward the next step. To accomplish this, include:
A clear confirmation message (e.g., “Thank you! We’ve received your information.”).
Next steps (e.g., “Our team will contact you within 24 hours.”). We have a video walking prospects through the next steps, as well as instructions as to what they can expect.
Additional value (e.g., testimonials, case studies, or a link to download helpful resources). This is key if you want to ensure you’re getting the most out of your form submissions.
2. Respond to Leads Quickly
Lead decay is real. A study by Harvard Business Review found that contacting a lead within an hour increases the likelihood of conversion by a factor of 7X. So, consider building processes for fast follow-up.

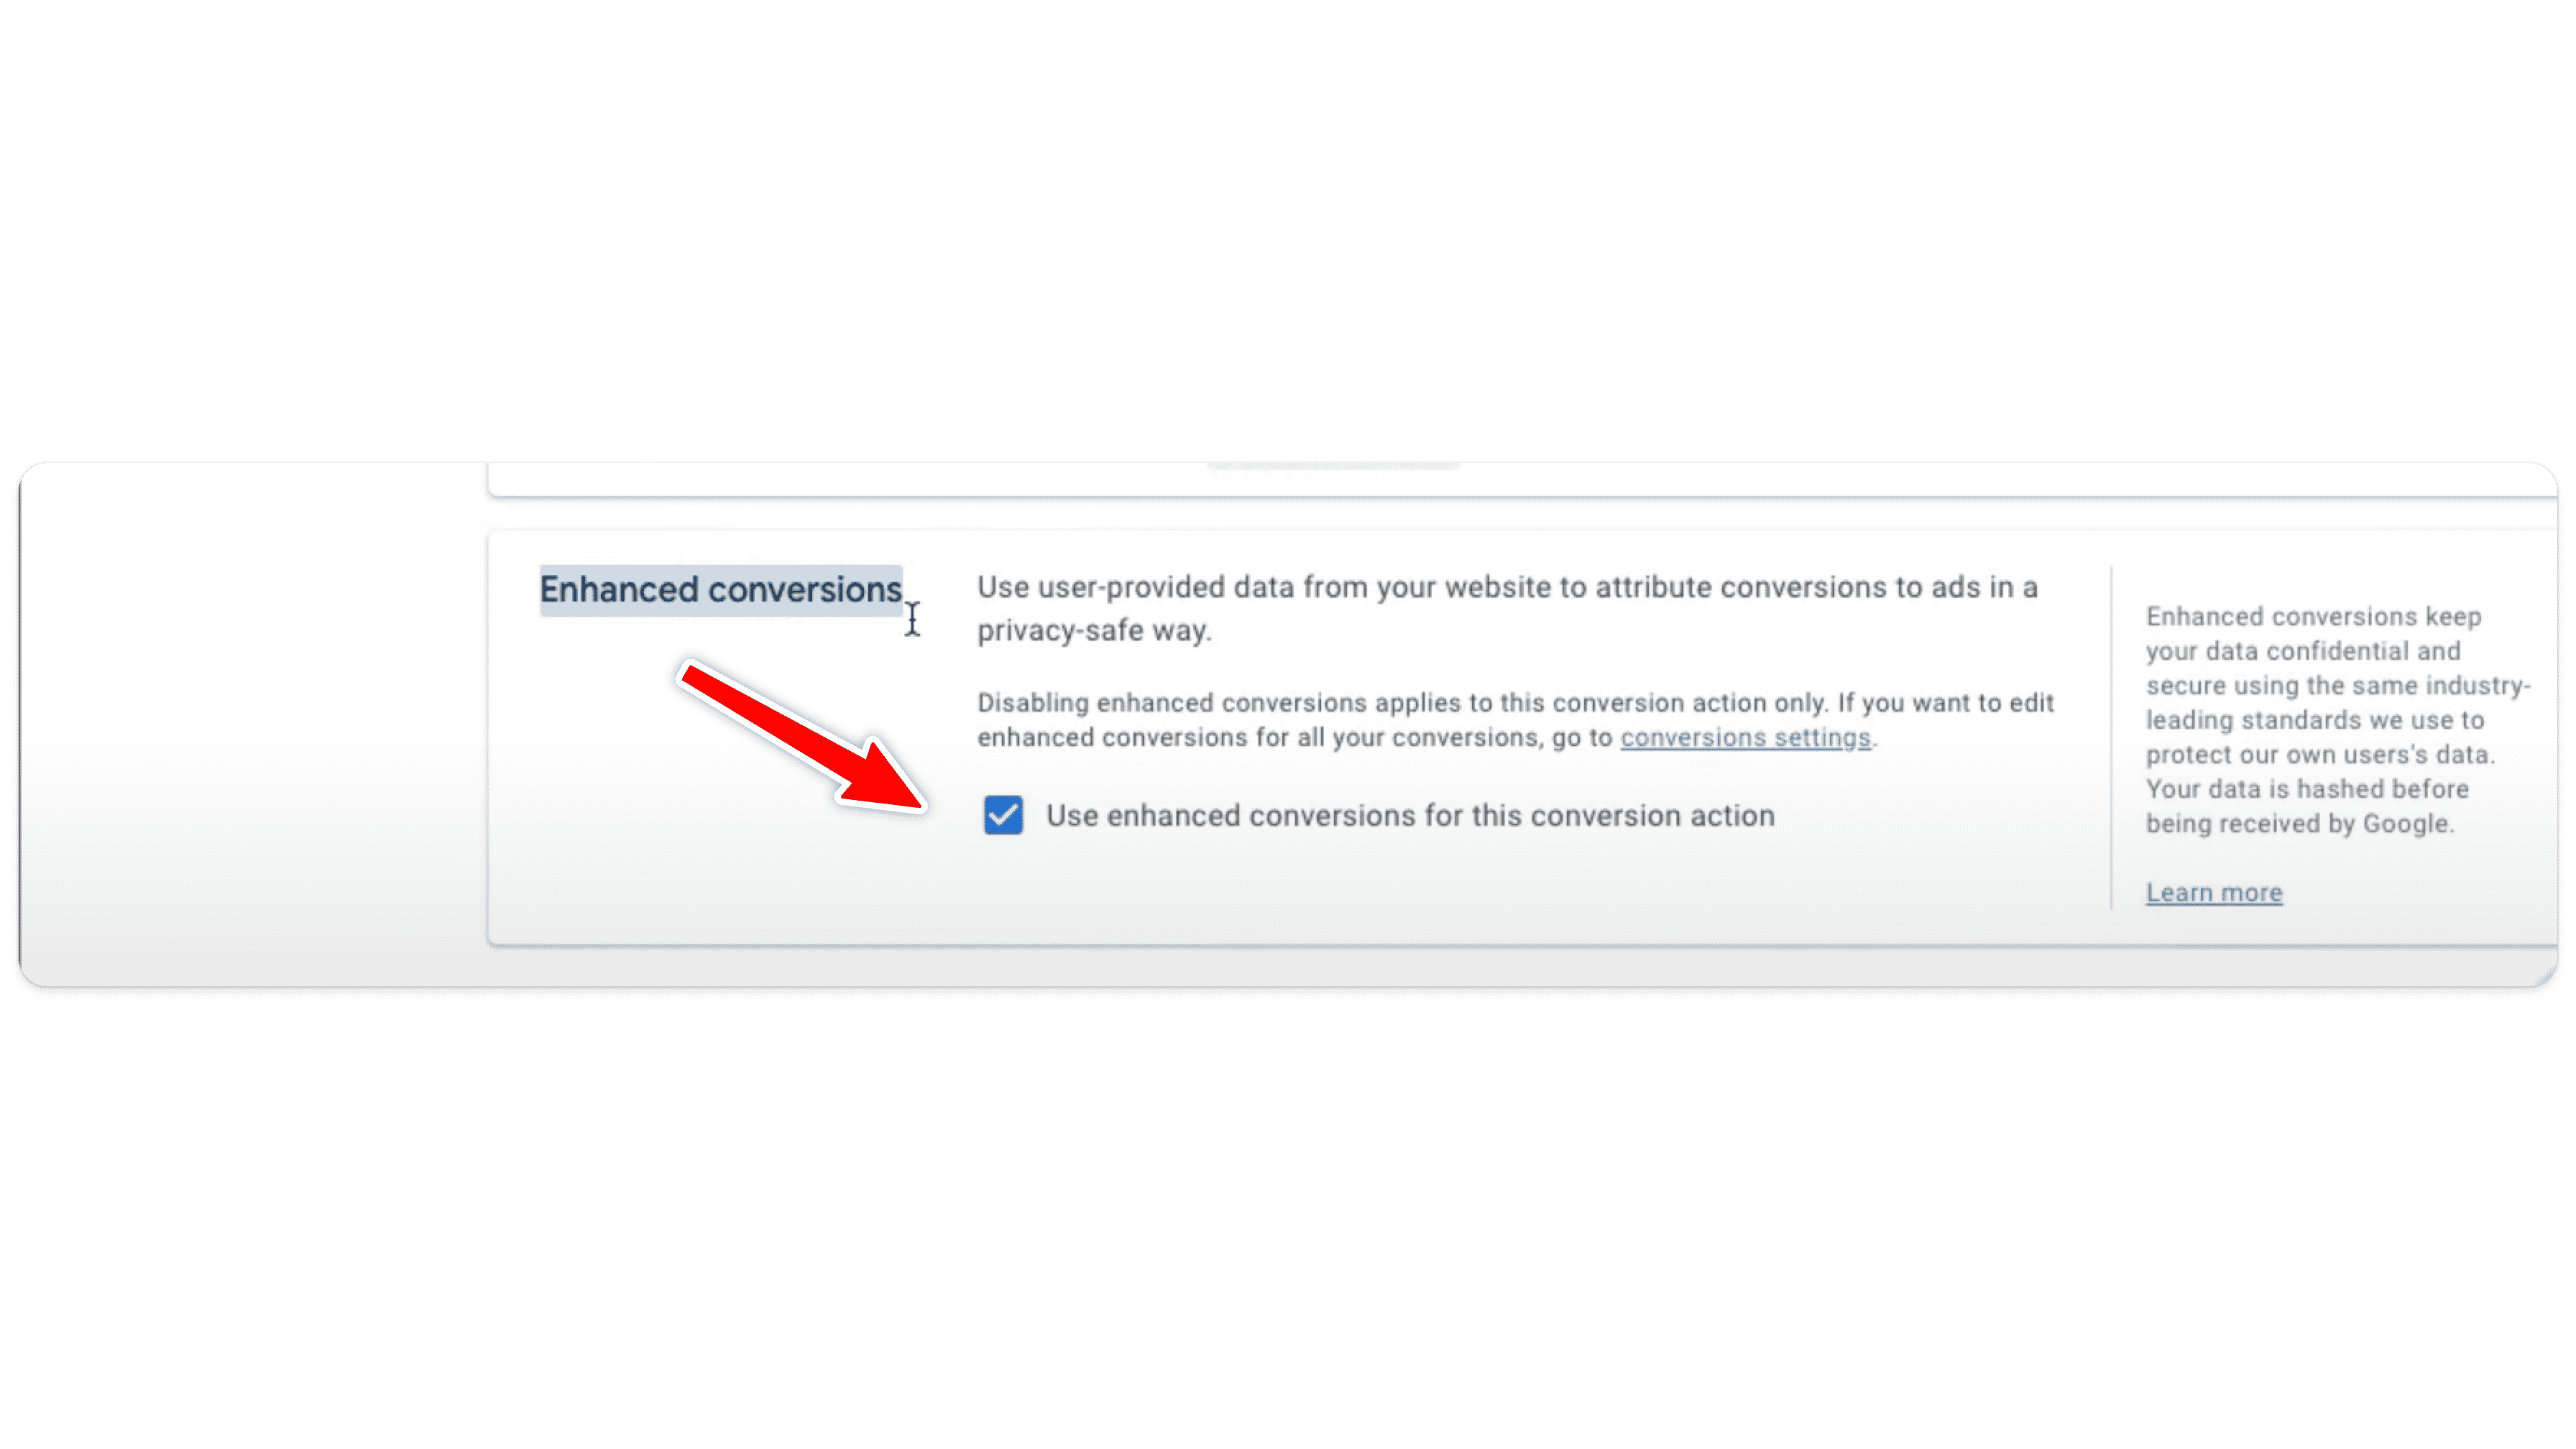
3. Enable Enhanced Conversions
Enhanced conversions allow you to send first-party data (e.g., an email address or phone number) back to Google Ads. This improves audience matching and reporting accuracy.
4. Use Unique URLs for Thank You Pages
Ensure each lead form redirects to a unique thank you page. This simplifies form tracking and prevents confusion when multiple forms are on your site.
5. Monitor for Duplicate Form Submissions
Set your Google Ads conversion action to count One conversion per user to avoid inflated numbers from page reloads.
Advanced Tips for Optimizing Lead Form Campaigns
1. Leverage Primary and Secondary Conversions
Primary Conversions: Use these for actions that directly impact your goals, such as lead form submissions.
Secondary Conversions: Track supporting actions, such as newsletter sign-ups or downloads, to gain additional insights without affecting smart bidding.
2. Assign Dynamic Values to Leads
If different leads have varying potential values, integrate dynamic conversion values. For example, you might consider assigning higher values to leads from high-value product pages.
3. Implement UTM Parameters
UTM tracking helps you identify which campaigns and keywords drive the most valuable leads. Use consistent UTM parameters for better attribution insights in Google Analytics.
Final Thoughts
Setting up Google Ads conversion tracking for lead form submissions is essential for optimizing your ad campaigns. By using a thank you page to track a successful form submission, you ensure that only genuine conversions are counted, giving you the reliable data needed to make informed decisions going forward.
With the step-by-step process outlined here, you can confidently set up form tracking that delivers actionable insights. Once proper form tracking is implemented, don’t forget to optimize your thank you pages, follow up with leads promptly, and use advanced techniques like enhanced conversions and UTM tracking for even greater success.
Ready to get started with Google Ads? We can help. Learn more about our approach here.
